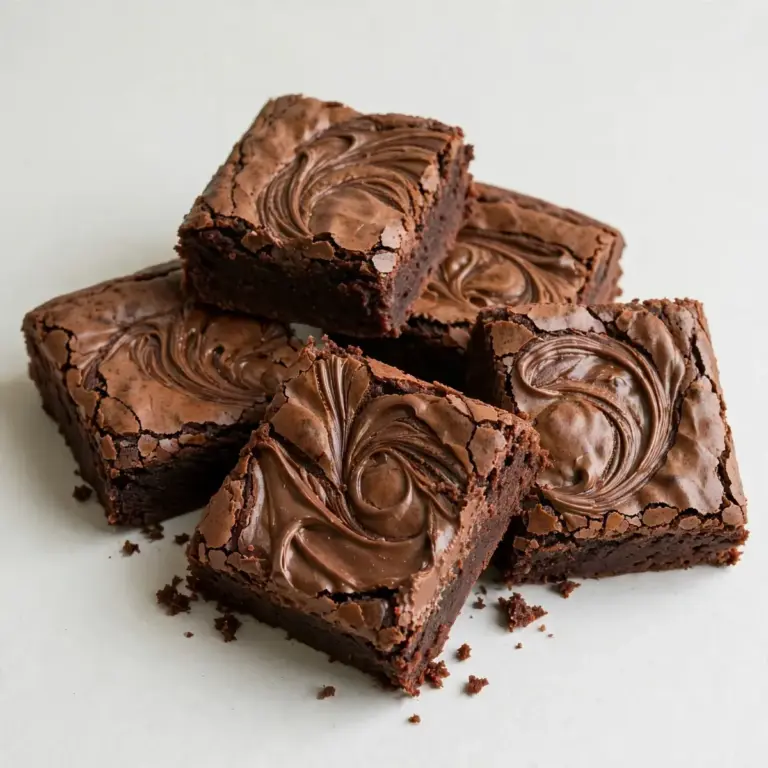
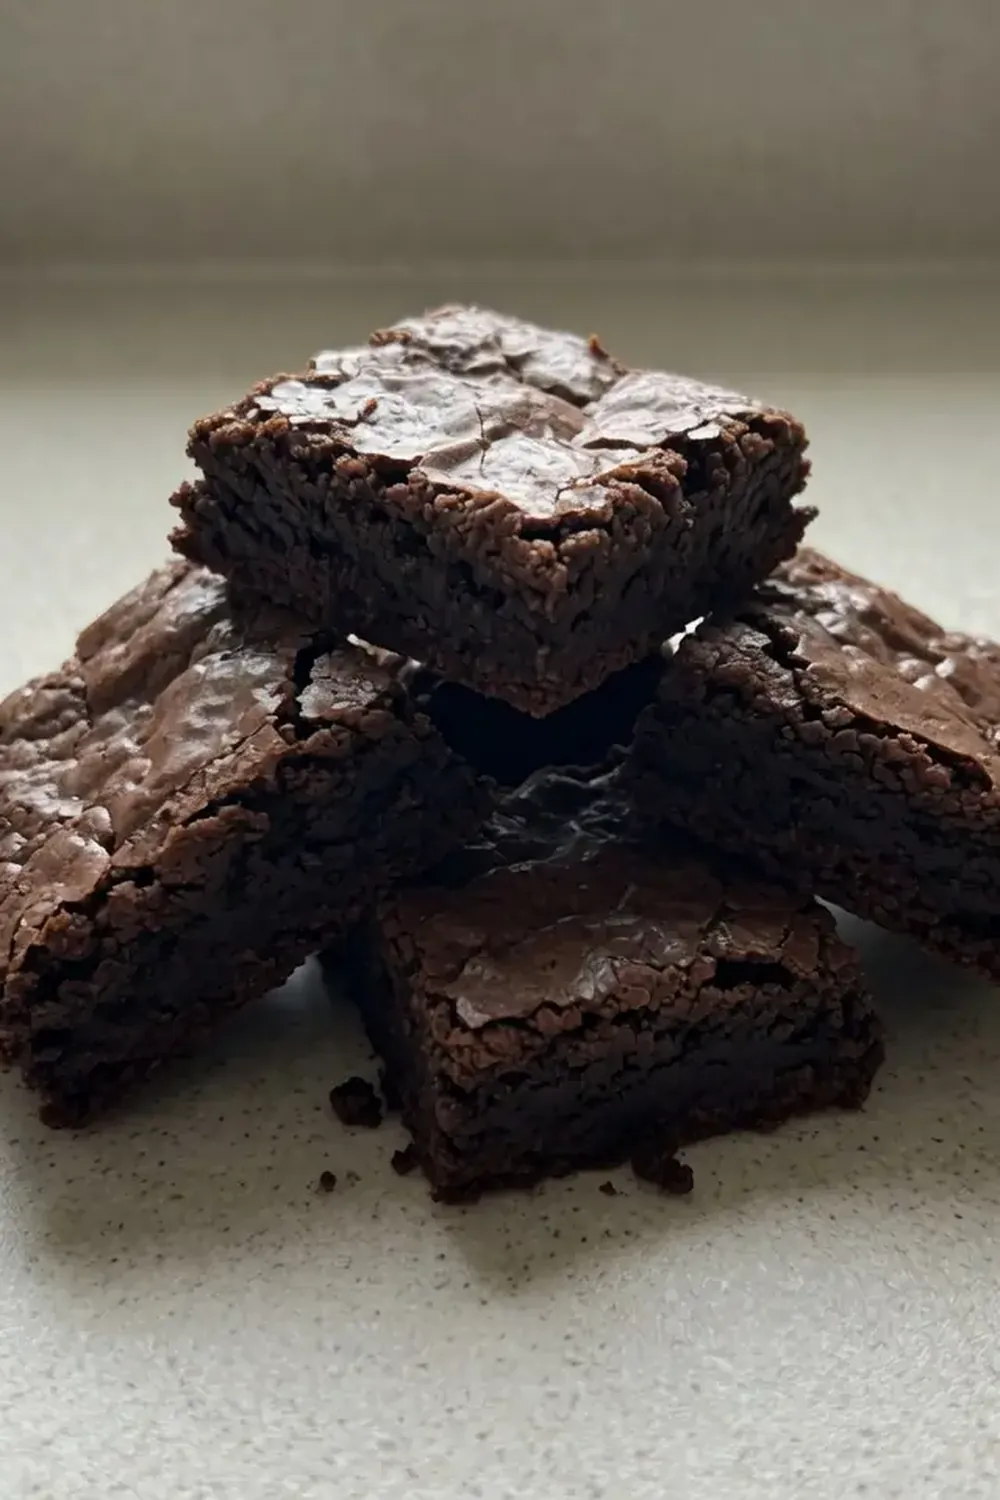
Fudgy Chocolate Brownies For A Crowd-Pleasing Dessert

Life with a bustling family often feels like a delightful whirlwind, doesn’t it? Between school runs, after-school clubs, and the never-ending pile of laundry, finding time to bake something truly special can seem like an impossible dream. But what if I told you there’s a dessert that not only comes together in a flash but also promises pure indulgence and minimal fuss, making it the perfect sweet treat for even the most hectic weeknights? This isn’t just any brownie recipe; it’s a testament to how simple ingredients, a handful of minutes, and a dash of love can transform an ordinary evening into something truly memorable.
I remember one particularly chaotic Tuesday evening. The kids had a late football practice, my partner was stuck in traffic, and I was staring at an empty dessert plate, wishing for a sprinkle of magic. That’s when I perfected this recipe for truly decadent brownies. It’s my go-to when I need something quick but still want to create that warm, comforting atmosphere at home. The beauty of these fudgy chocolate brownies lies in their straightforward preparation, requiring just one bowl and a baking tin, meaning less washing up – a huge win in my book!
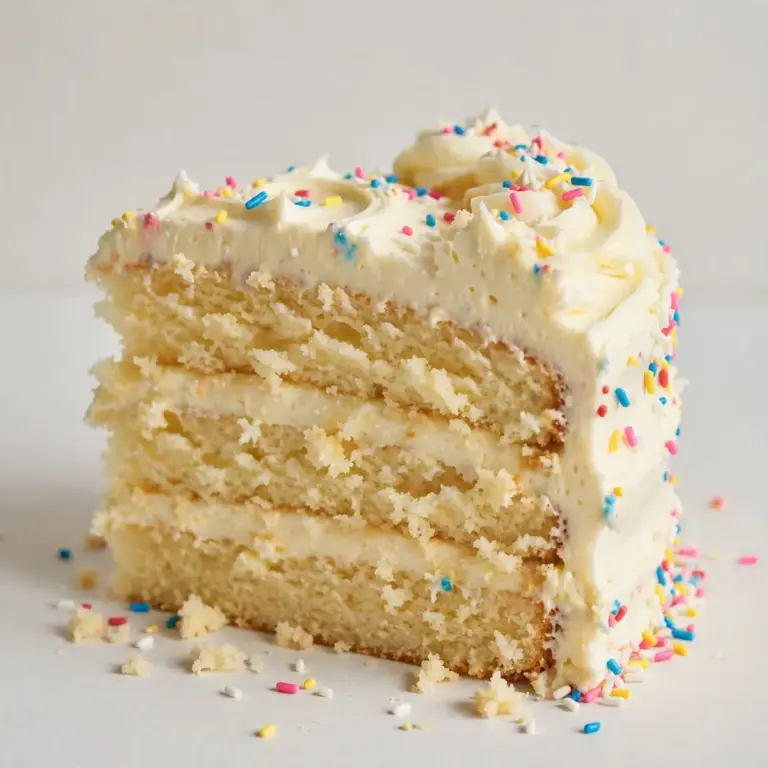
Forget the myth that exceptional baking demands hours of effort. This recipe is designed for busy families, by a busy home cook, ensuring you can whip up a batch after dinner, let them cool while you tidy up, and have a rich, satisfying dessert ready before anyone can even ask “What’s for pudding?”. It’s a guaranteed smile-inducer, and the aroma alone will make your home feel wonderfully inviting. These fudgy chocolate brownies are proof that deliciousness and convenience can absolutely go hand-in-hand, making every weeknight feel a little bit more special, much like Tangy Lemon Blueberry Desserts For Entertaining can elevate any gathering., or even starting your day with Decadent Chocolate Covered Doughnuts For Breakfast., or even a lighter option such as Greek Yogurt Brownies For A Light Sweet Treat.com/strawberry-cheesecake-danish-for-a-sweet-brunch-treat/”>Strawberry Cheesecake Danish For A Sweet Brunch Treat can elevate your weekend.
Recipe Overview
- Prep time: 15 minutes
- Cook time: 25-30 minutes
- Total time: 40-45 minutes (plus cooling)
- Servings: 12-16 squares
- Difficulty: Easy
Why You’ll Love This Fudgy Chocolate Brownies for a Crowd-Pleasing Dessert
- Effortless Preparation: This recipe comes together in a single bowl, drastically cutting down on washing up and making it ideal for a swift weeknight bake.
- Rich, Deep Flavour: Utilising both cocoa powder and melted chocolate ensures a profound chocolate experience that satisfies even the most discerning sweet tooth.
- Perfectly Fudgy Texture: We focus on precise baking times to achieve that coveted gooey centre and crinkly top, making every bite utterly delightful.
- Flexible & Adaptable: Easily double the batch for larger gatherings or adjust the mix-ins to suit your family’s preferences, from nuts to chocolate chips.
- Make-Ahead Convenience: These brownies keep beautifully for several days, meaning you can bake them when you have a spare moment and enjoy them throughout the week.
Ingredients You’ll Need
- 200g unsalted butter, cubed
- 200g good quality dark chocolate (at least 70% cocoa solids), chopped
- 3 large eggs
- 200g caster sugar
- 100g light brown sugar
- 100g plain flour
- 50g cocoa powder
- 1 teaspoon vanilla extract
- ½ teaspoon salt
- 100g chocolate chips or chunks (milk, dark, or white, your choice)
Tip: Using good quality chocolate makes all the difference here. It contributes significantly to the richness and overall depth of flavour in your brownies.
How to Make Fudgy Chocolate Brownies for a Crowd-Pleasing Dessert
- Prepare Your Workspace: Preheat your oven to 170°C (150°C fan/Gas Mark 3). Line a 23cm x 23cm (9×9 inch) square baking tin with parchment paper, ensuring it overhangs on two sides to create ‘handles’ for easy removal. This preparation step makes for minimal cleanup later, which is always a bonus on a busy evening.
- Melt the Chocolate and Butter: In a large heatproof bowl, combine the cubed unsalted butter and chopped dark chocolate. Place the bowl over a saucepan of simmering water (a bain-marie), ensuring the bottom of the bowl does not touch the water. Stir occasionally until the mixture is smooth and glossy, with a lovely rich, dark brown sheen. Alternatively, melt in the microwave in 30-second bursts, stirring between each, until completely melted and luxurious. Remove from the heat and let it cool slightly.
- Whisk Eggs and Sugars: In a separate large bowl (or directly into the slightly cooled chocolate mixture if you’re truly aiming for one-bowl simplicity), whisk together the eggs, caster sugar, and light brown sugar. Whisk vigorously for about 3-5 minutes until the mixture is pale, thick, and fluffy, creating light ribbons when you lift the whisk. This aeration is key to achieving that desirable crinkly top on your brownies.
- Combine Wet Ingredients: Gently fold the slightly cooled chocolate and butter mixture into the egg and sugar mixture. Add the vanilla extract and salt, mixing until just combined. The mixture will take on a rich, dark brown colour and a smooth, thick consistency. Do not overmix here; we want to keep that lovely air we’ve incorporated.
- Fold in Dry Ingredients and Chocolate Chips: Sift the plain flour and cocoa powder directly into the wet ingredients. Using a spatula, gently fold them in until just a few streaks of flour remain visible. At this point, add your chosen chocolate chips or chunks, folding them in until evenly distributed. The batter will be thick, dark, and wonderfully aromatic with deep chocolate notes. Stop folding as soon as no dry streaks are left to avoid developing the gluten too much.
- Bake to Perfection: Pour the brownie batter into your prepared baking tin, spreading it evenly with the spatula. Place the tin in the preheated oven and bake for 25-30 minutes. You’re looking for a shiny, crinkly top and edges that are just set, but the centre should still have a slight wobble when you gently shake the tin. A skewer inserted into the centre should come out with moist crumbs attached, not wet batter. The smell of rich chocolate will fill your kitchen, signalling they’re nearly done.
- Cool and Slice: Once baked, remove the tin from the oven and let the brownies cool completely in the tin on a wire rack. This is arguably the hardest part, but crucial for that perfect fudgy texture. As they cool, the brownies will set further, becoming denser and more delicious. Once completely cool (this could take a couple of hours), use the parchment paper handles to lift them out of the tin and slice them into squares. The edges will be firm, but the centre soft and yielding.
Equipment You’ll Need
- Stand mixer or hand mixer (optional, but great for aerating eggs)
- Large heatproof bowl (for melting chocolate)
- Large mixing bowl
- 23cm x 23cm (9×9 inch) baking tray
- Parchment paper
- Wire cooling rack
- Spatula or wooden spoon
- Whisk
Common Mistakes to Avoid
- Overcrowding the pan: Using a pan that’s too small will result in overly thick brownies that take longer to bake through and can end up dense or cakey rather than fudgy. Always stick to the recommended pan size (23cm x 23cm) to ensure even heat distribution and the correct texture.
- Wrong temperature: Baking at too high a temperature can cause the edges to burn before the centre is cooked, while too low a temperature can lead to dry, crumbly brownies. Always preheat your oven properly and use an oven thermometer if you suspect your oven runs hot or cold. The recommended 170°C (150°C fan) is key for fudginess.
- Skipping the rest time: It’s tempting to dive into warm brownies, but allowing them to cool completely in the tin is vital. This resting period allows the internal structure to set fully, resulting in that dense, chewy, and deeply fudgy texture we all crave. Cutting them too soon can lead to a crumbly mess.
Delicious Variations to Try
- Spicy Version: For a subtle warmth, add ½ to 1 teaspoon of ground chilli powder or a pinch of cayenne pepper to the dry ingredients. The heat enhances the chocolate flavour beautifully without being overpowering.
- Vegetarian/Vegan Option: To make these brownies plant-based, substitute the unsalted butter with a good quality plant-based block butter or coconut oil. For the eggs, use flax eggs (1 tablespoon ground flaxseed mixed with 3 tablespoons water, per egg, allowed to sit for 5 minutes) or a commercial egg replacer, ensuring your dark chocolate is dairy-free.
- Nutty Crunch: Fold in 100g of chopped walnuts, pecans, or almonds along with the chocolate chips for added texture and a lovely nutty counterpoint to the rich chocolate.
Tips From My Kitchen
- Don’t Overmix the Batter: When you fold in the flour and cocoa powder, mix until just combined, with no visible streaks of dry ingredients. The ‘why’ here is crucial: overmixing develops gluten, which can lead to a tougher, more cake-like brownie rather than the desired dense, fudgy texture. We want minimal gluten development for ultimate chewiness.
- Cool Completely for the Best Texture: I know, it’s agonising to wait, but allowing the brownies to cool entirely in the tin is non-negotiable for true fudginess. The ‘why’ is that as they cool, the chocolate and butter solidify, firming up the structure and locking in moisture. Cutting them warm often results in a crumbly, less satisfying texture. Patience truly is a virtue here!
- Achieve the Perfect Crinkly Top: The secret to that beautiful, shiny, crinkly top lies in thoroughly whisking the eggs and sugars. This process incorporates air and creates a stable emulsion that, when baked, forms that distinct, sought-after crust. It’s a small step with a big visual payoff, making your brownies look professionally baked.
- Use Room Temperature Eggs: While the chocolate and butter are melted, using room temperature eggs helps them emulsify better with the other ingredients. The ‘why’ is that cold eggs can cause the melted chocolate to seize slightly and make the batter less smooth. If you forget to take them out, simply place them in a bowl of warm (not hot) water for 5-10 minutes.
- Line Your Tin Properly for Easy Removal: Always use parchment paper and ensure it overhangs the edges of your baking tin. This creates ‘handles’ that allow you to lift the entire slab of cooled brownies out with ease. The ‘why’ is purely practical: it prevents sticking, ensures minimal cleanup, and allows for perfect, clean slices without wrestling with the tin. This is especially helpful on those busy weeknights when you want to get dessert on the table without a fuss. I make this at least once a week – it’s become a family favourite – and this tip saves me so much time.
- Store Them Correctly: Once cooled, store your brownies in an airtight container at room temperature for up to 3-4 days. For longer storage, you can freeze individual squares, wrapped tightly, for up to 3 months. The ‘why’ is to maintain their moisture and prevent them from drying out, ensuring they stay deliciously fudgy every time you reach for one.
What to Serve With Fudgy Chocolate Brownies for a Crowd-Pleasing Dessert
- A scoop of vanilla bean ice cream
- A dollop of freshly whipped cream
- A drizzle of warm caramel sauce
- Fresh berries, such as raspberries or strawberries, for a touch of freshness
- A sprinkle of sea salt to enhance the chocolate flavour
Frequently Asked Questions
Fudgy Chocolate Brownies for a Crowd-Pleasing Dessert
Ingredients
Method
-
Prepare Your Workspace: Preheat your oven to 170°C (150°C fan/Gas Mark 3). Line a 23cm x 23cm (9×9 inch) square baking tin with parchment paper, ensuring it overhangs on two sides to create ‘handles’ for easy removal. This preparation step makes for minimal cleanup later, which is always a bonus on a busy evening.
-
Melt the Chocolate and Butter: In a large heatproof bowl, combine the cubed unsalted butter and chopped dark chocolate. Place the bowl over a saucepan of simmering water (a bain-marie), ensuring the bottom of the bowl does not touch the water. Stir occasionally until the mixture is smooth and glossy, with a lovely rich, dark brown sheen. Alternatively, melt in the microwave in 30-second bursts, stirring between each, until completely melted and luxurious. Remove from the heat and let it cool slightly.
-
Whisk Eggs and Sugars: In a separate large bowl (or directly into the slightly cooled chocolate mixture if you’re truly aiming for one-bowl simplicity), whisk together the eggs, caster sugar, and light brown sugar. Whisk vigorously for about 3-5 minutes until the mixture is pale, thick, and fluffy, creating light ribbons when you lift the whisk. This aeration is key to achieving that desirable crinkly top on your brownies.
-
Combine Wet Ingredients: Gently fold the slightly cooled chocolate and butter mixture into the egg and sugar mixture. Add the vanilla extract and salt, mixing until just combined. The mixture will take on a rich, dark brown colour and a smooth, thick consistency. Do not overmix here; we want to keep that lovely air we’ve incorporated.
-
Fold in Dry Ingredients and Chocolate Chips: Sift the plain flour and cocoa powder directly into the wet ingredients. Using a spatula, gently fold them in until just a few streaks of flour remain visible. At this point, add your chosen chocolate chips or chunks, folding them in until evenly distributed. The batter will be thick, dark, and wonderfully aromatic with deep chocolate notes. Stop folding as soon as no dry streaks are left to avoid developing the gluten too much.
-
Bake to Perfection: Pour the brownie batter into your prepared baking tin, spreading it evenly with the spatula. Place the tin in the preheated oven and bake for 25-30 minutes. You’re looking for a shiny, crinkly top and edges that are just set, but the centre should still have a slight wobble when you gently shake the tin. A skewer inserted into the centre should come out with moist crumbs attached, not wet batter. The smell of rich chocolate will fill your kitchen, signalling they’re nearly done.
-
Cool and Slice: Once baked, remove the tin from the oven and let the brownies cool completely in the tin on a wire rack. This is arguably the hardest part, but crucial for that perfect fudgy texture. As they cool, the brownies will set further, becoming denser and more delicious. Once completely cool (this could take a couple of hours), use the parchment paper handles to lift them out of the tin and slice them into squares. The edges will be firm, but the centre soft and yielding.
Notes
There you have it – my tried-and-tested recipe for fudgy chocolate brownies that truly delivers on flavour, speed, and minimal effort. It’s more than just a dessert; it’s a little slice of joy that can effortlessly brighten any evening, transforming a simple meal into a delightful occasion. Give it a go this week, and I promise you’ll be amazed at how easily you can create something so utterly delicious, even with the busiest schedule. I hope these fudgy chocolate brownies bring as much warmth and happiness to your family table as they do to mine. Don’t forget to check out Positivevibezplz.Com for more inspiration! Do you have any secret brownie ingredients or serving suggestions? I’d love to hear them in the comments below!