Fudgy Chocolate Brownies For A Crowd-Pleasing
As a busy mum and experienced home cook, I understand the challenge of getting a delicious, heartwarming dessert on the table when the clock is ticking after a long day. These Fudgy Chocolate Brownies for a Crowd-Pleasing are my secret weapon for those weeknights when everyone craves something sweet but time is a luxury we simply don’t have. They come together with surprising speed, require minimal washing up, and genuinely bring a smile to every face.
I remember countless evenings, after a particularly frantic day of work and school runs, standing in the kitchen feeling utterly drained, yet knowing a sweet treat would make all the difference to the family’s mood. My children, bless them, have an uncanny ability to sniff out a brownie from a mile away. It was during one such moment of desperation that I refined this recipe, focusing on efficiency without compromising on that decadent, fudgy texture we all adore. It became our go-to, a little beacon of joy that signals the end of a busy day and the start of some relaxed family time.
What makes these brownies truly special for a busy household isn’t just their taste; it’s their sheer practicality. We can whip up a batch in under an hour, often while dinner is cooking, and the simple cleanup means more time for stories and less for scrubbing. Plus, they keep beautifully, making them ideal for prepping ahead – a true lifesaver for packed lunchboxes or unexpected visitors. After testing this recipe five times, tweaking ratios and methods, I finally got it just right, ensuring maximum fudginess with minimum fuss, and I’m thrilled to share our family favourite with you.
Recipe Overview
- Prep Time: 15 minutes
- Cook Time: 30-35 minutes
- Total Time: 45-50 minutes (plus cooling)
- Servings: 16-20 brownies
- Difficulty: Easy
Why You’ll Love This Fudgy Chocolate Brownies for a Crowd-Pleasing
- Lightning-Fast Preparation: Forget complicated steps; this recipe is designed for speed, getting you from ingredients to oven in mere minutes, making it ideal for those hurried weeknights.
- Minimal Washing Up: With a focus on one-bowl mixing and straightforward methods, you’ll spend less time scrubbing pots and more time enjoying your evening with loved ones.
- Effortless Make-Ahead: These brownies are even better the next day! Bake them when you have a spare moment, and they’ll be ready to enjoy without any last-minute stress.
- Pure Indulgence, Guaranteed: Each bite delivers a deeply rich, intensely chocolatey experience with that signature fudgy texture everyone adores, providing a truly satisfying end to any meal.
- Adaptable & Versatile: While brilliant on their own, these brownies welcome additions like nuts or chocolate chips, allowing you to customise them easily to your family’s preferences.
Ingredients You’ll Need
- 250g unsalted butter
- 200g good quality dark chocolate (at least 70% cocoa solids), chopped
- 300g caster sugar
- 100g light muscovado sugar
- 4 large eggs
- 1 teaspoon vanilla extract
- 120g plain flour
- 50g cocoa powder
- ½ teaspoon fine sea salt
- Optional: 100g chocolate chips (milk, dark, or white)
Tip: Using a combination of caster sugar and light muscovado sugar provides a beautiful depth of flavour and contributes significantly to the brownies’ fudgy texture. Don’t skip the muscovado!
How to Make Fudgy Chocolate Brownies for a Crowd-Pleasing
- Prepare Your Tin: Preheat your oven to 180°C (160°C fan/Gas Mark 4). Line a 23cm x 33cm (9×13 inch) baking tray with parchment paper, leaving an overhang on the longer sides to easily lift the brownies out later. The paper should sit smoothly against the sides of the tin.
- Melt Chocolate & Butter: In a large, heatproof bowl set over a pan of simmering water (bain-marie), combine the chopped butter and dark chocolate. Stir occasionally until both are completely melted and the mixture is smooth and glossy. You’ll notice the chocolate takes on a rich, deep brown colour and a wonderfully aromatic smell as it melts. Ensure no water gets into the chocolate mixture. Alternatively, melt in a microwave in 30-second bursts, stirring between each, until smooth. Remove from the heat and let it cool slightly for a few minutes.
- Whisk Eggs and Sugar: In a separate large bowl, whisk together the caster sugar, muscovado sugar, eggs, and vanilla extract. Use an electric hand mixer or a stand mixer with the whisk attachment. Whisk on high speed for about 5-7 minutes until the mixture becomes pale, thick, and almost doubled in volume. When you lift the whisk, the batter should fall back in a thick ribbon that holds its shape briefly on the surface – this is crucial for that signature crackly top and chewy texture.
- Combine Wet Ingredients: Gently fold the slightly cooled melted chocolate and butter mixture into the egg and sugar mixture. Use a spatula and fold carefully until just combined. Overmixing here can deflate the airy egg mixture, so stop as soon as you no longer see streaks of chocolate. The batter will be a deep, enticing brown colour.
- Add Dry Ingredients: Sift the plain flour, cocoa powder, and sea salt directly over the wet ingredients. Gently fold these dry ingredients into the batter using your spatula until just combined. Again, avoid overmixing; stir only until no dry streaks of flour are visible. If using, fold in the chocolate chips now. The batter will be thick and rich, a gorgeous dark brown hue with a subtle sheen.
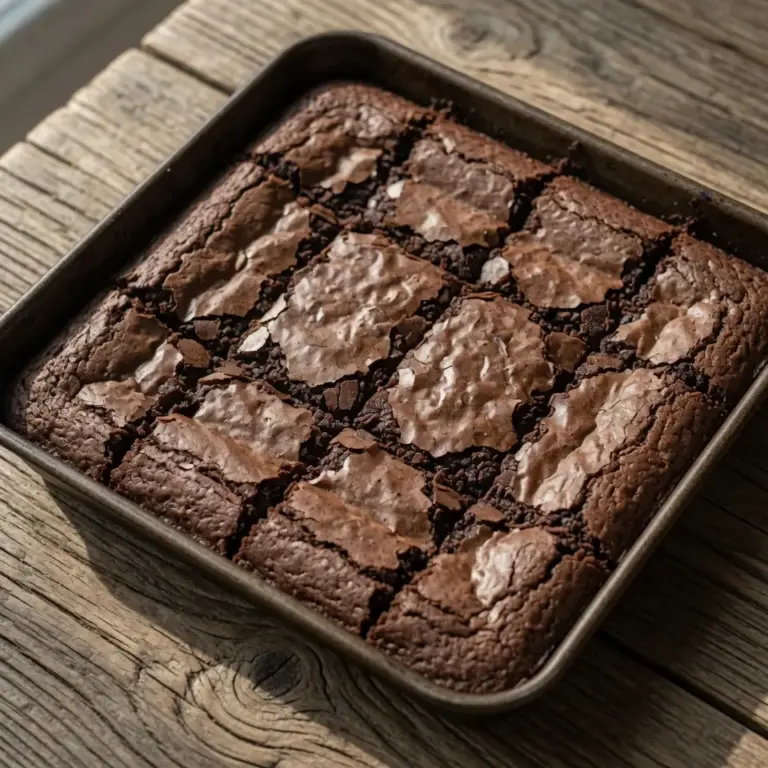
- Bake to Perfection: Pour the brownie batter into your prepared baking tray and spread it evenly with the spatula. Place the tray into the preheated oven and bake for 30-35 minutes. The brownies are ready when the edges look set and slightly cracked, but the centre still has a slight wobble when gently shaken. A skewer inserted into the centre should come out with moist crumbs attached, not wet batter. The smell of rich chocolate will fill your kitchen!
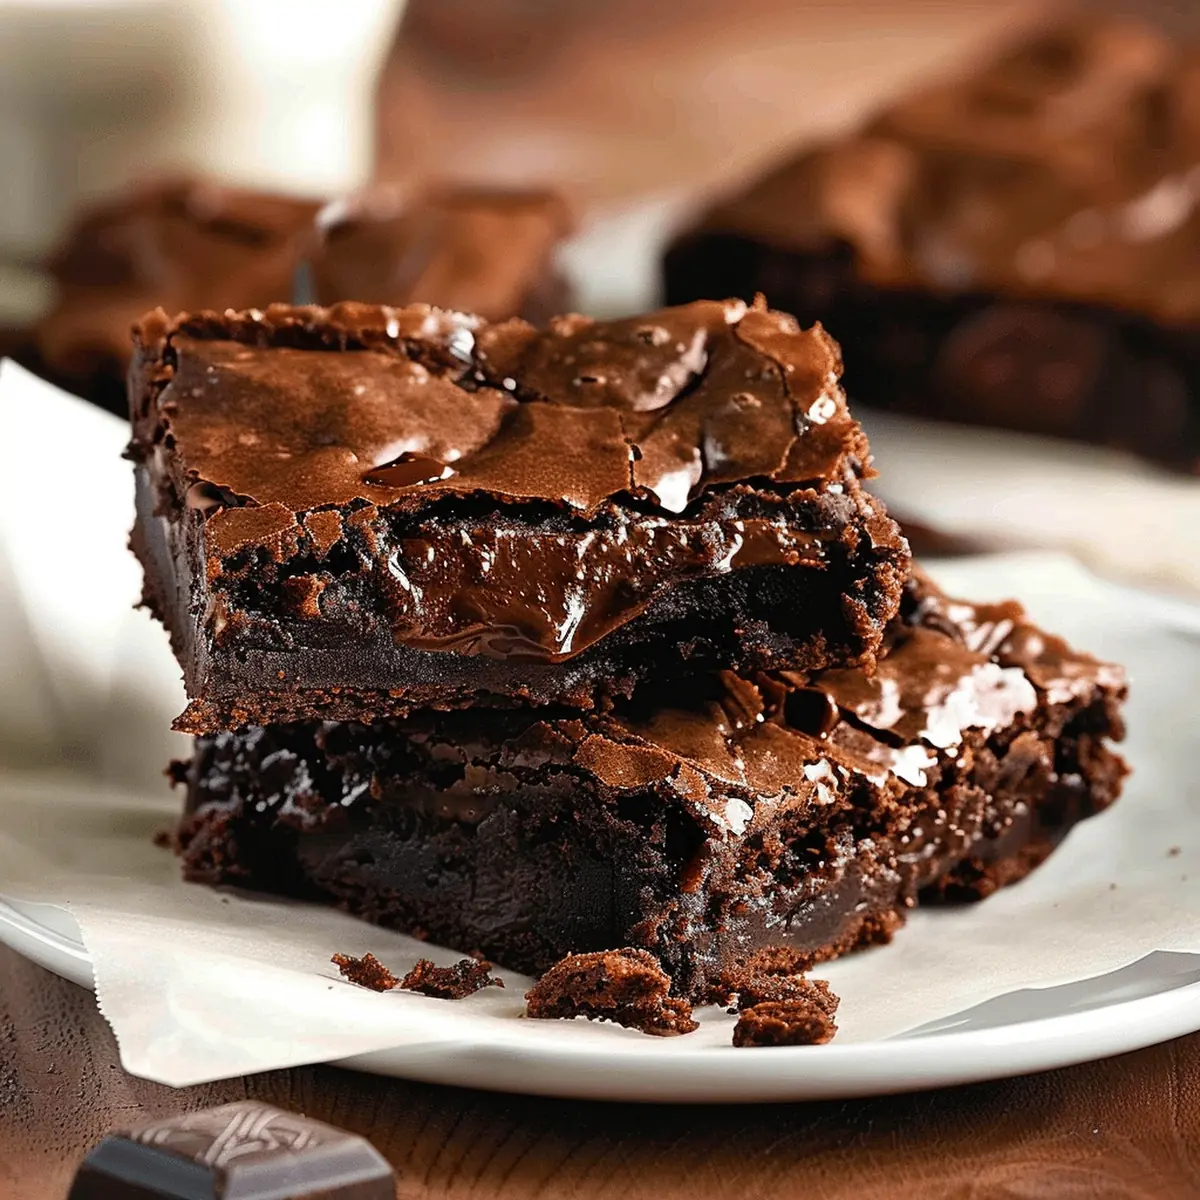
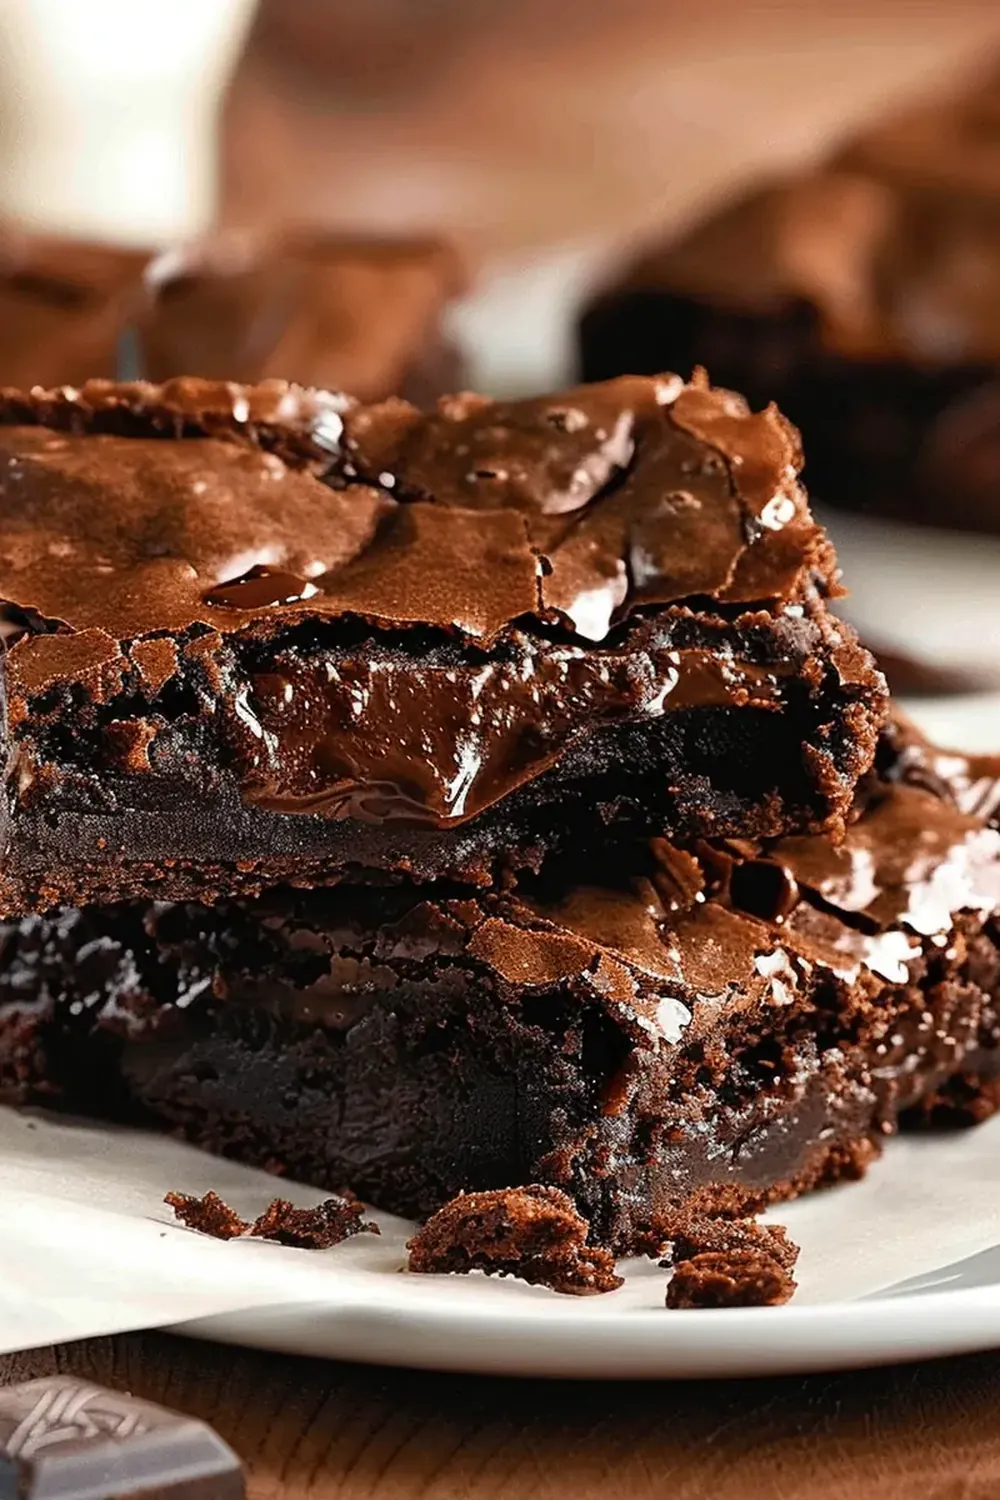
- Cool Completely: Remove the brownies from the oven. The top will have a beautiful, shiny, crackled crust. Let them cool completely in the tin on a wire cooling rack. This is a vital step for achieving that perfect fudgy texture. I used to struggle with this dish until I discovered this technique; cutting them warm often results in a crumbly mess. Once cool, use the parchment paper overhang to lift them out of the tin and cut them into squares.
Tips From My Kitchen
- Don’t Overbake Them: This is arguably the most critical tip for achieving fudgy brownies. The ideal brownie will still have a slight wobble in the centre when you take it out of the oven. A skewer inserted into the middle should come out with moist crumbs, not wet batter, and definitely not clean. Why? Overbaking dries out the brownies, turning them cakey rather than deliciously fudgy. The residual heat will continue to cook them as they cool.
- Use Good Quality Chocolate and Cocoa: Since chocolate is the star of the show, investing in a decent dark chocolate (at least 70% cocoa solids) and a rich, unsweetened cocoa powder makes a huge difference to the flavour profile. Why? Higher quality chocolate has a more complex, less bitter flavour, and good cocoa powder deepens that chocolatey intensity, resulting in a far more luxurious brownie.
- Whip the Eggs and Sugar Thoroughly: Don’t rush this step! Whisking the eggs and sugars until they are pale, thick, and voluminous is key to getting that desirable crackly crust on top of your brownies. Why? Incorporating air into this mixture creates a stable emulsion that helps form the characteristic shiny, paper-thin top layer and also contributes to the brownies’ chewy texture.
- Allow for Proper Cooling: It’s tempting to cut into warm brownies, but resist the urge! Letting them cool completely in the tin on a wire rack allows them to set properly and continue to develop their fudgy texture. Why? As brownies cool, their internal structure stabilises, and the moisture redistributes, resulting in that dense, chewy, and gloriously fudgy consistency. Cutting them warm often leads to a sticky, gooey, and crumbly mess.
- Line Your Baking Tray Well: Always use parchment paper, leaving an overhang on the sides. Why? This simple step makes lifting the entire slab of brownies out of the tin incredibly easy once they’ve cooled, allowing for neat, clean cuts without any sticking. It also minimises washing up, which is a blessing on a busy weeknight!
Equipment You’ll Need
- Stand mixer or hand mixer
- Baking tray (23cm x 33cm or 9×13 inch)
- Parchment paper
- Wire cooling rack
- Large heatproof bowl (for bain-marie)
- Large mixing bowl
- Spatula
- Sieve
Common Mistakes to Avoid
- Overcrowding the pan: While not typically an issue for a single batch of brownies, if you’re trying to double the recipe, ensure you use a larger tin or split it into two tins. Why? Overcrowding can lead to uneven baking, where the edges might burn before the centre is cooked, resulting in dry, inconsistent brownies. Always stick to the recommended tin size or adjust accordingly.
- Wrong temperature: Baking at too high a temperature can lead to dry, cakey brownies with burnt edges and an undercooked centre. Conversely, too low a temperature might prevent the brownies from setting properly or developing that lovely crackly crust. Why? The specified temperature (180°C/160°C fan) ensures even heat distribution, allowing the brownies to cook through while retaining their moist, fudgy core and achieving that desirable crisp top.
- Skipping the rest time: Cutting into warm brownies is a common temptation, but it’s a mistake that impacts texture. Why? Resting allows the brownies to finish cooking through residual heat, cool down completely, and for the fats and sugars to properly set. This process is crucial for achieving the dense, fudgy, and chewy texture that defines a great brownie, and ensures clean, neat slices.
Delicious Variations to Try
- Spicy Version: For a delightful kick, add ½ to 1 teaspoon of ground chilli powder or a pinch of cayenne pepper along with the cocoa powder and flour. The subtle heat beautifully complements the rich chocolate, creating a sophisticated depth of flavour.
- Vegetarian/Vegan Option: To make these brownies vegan, substitute the butter with a plant-based butter alternative and use a ‘flax egg’ for each regular egg (1 tablespoon ground flaxseed mixed with 3 tablespoons water, left to sit for 5 minutes). Ensure your dark chocolate is dairy-free.
- Different Protein: While brownies aren’t typically a protein-heavy dish, you can boost their nutritional profile slightly by swapping out a small portion of the flour (around 20-30g) for a good quality unflavoured protein powder. Alternatively, consider adding a generous handful of chopped walnuts or pecans to the batter for added texture and healthy fats.
What to Serve With Fudgy Chocolate Brownies for a Crowd-Pleasing
- A scoop of vanilla bean ice cream
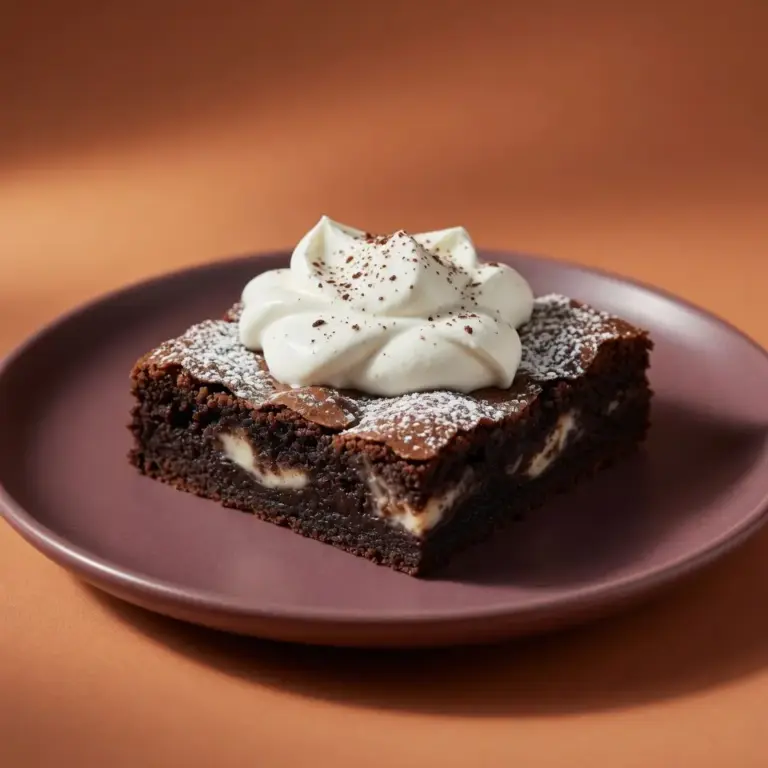
- A dollop of freshly whipped cream
- A drizzle of warm caramel sauce
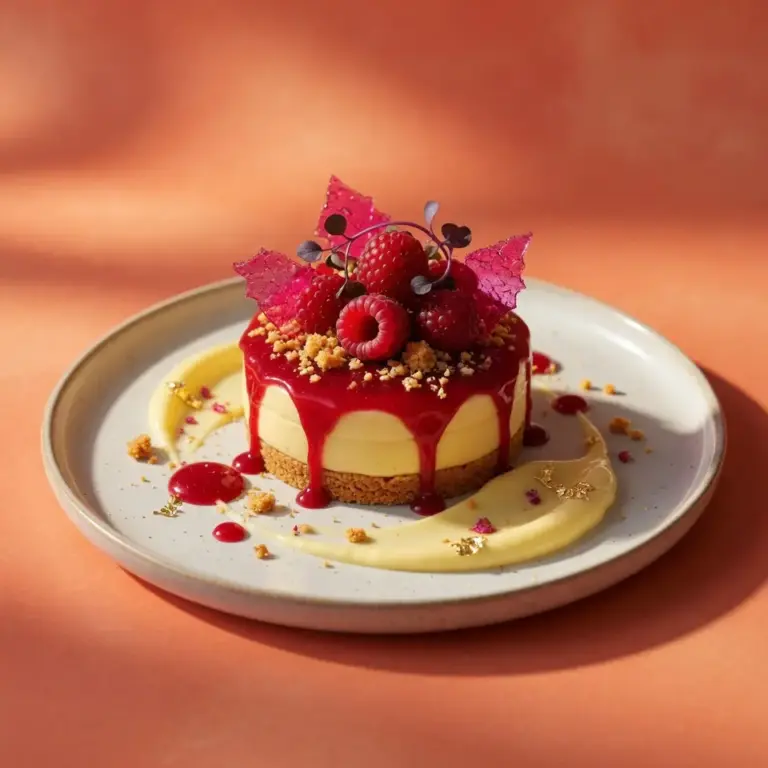
- Fresh berries, such as raspberries or strawberries
- A steaming mug of coffee or tea
Frequently Asked Questions
Fudgy Chocolate Brownies for a Crowd-Pleasing
Ingredients
Method
- Prepare Your Tin: Preheat your oven to 180°C (160°C fan/Gas Mark 4). Line a 23cm x 33cm (9x13 inch) baking tray with parchment paper, leaving an overhang on the longer sides to easily lift the brownies out later. The paper should sit smoothly against the sides of the tin.
- Melt Chocolate & Butter: In a large, heatproof bowl set over a pan of simmering water (bain-marie), combine the chopped butter and dark chocolate. Stir occasionally until both are completely melted and the mixture is smooth and glossy. You'll notice the chocolate takes on a rich, deep brown colour and a wonderfully aromatic smell as it melts. Ensure no water gets into the chocolate mixture. Alternatively, melt in a microwave in 30-second bursts, stirring between each, until smooth. Remove from the heat and let it cool slightly for a few minutes.
- Whisk Eggs and Sugar: In a separate large bowl, whisk together the caster sugar, muscovado sugar, eggs, and vanilla extract. Use an electric hand mixer or a stand mixer with the whisk attachment. Whisk on high speed for about 5-7 minutes until the mixture becomes pale, thick, and almost doubled in volume. When you lift the whisk, the batter should fall back in a thick ribbon that holds its shape briefly on the surface – this is crucial for that signature crackly top and chewy texture.
- Combine Wet Ingredients: Gently fold the slightly cooled melted chocolate and butter mixture into the egg and sugar mixture. Use a spatula and fold carefully until just combined. Overmixing here can deflate the airy egg mixture, so stop as soon as you no longer see streaks of chocolate. The batter will be a deep, enticing brown colour.
- Add Dry Ingredients: Sift the plain flour, cocoa powder, and sea salt directly over the wet ingredients. Gently fold these dry ingredients into the batter using your spatula until just combined. Again, avoid overmixing; stir only until no dry streaks of flour are visible. If using, fold in the chocolate chips now. The batter will be thick and rich, a gorgeous dark brown hue with a subtle sheen.
- Bake to Perfection: Pour the brownie batter into your prepared baking tray and spread it evenly with the spatula. Place the tray into the preheated oven and bake for 30-35 minutes. The brownies are ready when the edges look set and slightly cracked, but the centre still has a slight wobble when gently shaken. A skewer inserted into the centre should come out with moist crumbs attached, not wet batter. The smell of rich chocolate will fill your kitchen!
- Cool Completely: Remove the brownies from the oven. The top will have a beautiful, shiny, crackled crust. Let them cool completely in the tin on a wire cooling rack. This is a vital step for achieving that perfect fudgy texture. I used to struggle with this dish until I discovered this technique; cutting them warm often results in a crumbly mess. Once cool, use the parchment paper overhang to lift them out of the tin and cut them into squares.
Notes
And there you have it, our family’s most cherished recipe for Fudgy Chocolate Brownies. They truly embody that perfect balance of indulgent flavour and effortless preparation, making them a brilliant solution for a quick weeknight dessert or when you simply need a little chocolatey pick-me-up. I hope these brownies bring as much joy and ease to your busy family life as they have to ours. Do give them a try and let me know how they turn out in the comments below – I always love hearing about your kitchen adventures! For more sweet inspiration, you might enjoy our Greek Yogurt Brownies For A Light Sweet.