5-Minute Oreo Truffle Brownie Bars
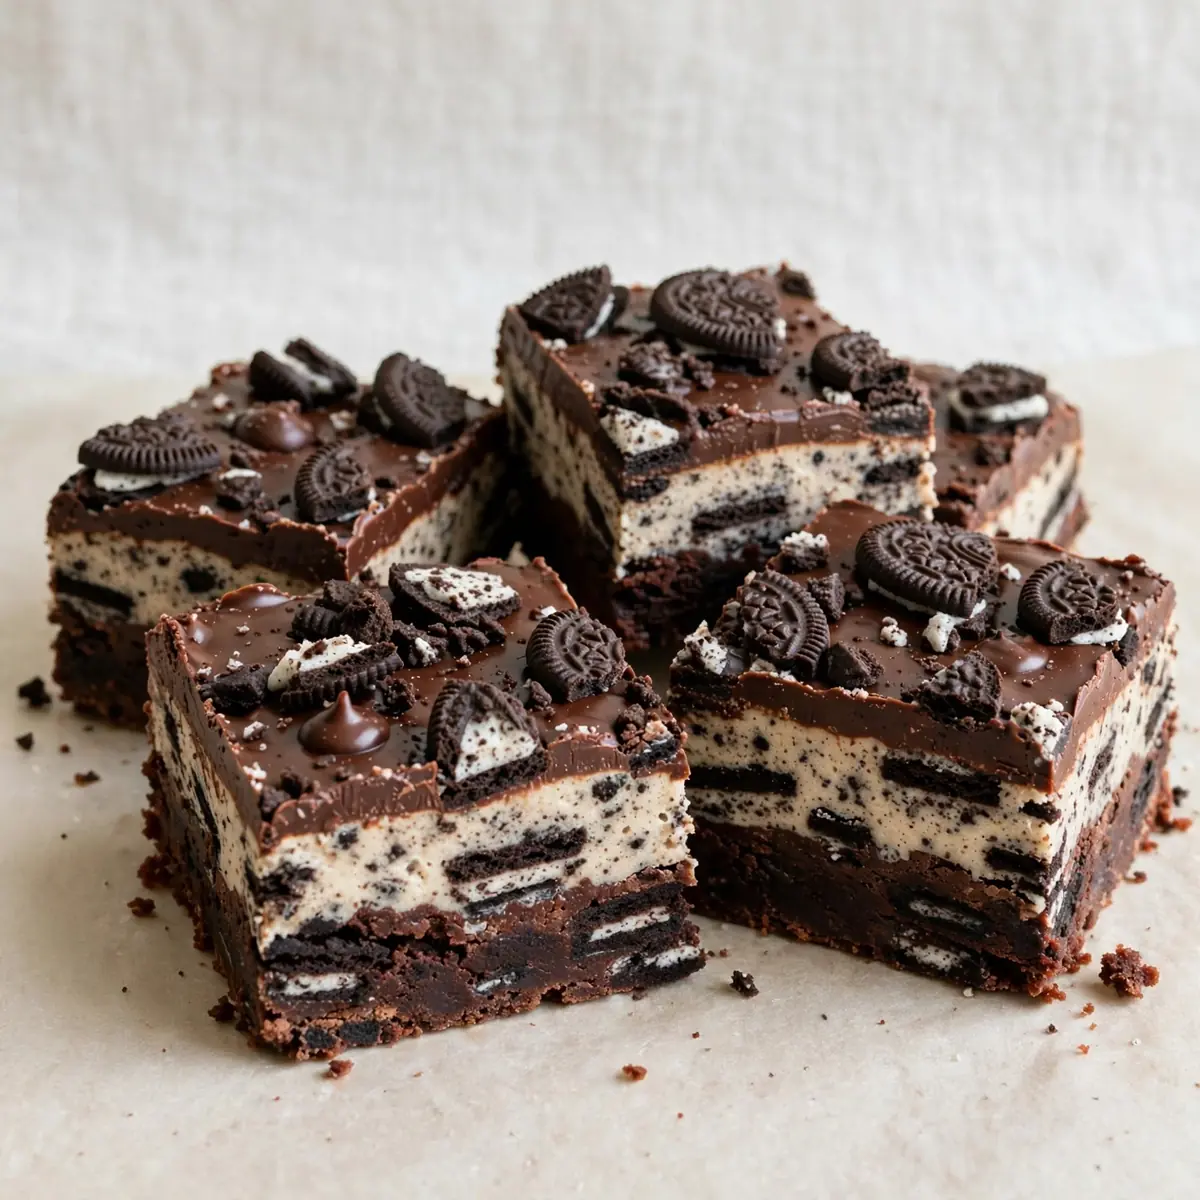
I’ve been making this for over 7 years, and it never disappoints when we’re racing against the clock on a Tuesday night. This Oreo Truffle Brownie Bars recipe is my secret weapon for turning a chaotic weeknight into a moment of sweet, earned calm.
Recipe Overview
- Prep Time: 15 minutes
- Cook Time: 25 minutes
- Total Time: 40 minutes (plus 30 minutes cooling)
- Servings: 16 generous bars
- Difficulty: Easy
Why You’ll Love This Oreo Truffle Brownie Bars
- Ready in under an hour from start to finish. From craving to plate in the time it takes to watch a single episode of a show. This is real weeknight baking.
- One bowl for the brownie, one bowl for the truffle layer. Minimal washing up means more time sitting down. I’ve timed it; the cleanup takes less than five minutes.
- Make-ahead friendly. You can bake the brownie base a day early, then finish the truffle layer and topping on the night you serve them. No stress, just assembly.
- No fancy equipment required. A mixing bowl, a baking tin, and a spatula are all you truly need. No stand mixer necessary if you have good arm strength and a whisk.
- Uses pantry staples. Butter, sugar, eggs, flour, cocoa, and a pack of Oreos. I’ve made these when the cupboards were practically bare except for the essentials.
Ingredients You’ll Need
- 200g unsalted butter, melted
- 200g caster sugar
- 100g light brown sugar
- 3 large eggs, at room temperature
- 1 tsp vanilla extract
- 100g plain flour
- 50g cocoa powder
- ½ tsp salt
- 200g Oreo biscuits (about 20 biscuits)
- 200g full-fat cream cheese, softened
- 100g icing sugar
- 100g dark chocolate (70% cocoa), chopped
- 50ml double cream
Tip: For the truffle layer, ensure your cream cheese is genuinely at room temperature. If it’s too cold, the mixture will be lumpy and refuse to spread smoothly over the brownie base. Let it sit out for at least 30 minutes before you begin.
How to Make Oreo Truffle Brownie Bars
- Preheat the oven to 180°C (160°C fan) and line a 20cm square baking tin with parchment paper. Leave an overhang on two opposite sides — this will be your handles to lift the finished bars out cleanly. The paper should feel crisp and taut against the sides of the tin.
- Make the brownie base. In a large bowl, whisk the melted butter with both sugars until the mixture looks smooth and glossy, about 1 minute. The grains of sugar should feel almost dissolved when you rub a tiny bit between your fingers. Add the eggs one at a time, whisking vigorously after each until the batter is thick and falls in a ribbon from the whisk. Stir in the vanilla.
- Fold in the dry ingredients. Sift the flour, cocoa powder, and salt over the wet mixture. Fold gently with a spatula until you see no more streaks of white flour. The batter should be thick, dark, and smell deeply of chocolate. Pour it into the prepared tin and spread it evenly to the corners. The surface should be smooth and level.
- Bake the brownie base for 20-22 minutes. The edges should look set and slightly pulling away from the sides of the tin, but the centre should still wobble just a little when you gently shake the tin. A skewer inserted into the centre should come out with a few moist crumbs clinging to it — not wet batter, but not clean either. Set the tin on a wire rack and let it cool completely in the tin. You want it to be cool to the touch before adding the next layer.
- Make the Oreo truffle layer while the brownie cools. Place the Oreo biscuits in a sealed plastic bag and crush them with a rolling pin until you have a mix of fine crumbs and small, pea-sized chunks. You want texture, not dust. In a medium bowl, beat the softened cream cheese with the icing sugar until smooth, pale, and fluffy — about 2 minutes with a hand mixer. Fold in the crushed Oreos until evenly distributed. The mixture should be thick, slightly sticky, and studded with dark biscuit pieces.
- Assemble the bars. Once the brownie base is completely cool, dollop the Oreo truffle mixture over the top. Use an offset spatula or the back of a spoon to spread it evenly, pressing gently so it adheres to the brownie. The layer should be about 1cm thick and completely cover the brownie surface. Place the tin in the fridge for at least 20 minutes to firm up.
- Make the chocolate topping. In a small heatproof bowl over a pan of barely simmering water (or in the microwave in 20-second bursts), melt the chopped dark chocolate with the double cream. Stir until the mixture is completely smooth, shiny, and runs off the spoon in a thick ribbon. Let it cool for 2 minutes — it should feel warm but not hot to the touch.
- Finish and chill. Pour the melted chocolate over the chilled truffle layer. Tilt the tin gently so the chocolate runs to the edges and covers the surface evenly. Return the tin to the fridge for at least 30 minutes, or until the topping is firm and no longer sticky when you touch it gently. The surface should look set and have a slight sheen.
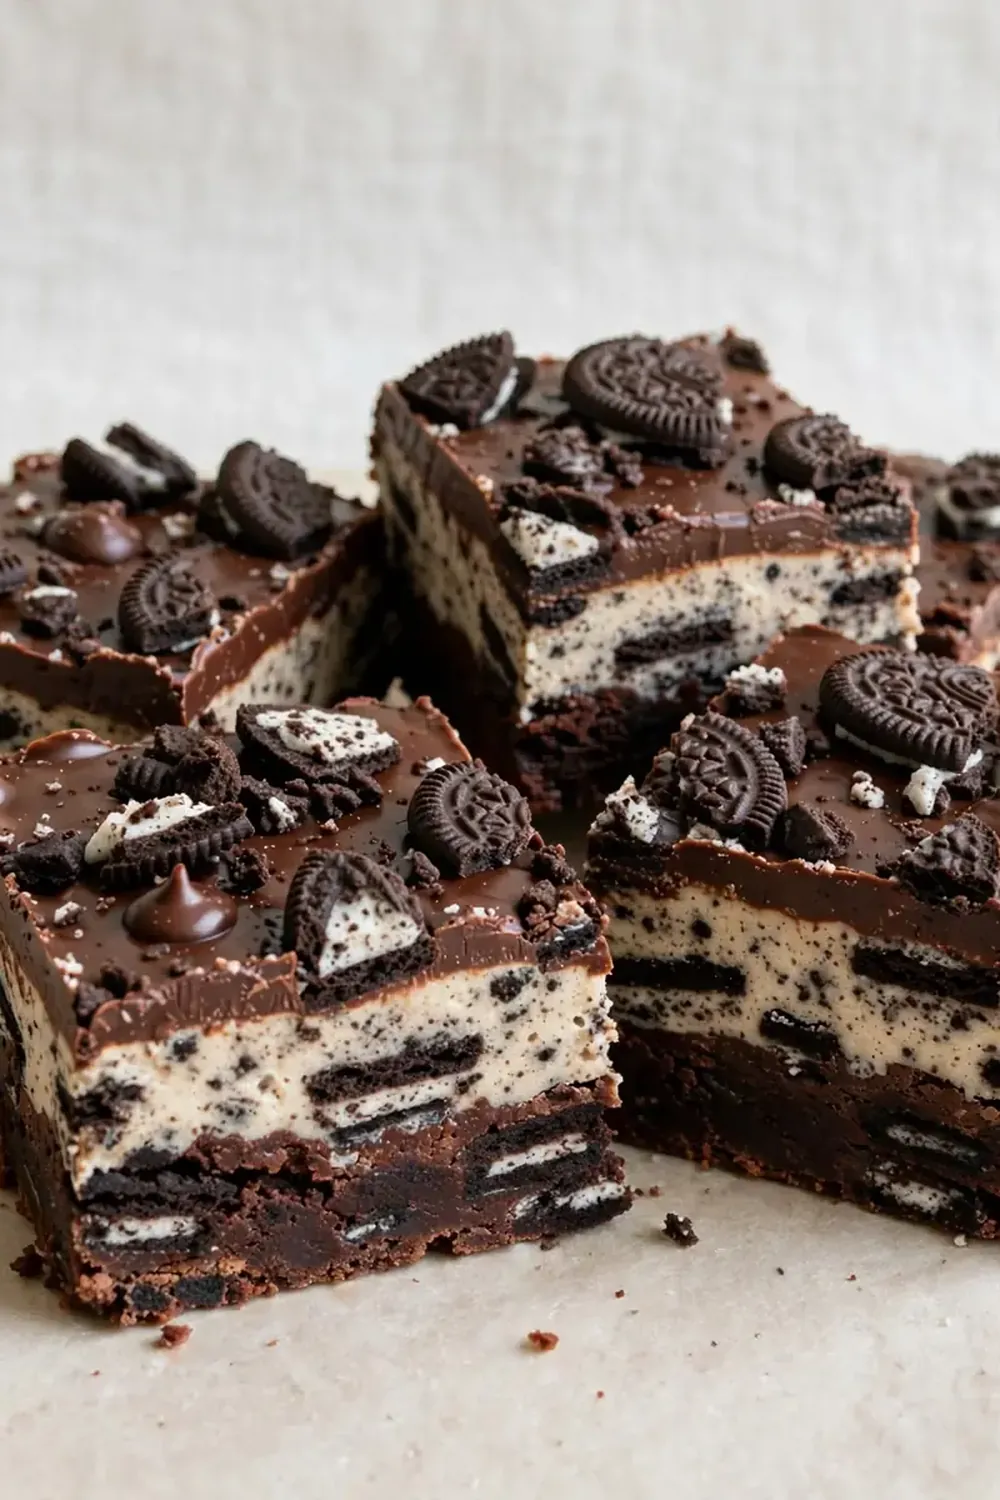
- Slice and serve. Lift the bars out of the tin using the parchment overhang. Place on a cutting board with a sharp knife. For clean slices, warm the knife under hot water, dry it, and cut with one swift motion. Wipe the blade clean between each cut. The bars should reveal three distinct layers: a fudgy brownie base, a creamy Oreo truffle centre, and a glossy chocolate cap.
Tips From My Kitchen
- Don’t overbake the brownie base. The key to a fudgy, not cakey, texture is pulling it out when the centre still has a slight jiggle. It will continue to set as it cools. Overbaking yields a dry, crumbly base that won’t hold the truffle layer well.
- Use full-fat cream cheese. Low-fat versions contain too much water, which makes the truffle layer weepy and unstable. Full-fat gives you a dense, creamy texture that holds its shape when sliced. I learned this the hard way after a few soggy batches.
- Crush the Oreos with intention. You want a mix of textures — some fine crumb for binding and some chunkier pieces for bite. If you blitz them in a food processor to a powder, the truffle layer becomes pasty and one-dimensional. A rolling pin and a sturdy bag give you control.
- Patience with the cooling stages. Each layer needs to be properly set before adding the next. If you spread the truffle layer onto a warm brownie, it will melt and sink in. If you pour the chocolate topping onto a soft truffle layer, they’ll merge into a muddy mess. Chilling is not optional; it’s structural.
- Slice with a hot, dry knife. The chocolate topping is firm and can crack if you force the knife through. Running the blade under hot water, drying it thoroughly, then cutting with a single clean motion gives you professional-looking slices. Clean the blade between cuts for the best results.
Equipment You’ll Need
- Stand mixer or hand mixer
- 20cm square baking tin
- Parchment paper
- Wire cooling rack
- Mixing bowls (large and medium)
- Rolling pin and sealable plastic bag
- Offset spatula (optional but helpful)
- Sharp knife
Common Mistakes to Avoid
- Overcrowding the pan: Spreading the brownie batter too thin results in a dry, crisp base rather than a fudgy one. Use a 20cm square tin as specified — anything larger will spread the batter too thinly and change the texture entirely. If you only have a larger tin, double the brownie recipe to maintain the correct depth.
- Wrong temperature: Baking at too high a temperature sets the edges before the centre has a chance to cook through, leaving you with a crusty ring and a raw middle. Stick to 180°C (160°C fan) and trust the visual cues — the edges should be set, the centre should jiggle.
- Skipping the rest time: These bars need time in the fridge to set properly between layers and after assembly. Rushing the process leads to layers that slide apart when you cut them. The final 30-minute chill is what gives you those clean, distinct layers that make the bars look as good as they taste.
What to Serve With Oreo Truffle Brownie Bars
- A scoop of vanilla ice cream to cut through the richness
- A tall glass of cold milk — the classic companion
- Fresh raspberries or strawberries for a tart contrast
- A drizzle of salted caramel sauce for extra indulgence
Still hungry for ideas? You might also love Chocolate Brownie Protein Bars, Mint Oreo Cheesecake Bars Recipe Dessert from our sister kitchens.
Frequently Asked Questions
Oreo Truffle Brownie Bars
Ingredients
Method
- Preheat the oven to 180°C (160°C fan) and line a 20cm square baking tin with parchment paper. Leave an overhang on two opposite sides — this will be your handles to lift the finished bars out cleanly. The paper should feel crisp and taut against the sides of the tin.
- Make the brownie base. In a large bowl, whisk the melted butter with both sugars until the mixture looks smooth and glossy, about 1 minute. The grains of sugar should feel almost dissolved when you rub a tiny bit between your fingers. Add the eggs one at a time, whisking vigorously after each until the batter is thick and falls in a ribbon from the whisk. Stir in the vanilla.
- Fold in the dry ingredients. Sift the flour, cocoa powder, and salt over the wet mixture. Fold gently with a spatula until you see no more streaks of white flour. The batter should be thick, dark, and smell deeply of chocolate. Pour it into the prepared tin and spread it evenly to the corners. The surface should be smooth and level.
- Bake the brownie base for 20-22 minutes. The edges should look set and slightly pulling away from the sides of the tin, but the centre should still wobble just a little when you gently shake the tin. A skewer inserted into the centre should come out with a few moist crumbs clinging to it — not wet batter, but not clean either. Set the tin on a wire rack and let it cool completely in the tin. You want it to be cool to the touch before adding the next layer.
- Make the Oreo truffle layer while the brownie cools. Place the Oreo biscuits in a sealed plastic bag and crush them with a rolling pin until you have a mix of fine crumbs and small, pea-sized chunks. You want texture, not dust. In a medium bowl, beat the softened cream cheese with the icing sugar until smooth, pale, and fluffy — about 2 minutes with a hand mixer. Fold in the crushed Oreos until evenly distributed. The mixture should be thick, slightly sticky, and studded with dark biscuit pieces.
- Assemble the bars. Once the brownie base is completely cool, dollop the Oreo truffle mixture over the top. Use an offset spatula or the back of a spoon to spread it evenly, pressing gently so it adheres to the brownie. The layer should be about 1cm thick and completely cover the brownie surface. Place the tin in the fridge for at least 20 minutes to firm up.
- Make the chocolate topping. In a small heatproof bowl over a pan of barely simmering water (or in the microwave in 20-second bursts), melt the chopped dark chocolate with the double cream. Stir until the mixture is completely smooth, shiny, and runs off the spoon in a thick ribbon. Let it cool for 2 minutes — it should feel warm but not hot to the touch.
- Finish and chill. Pour the melted chocolate over the chilled truffle layer. Tilt the tin gently so the chocolate runs to the edges and covers the surface evenly. Return the tin to the fridge for at least 30 minutes, or until the topping is firm and no longer sticky when you touch it gently. The surface should look set and have a slight sheen.
- Slice and serve. Lift the bars out of the tin using the parchment overhang. Place on a cutting board with a sharp knife. For clean slices, warm the knife under hot water, dry it, and cut with one swift motion. Wipe the blade clean between each cut. The bars should reveal three distinct layers: a fudgy brownie base, a creamy Oreo truffle centre, and a glossy chocolate cap.
Notes
I stumbled upon this combination by accident, and it’s been a hit ever since. The first time I made these Oreo Truffle Brownie Bars, I was testing a brownie recipe for a weeknight and had a leftover pack of Oreos staring at me from the cupboard. That happy accident has since become the most-requested dessert in our house, and I hope it becomes one in yours too. If you give these a try, I’d love to hear how they turned out — drop a comment below and let me know what your family thought. For another quick treat, you might enjoy these Easy Coconut Truffles Tutorial With 3 Ingredients or this Creamy High Protein Chocolate Pudding Recipe 2 for a lighter option. Happy baking!