
No-Bake Peanut Butter Chocolate Fudge
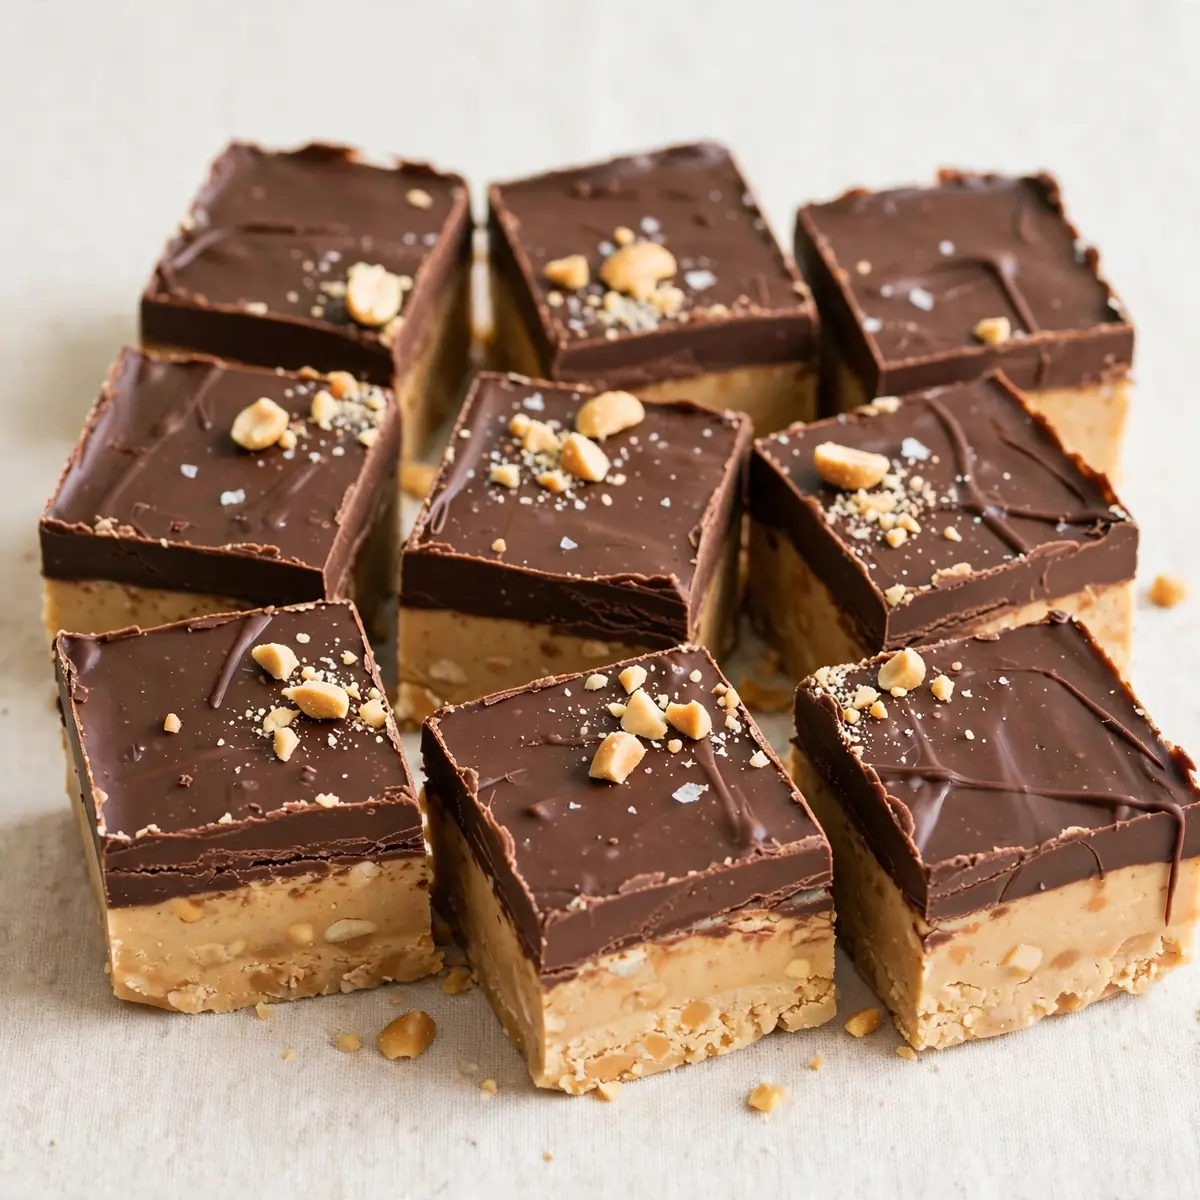
There are weekends for dashing about, and then there are weekends for pressing pause, pulling on a thick jumper, and filling the house with the kind of smells that make you want to curl up on the sofa. This No-Bake Peanut Butter Chocolate Fudge is my favourite kind of project for those slower days—a quietly rewarding task that requires no oven, very little fuss, and delivers a tray of glossy, rich squares that taste like a proper treat.
Recipe Overview
- Prep Time: 15 minutes
- Chill Time: 2 hours (minimum)
- Total Time: 2 hours 15 minutes
- Servings: Makes 24 generous squares
- Difficulty: Easy
Why You’ll Love This No-Bake Peanut Butter Chocolate Fudge
- No oven required: This fudge sets firm in the fridge, making it ideal for warm days or when you simply don’t want to heat up the kitchen.
- Deeply satisfying to make: There’s a meditative rhythm to stirring the chocolate and peanut butter together, watching it transform into a silky, unified mixture.
- Perfect for sharing: Friends always ask me for this recipe after trying it at dinner parties, and it makes a lovely homemade gift wrapped in a little box.
- Customisable texture: You can leave it perfectly smooth or add a handful of chopped nuts for a bit of crunch—the choice is yours.
- Simple, honest ingredients: Nothing complicated here, just pantry staples that come together to create something far greater than the sum of their parts.
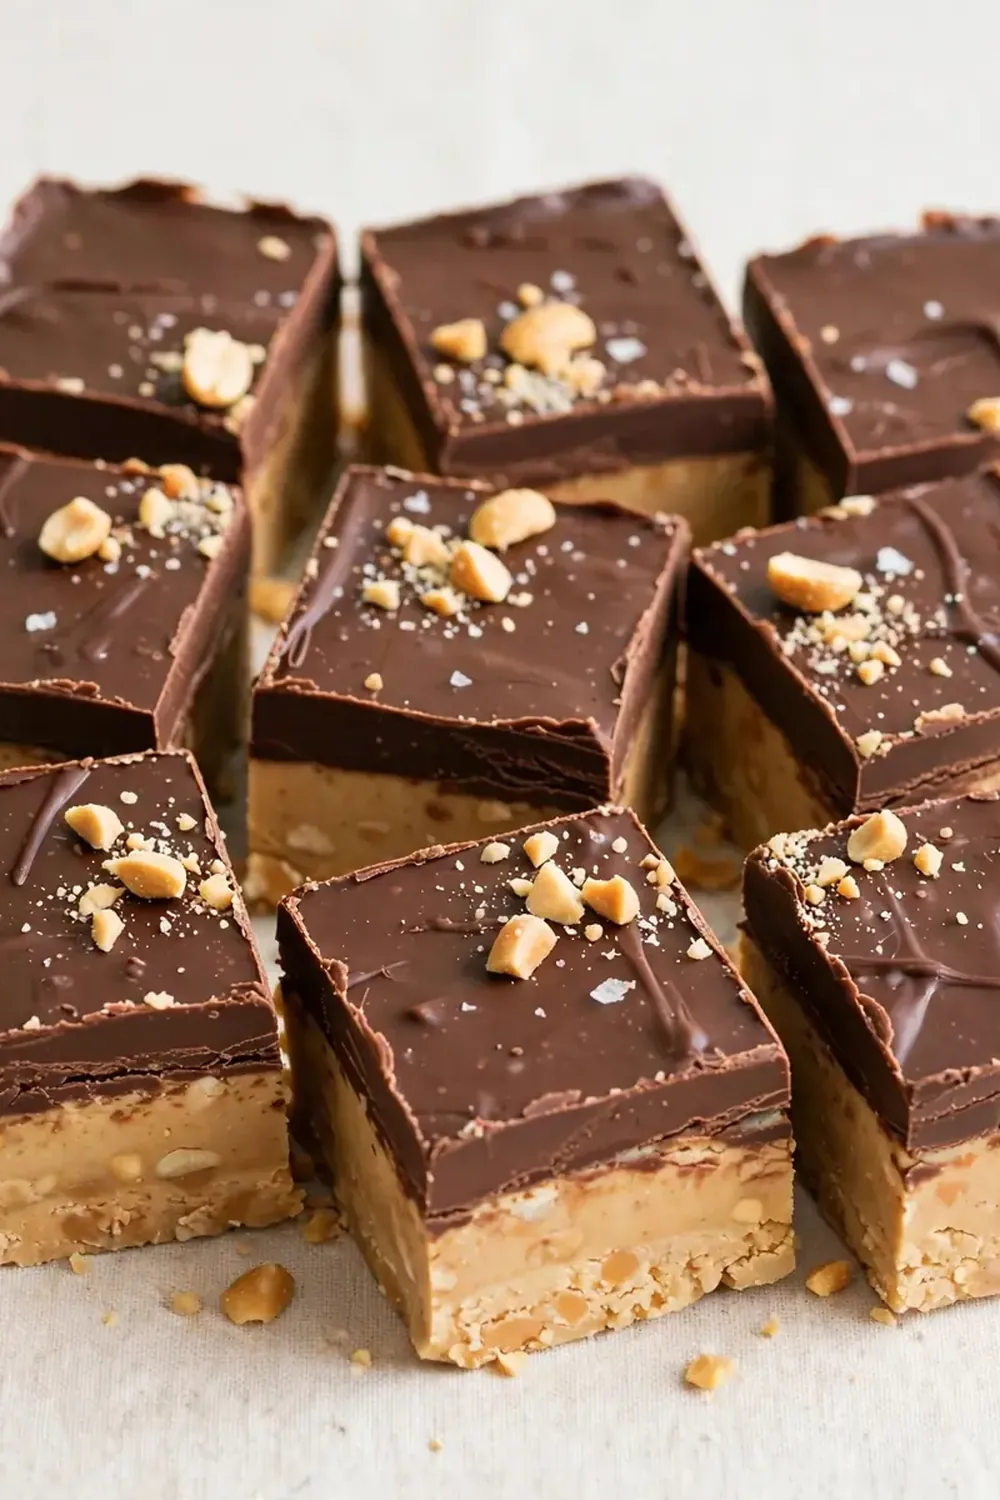
Ingredients You’ll Need
- 400g dark chocolate (at least 70% cocoa solids), roughly chopped
- 1 x 397g tin sweetened condensed milk
- 200g smooth peanut butter (no added sugar or oil varieties work best)
- 60g unsalted butter, cubed
- 1 teaspoon vanilla extract
- A generous pinch of sea salt flakes
- 100g roasted salted peanuts, roughly chopped (optional, for texture)
- 100g milk chocolate chips (for the topping swirl)
Tip: Use a good-quality dark chocolate here—it’s the backbone of the fudge. Cheap chocolate can seize or remain grainy, and we want that luscious, melt-in-the-mouth finish.
How to Make No-Bake Peanut Butter Chocolate Fudge
- Prepare your tin: Line a 9×13 inch baking dish with a long sheet of aluminium foil, leaving some overhang on two sides. This will act as handles later. Press the foil neatly into the corners—you’ll thank yourself later when lifting out the set fudge.
- Melt the base: Place the chopped dark chocolate, sweetened condensed milk, and cubed butter into a medium-sized heatproof bowl. Set it over a pan of gently simmering water—make sure the bottom of the bowl doesn’t touch the water. Stir slowly and steadily with a rubber spatula. As the chocolate begins to melt, you’ll notice the mixture turning glossy and smelling deeply of cocoa and butter.
- Add the peanut butter: Once the chocolate is almost completely melted and the mixture is smooth (you’ll see it become thick and luscious, like a warm ganache), add the peanut butter and vanilla extract. Continue stirring. The colour will shift to a warm, caramel-like brown, and the aroma will become nutty and inviting. Stir until every streak of peanut butter has disappeared.
- Season and texture: Remove the bowl from the heat. Stir in the sea salt flakes and, if you’re using them, the chopped roasted peanuts. You should hear a soft scrape of salt against the bowl, and the peanuts will give the mixture a pleasant, hearty look.
- Pour and spread: Tip the mixture into your prepared tin. Use the spatula to coax it into every corner, smoothing the top as evenly as you can. It will be thick and slightly resistant, but keep at it. The surface should look uniformly dark and glossy.
- Create the swirl: In a small, separate bowl, melt the milk chocolate chips in the microwave in 20-second bursts, stirring between each, until smooth. Drizzle this melted milk chocolate over the fudge in zigzag lines. Take a skewer or the tip of a knife and drag it through the lines to create a marbled effect. The contrast of the lighter milk chocolate against the dark fudge is beautiful.
- Set and slice: Place the tin in the refrigerator, uncovered, for at least 2 hours, or until the fudge feels firm to the touch. Once set, lift it out using the foil overhang. Peel back the foil, place the slab on a chopping board, and use a sharp knife to cut it into squares. The knife should glide through cleanly, revealing a smooth, dense interior.
Tips From My Kitchen
- Don’t rush the melting process: Melting the chocolate over a gentle heat is crucial. If the water is boiling too vigorously, steam can get into the bowl and cause the chocolate to seize—turning it grainy and stiff. Patience here guarantees that silky texture we’re after.
- Use the right peanut butter: Natural, runny peanut butter that separates in the jar can sometimes make the fudge oily or soft. I find a standard smooth peanut butter (the kind that’s already stirred and stable) gives the best, creamiest result. My kids absolutely devour this every time I make it, and I credit the peanut butter choice for that perfect, sliceable consistency.
- Chill fully before slicing: Two hours is the minimum, but an overnight chill is even better. If you try to cut the fudge while it’s still slightly soft at room temperature, you’ll end up with smudged edges. Cold fudge cuts like a dream.
- Room temperature ingredients help: Make sure your butter and condensed milk are at room temperature before you start. Cold ingredients can cause the melted chocolate to cool too quickly and thicken before you’ve had a chance to spread it evenly.
- Line the tin generously: Don’t skimp on the foil overhang. It’s the single best trick for getting the fudge out in one perfect slab. Without it, you’ll be digging around with a spatula, and nobody wants that.
Equipment You’ll Need
- 9×13 inch baking dish
- Aluminium foil
- Mixing bowls (heatproof and regular)
- Sharp knife
- Rubber spatula
- Small saucepan (for the bain-marie)
- Skewer or toothpick (for swirling)
Delicious Variations to Try
- Spicy Version: Add ½ teaspoon of cayenne pepper and ½ teaspoon of ground cinnamon to the chocolate mixture just before pouring. The warmth of the spice plays beautifully against the sweet, creamy fudge, and adds a lovely, unexpected tingle at the finish.
- Vegetarian/Vegan Option: Swap the butter for a high-quality coconut oil (solid, not melted) and use a vegan dark chocolate. Ensure your sweetened condensed milk is a plant-based version—there are excellent coconut or oat-based alternatives available now that work wonderfully.
- Different Protein: Replace the peanut butter with almond butter or cashew butter for a different nutty profile. If using a very oily nut butter, reduce the butter quantity by 10g to keep the fudge from becoming too soft. The result is a slightly more delicate, but equally decadent, treat.
What to Serve With No-Bake Peanut Butter Chocolate Fudge
- A small glass of cold milk—it cuts through the richness perfectly.
- Fresh berries, such as raspberries or sliced strawberries, for a sharp, fruity contrast.
- A scoop of vanilla ice cream, if you’re feeling particularly indulgent.
- A strong cup of black coffee or an espresso to balance the sweetness.
Still hungry for ideas? You might also love No Bake Chocolate Peanut Butter Balls, Hot Chocolate Peppermint Fudge No Bake from our sister kitchens.
Frequently Asked Questions
No-Bake Peanut Butter Chocolate Fudge
Ingredients
Method
- Prepare your tin: Line a 9x13 inch baking dish with a long sheet of aluminium foil, leaving some overhang on two sides. This will act as handles later. Press the foil neatly into the corners—you'll thank yourself later when lifting out the set fudge.
- Melt the base: Place the chopped dark chocolate, sweetened condensed milk, and cubed butter into a medium-sized heatproof bowl. Set it over a pan of gently simmering water—make sure the bottom of the bowl doesn't touch the water. Stir slowly and steadily with a rubber spatula. As the chocolate begins to melt, you'll notice the mixture turning glossy and smelling deeply of cocoa and butter.
- Add the peanut butter: Once the chocolate is almost completely melted and the mixture is smooth (you'll see it become thick and luscious, like a warm ganache), add the peanut butter and vanilla extract. Continue stirring. The colour will shift to a warm, caramel-like brown, and the aroma will become nutty and inviting. Stir until every streak of peanut butter has disappeared.
- Season and texture: Remove the bowl from the heat. Stir in the sea salt flakes and, if you're using them, the chopped roasted peanuts. You should hear a soft scrape of salt against the bowl, and the peanuts will give the mixture a pleasant, hearty look.
- Pour and spread: Tip the mixture into your prepared tin. Use the spatula to coax it into every corner, smoothing the top as evenly as you can. It will be thick and slightly resistant, but keep at it. The surface should look uniformly dark and glossy.
- Create the swirl: In a small, separate bowl, melt the milk chocolate chips in the microwave in 20-second bursts, stirring between each, until smooth. Drizzle this melted milk chocolate over the fudge in zigzag lines. Take a skewer or the tip of a knife and drag it through the lines to create a marbled effect. The contrast of the lighter milk chocolate against the dark fudge is beautiful.
- Set and slice: Place the tin in the refrigerator, uncovered, for at least 2 hours, or until the fudge feels firm to the touch. Once set, lift it out using the foil overhang. Peel back the foil, place the slab on a chopping board, and use a sharp knife to cut it into squares. The knife should glide through cleanly, revealing a smooth, dense interior.
Notes
I hope this cosy, no-fuss fudge becomes a part of your weekend ritual as much as it has mine. If you give it a try, I’d love to hear how you got on—pop a comment below and tell me about the smell that filled your kitchen, or how quickly the tin disappeared. And if you’re in the mood for more sweet baking projects, you might enjoy our Fudgy Chocolate Brownies For A Crowd Pleasing Dessert or these Creamy No Bake Oreo Cheesecake Cups Recipe 2 for another no-bake option. Happy cooking, friends.






