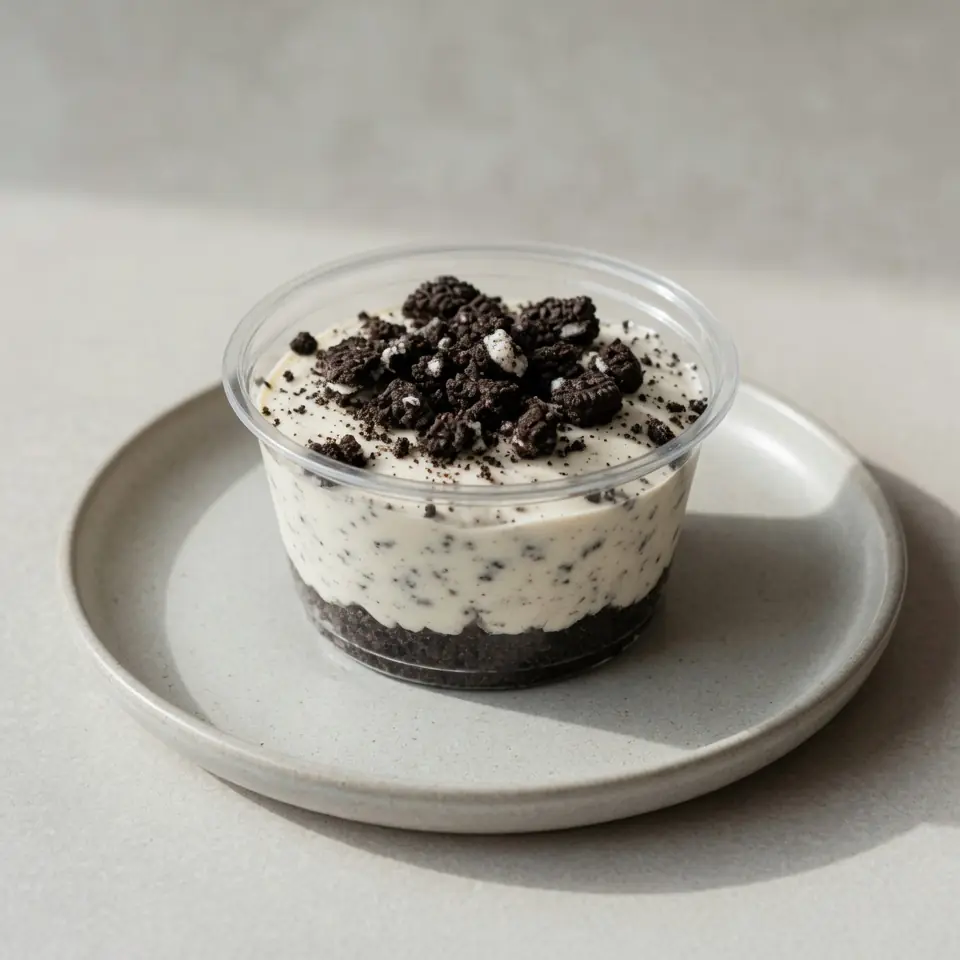
Creamy No Bake Oreo Cheesecake Cups Recipe
When the weeknight rush hits, finding a dessert that delights everyone without adding to the chaos can feel like searching for a needle in a haystack. This Creamy No Bake Oreo Cheesecake Cups recipe is my absolute go-to for those evenings when time is short but the craving for something sweet and satisfying is strong. It’s a brilliant solution for busy families, offering speed, minimal cleanup, and the fantastic bonus of being entirely make-ahead.
I remember one particularly hectic Tuesday; my youngest had a school play rehearsal, my eldest had football, and my husband was working late. Dinner was a quick affair, but I’d promised a treat. I’d whipped up a batch of these cheesecake cups the night before, tucked them away in the fridge, and that evening, pulling them out felt like magic. The kids’ faces lit up at the sight of them, and it transformed a potentially stressful evening into one with a lovely, sweet ending. This recipe isn’t just about dessert; it’s about reclaiming a little bit of calm and joy in the middle of a busy week.
What I adore about these cheesecake cups is their sheer simplicity and the universal adoration they receive. Friends always ask me for this recipe after trying it at dinner parties, completely surprised that something so decadent and inviting requires no oven time at all. My husband, who’s usually quite particular about his sweets, even asked for seconds that night! It’s become a firm favourite in our household, a proper little win that proves you don’t need hours in the kitchen to create something truly special, much like these Creative Thanksgiving Dessert Ideas For Guests.com/nutritious-pumpkin-pie-smoothie-bowl-recipe/”>Nutritious Pumpkin Pie Smoothie Bowl Recipe.com/mini-chocolate-nut-desserts-for-any-occasion-2/”>Mini Chocolate Nut Desserts For Any Occasion.com/beautiful-strawberry-pastries-for-a-sweet-occasion-2/”>Beautiful Strawberry Pastries For A Sweet Occasion.com/fudgy-zucchini-brownies-with-chocolate-glaze-2/”>Fudgy Zucchini Brownies With Chocolate Glaze.
Recipe Overview
- Prep time: 25 minutes
- Chill time: 4 hours (minimum)
- Total time: 4 hours 25 minutes
- Servings: 12 cups
- Difficulty: Easy
Why You’ll Love This Creamy No Bake Oreo Cheesecake Cups Recipe
- Effortless Elegance: These cups look sophisticated but are incredibly simple to assemble, making them ideal for last-minute entertaining or a special weeknight treat.
- No Baking Required: Keep your kitchen cool, especially during warmer months, as there’s no need to switch on the oven at all – just mix, chill, and enjoy.
- Perfect for Make-Ahead: Prepare these a day or two in advance, freeing up your evening for family activities or simply relaxing. They actually taste even better after a good chill!
- Minimal Washing Up: With just a few bowls and a mixer, cleanup is a breeze, which is a massive plus on busy school nights.
- Customisable to Your Liking: Easily adapt the toppings or even the biscuit base to suit different preferences or whatever you have in the cupboard.

Ingredients You’ll Need
- 300g Oreo biscuits (ensure they are vegetarian-friendly if needed)
- 100g unsalted butter, melted
- 250g full-fat cream cheese, softened
- 100g icing sugar (powdered sugar)
- 1 teaspoon vanilla extract
- 300ml double cream
- 150g white chocolate, melted and cooled (optional, for extra richness)
- 50g extra Oreo biscuits, roughly chopped, for topping
- 12 paper cupcake cases or silicone muffin moulds
Tip: For the best texture and flavour, ensure your cream cheese is at room temperature. This helps it blend smoothly with the other ingredients, preventing lumps and creating a truly velvety filling.
How to Make Creamy No Bake Oreo Cheesecake Cups Recipe
- Prepare the Biscuit Base: Take your 300g of Oreo biscuits and crush them finely. You can do this by placing them in a sealed plastic bag and crushing them with a rolling pin until they resemble dark, fine soil, or use a food processor for a quicker, more uniform crumble. Once crushed, pour in the 100g of melted unsalted butter and mix well until the biscuit crumbs are evenly coated and appear moist and sticky. This forms a cohesive base.
- Form the Cup Bases: Line a 12-hole muffin tin with paper cupcake cases. Distribute the buttery Oreo mixture evenly among the 12 cases. Use the back of a spoon or your fingertips to firmly press the mixture down into the bottom of each case, creating a compact, dark base. Once pressed, place the muffin tin in the fridge to chill for at least 15 minutes while you prepare the filling.
- Create the Cream Cheese Mixture: In a large mixing bowl, beat the softened 250g full-fat cream cheese with an electric mixer until it’s light and fluffy, taking on a pale, creamy hue. Gradually add the 100g of icing sugar, beating until fully incorporated and the mixture is smooth and sweet-smelling. Stir in the 1 teaspoon of vanilla extract. If using, gently fold in the 150g of melted and cooled white chocolate until just combined; the mixture will look thick and glossy.
- Whip the Cream: In a separate, clean bowl, pour in the 300ml of double cream. Using an electric mixer, whisk the cream on a medium-high speed until it forms soft peaks. You’ll notice the cream becoming much thicker and holding its shape, with a lovely, airy texture. Be careful not to over-whisk, or it might become grainy.
- Combine and Fill: Gently fold the whipped double cream into the cream cheese mixture using a spatula. Do this in two additions, taking care not to knock out too much air. The goal is a light, airy, and uniform mixture that smells divinely sweet and vanilla-scented. Spoon or pipe this creamy filling over the chilled Oreo bases in each cupcake case, filling them almost to the top. The filling should look wonderfully smooth and inviting.
- Chill and Top: Once all the cups are filled, loosely cover the muffin tin with cling film and return it to the fridge to chill for a minimum of 4 hours, or ideally overnight. This chilling time is crucial for the cheesecake to set properly, firming up to a delightful, scoopable texture. Before serving, sprinkle the top of each cup with the extra 50g of roughly chopped Oreo biscuits for a satisfying crunch and visual appeal.
Tips From My Kitchen
- Room Temperature Cream Cheese is Key: Always, always ensure your full-fat cream cheese is at room temperature before you start. The “why” here is simple: cold cream cheese won’t blend smoothly with the other ingredients. You’ll end up with a lumpy, uneven filling, no matter how much you beat it. Taking it out of the fridge an hour or two before you begin will result in a perfectly silky-smooth, lump-free cheesecake filling that melts in the mouth.
- Don’t Over-mix the Cream: When whipping your double cream, keep a close eye on it. The moment it forms soft peaks – meaning it holds its shape but still looks light and airy – stop. Over-mixing can cause the cream to become grainy or even split, which will ruin the delicate texture of your cheesecake filling. You want it to be light and fluffy, ready to fold gently into the cream cheese mixture.
- Firmly Press the Biscuit Base: After mixing the crushed Oreos with melted butter, make sure you press the mixture very firmly into the bottom of each cupcake case. The “why” is twofold: firstly, it creates a stable base that won’t crumble apart when you try to eat it, and secondly, it prevents the base from absorbing too much moisture from the filling, ensuring a lovely, crisp texture. Use the back of a spoon or a small glass to really compact it.
- Chill for Long Enough: I know it’s tempting to dive in, but resist the urge! These no-bake cheesecakes truly need their minimum of 4 hours, or better yet, an overnight chill. The “why” is that this time allows the cream cheese and cream mixture to set properly, firming up to that classic cheesecake consistency. Rushing it will result in a gooey, unset dessert that won’t hold its shape. A well-chilled cheesecake is a happy cheesecake!
- Use Full-Fat Ingredients: For the most luscious, creamy texture and rich flavour, stick to full-fat cream cheese and double cream. Reduced-fat versions often contain more water, which can make your cheesecake filling less stable and result in a thinner, less satisfying consistency. The full-fat options provide that wonderful, velvety mouthfeel we all crave in a proper cheesecake.
Equipment You’ll Need
- Stand mixer or hand mixer
- Baking tray
- Parchment paper
- Wire cooling rack
- 12-hole muffin tin
- Paper cupcake cases or silicone muffin moulds
- Large mixing bowls (2)
- Rubber spatula
- Measuring jug and scales
Common Mistakes to Avoid
- Overcrowding the pan: While you’re not baking, overcrowding the fridge or freezer with too many cheesecake cups can hinder proper chilling. Give them space so the cold air can circulate evenly around each cup, ensuring they set uniformly. If you’re making a double batch, use a second tray or chill them in batches.
- Wrong temperature: As mentioned in my tips, using cold cream cheese directly from the fridge is a common pitfall. The cream cheese must be at room temperature to achieve a smooth, lump-free filling. Similarly, ensure your melted white chocolate (if using) has cooled sufficiently before adding to the mixture; hot chocolate could curdle the cream cheese.
- Skipping the rest time: This is arguably the most crucial step for a no-bake cheesecake. Skipping or shortening the minimum 4-hour chilling time means the cheesecake won’t have adequately set. The filling will be too soft and won’t hold its shape when you try to serve it. Patience truly is a virtue here!
Delicious Variations to Try
- Spicy Version: While not traditional for cheesecake, you could add a very subtle warmth by incorporating a tiny pinch of ground ginger or cinnamon into the biscuit base alongside the Oreos. This offers a gentle, unexpected layer of flavour without overwhelming the sweetness.
- Vegetarian/Vegan Option: To make these plant-based, swap the Oreos for a vegan-friendly chocolate sandwich biscuit (check ingredients carefully). Replace the unsalted butter with a vegan baking block or coconut oil. For the filling, use a good quality vegan cream cheese alternative and plant-based double cream (such as an oat or coconut-based whipping cream). Ensure your white chocolate is also dairy-free.
- Different Protein: As these are a dessert, a “different protein” variation focuses more on enriching the flavour profile. You could swirl a tablespoon of smooth, unsweetened peanut butter into a portion of the cheesecake filling for a nutty kick, or even fold in some finely chopped roasted almonds for added texture and a boost of plant-based protein.
What to Serve With Creamy No Bake Oreo Cheesecake Cups Recipe
- A dusting of cocoa powder
- Fresh berries like raspberries or strawberries
- A drizzle of chocolate sauce
- A dollop of extra whipped cream
- A sprig of fresh mint for garnish
Frequently Asked Questions
Creamy No Bake Oreo Cheesecake Cups Recipe
Ingredients
Method
-
Prepare the Biscuit Base: Take your 300g of Oreo biscuits and crush them finely. You can do this by placing them in a sealed plastic bag and crushing them with a rolling pin until they resemble dark, fine soil, or use a food processor for a quicker, more uniform crumble. Once crushed, pour in the 100g of melted unsalted butter and mix well until the biscuit crumbs are evenly coated and appear moist and sticky. This forms a cohesive base.
-
Form the Cup Bases: Line a 12-hole muffin tin with paper cupcake cases. Distribute the buttery Oreo mixture evenly among the 12 cases. Use the back of a spoon or your fingertips to firmly press the mixture down into the bottom of each case, creating a compact, dark base. Once pressed, place the muffin tin in the fridge to chill for at least 15 minutes while you prepare the filling.
-
Create the Cream Cheese Mixture: In a large mixing bowl, beat the softened 250g full-fat cream cheese with an electric mixer until it’s light and fluffy, taking on a pale, creamy hue. Gradually add the 100g of icing sugar, beating until fully incorporated and the mixture is smooth and sweet-smelling. Stir in the 1 teaspoon of vanilla extract. If using, gently fold in the 150g of melted and cooled white chocolate until just combined; the mixture will look thick and glossy.
-
Whip the Cream: In a separate, clean bowl, pour in the 300ml of double cream. Using an electric mixer, whisk the cream on a medium-high speed until it forms soft peaks. You’ll notice the cream becoming much thicker and holding its shape, with a lovely, airy texture. Be careful not to over-whisk, or it might become grainy.
-
Combine and Fill: Gently fold the whipped double cream into the cream cheese mixture using a spatula. Do this in two additions, taking care not to knock out too much air. The goal is a light, airy, and uniform mixture that smells divinely sweet and vanilla-scented. Spoon or pipe this creamy filling over the chilled Oreo bases in each cupcake case, filling them almost to the top. The filling should look wonderfully smooth and inviting.
-
Chill and Top: Once all the cups are filled, loosely cover the muffin tin with cling film and return it to the fridge to chill for a minimum of 4 hours, or ideally overnight. This chilling time is crucial for the cheesecake to set properly, firming up to a delightful, scoopable texture. Before serving, sprinkle the top of each cup with the extra 50g of roughly chopped Oreo biscuits for a satisfying crunch and visual appeal.
Notes
I genuinely hope these Creamy No Bake Oreo Cheesecake Cups become a beloved staple in your family, just as they have in mine. They’re a testament to the fact that you can have a truly indulgent and satisfying dessert without any of the faff or fuss. Give them a try on your next busy weeknight, and let me know how they turn out in the comments below. For more stress-free sweet treats, you might also like my Creamy Strawberry Dessert Cups For Entertaining or my Satisfying High Volume Low Calorie Desserts. Happy no-baking!