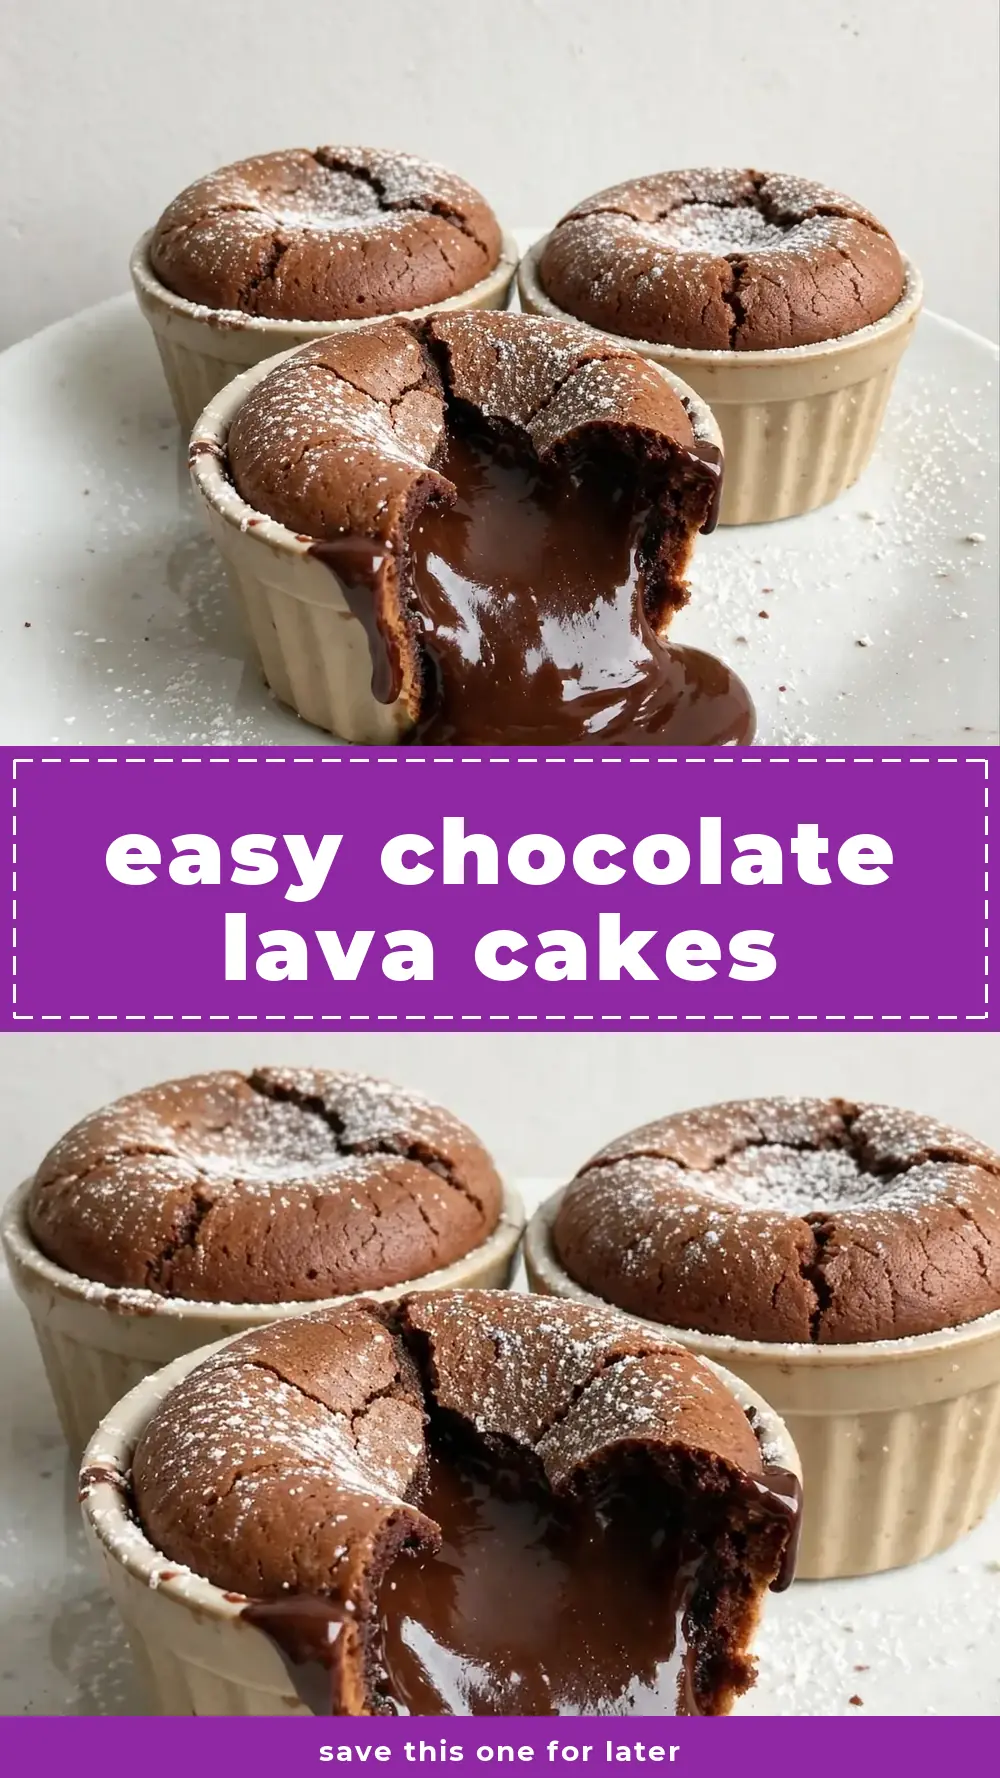
Easy Chocolate Lava Cakes
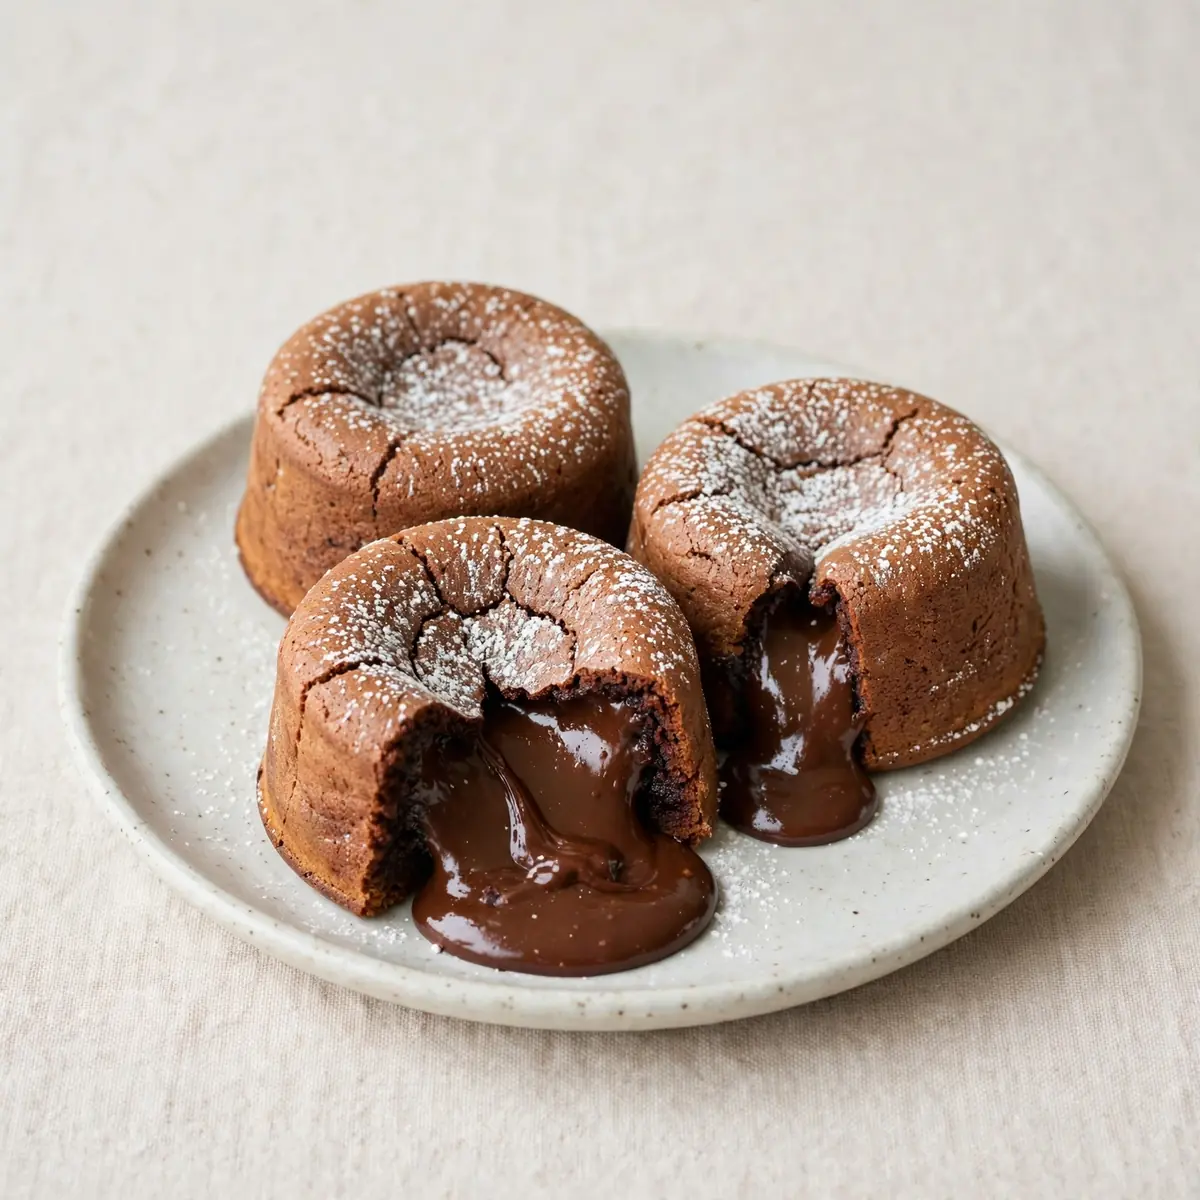
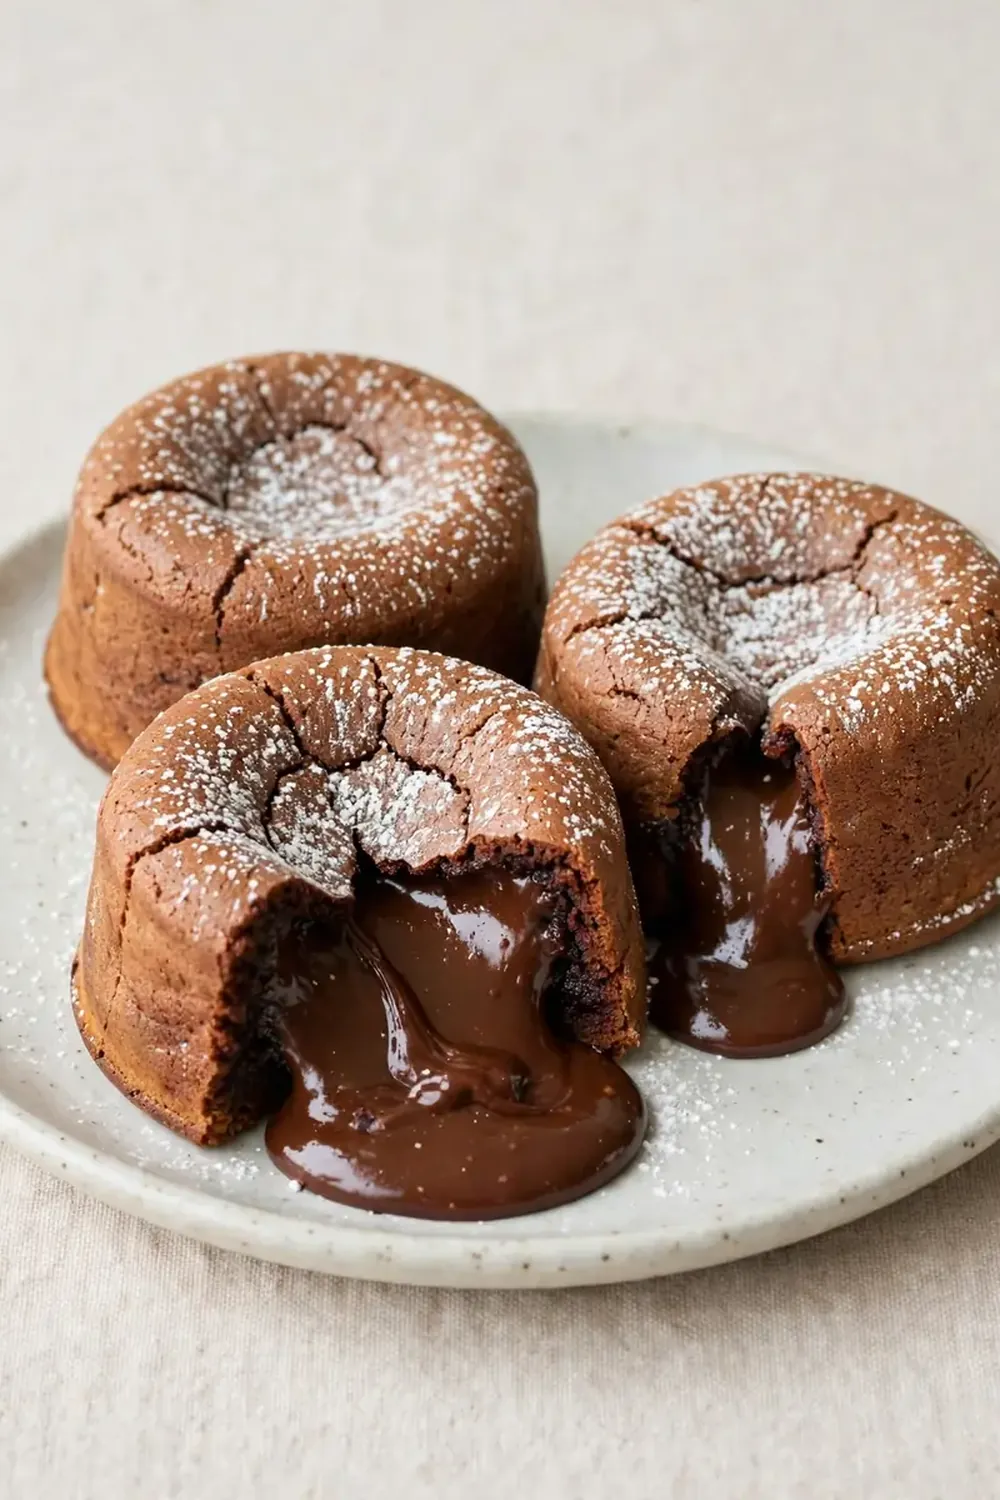
There are few things more comforting than surrendering a whole afternoon to your own kitchen, letting the rich scent of melting chocolate fill every room of the house. This Easy Chocolate Lava Cakes recipe is my favourite weekend project—a deliberate, slow ritual that ends with individual, perfectly gooey-centred desserts that feel both indulgent and deeply personal.
Recipe Overview
- Prep Time: 20 minutes
- Cook Time: 12-14 minutes
- Total Time: 35 minutes (including resting time)
- Servings: 4 individual cakes
- Difficulty: Moderate (requires attention to timing)
Why You’ll Love This Easy Chocolate Lava Cakes
- That first spoonful moment: There’s a magic in cracking through the delicate, cakey exterior to reveal a warm, flowing centre—a small triumph every single time.
- Minimal ingredients, maximum reward: With just a handful of pantry staples, you create something that tastes far more complex than its component parts suggest.
- Perfect for slowing down: This isn’t a rushed weekday dessert; it’s an invitation to take your time, to breathe, to enjoy the process as much as the final plate.
- Customisable to your mood: Friends always ask me for this recipe after trying it at dinner parties, and I love showing them how easy it is to adapt with different fillings or flavourings, just like our Classic Caramel Pecan Cheesecake.
- Built-in portion control: Each little ramekin is its own perfect serving—no temptation to go back for another slice.
Ingredients You’ll Need
- 150g dark chocolate (70% cocoa solids), roughly chopped
- 110g unsalted butter, plus extra for greasing
- 2 large eggs, at room temperature
- 2 large egg yolks, at room temperature
- 75g golden caster sugar
- 40g plain flour, sifted
- A pinch of fine sea salt
- 1 teaspoon vanilla extract
- Cocoa powder, for dusting the ramekins
- Optional: 4 squares of extra dark chocolate, for an extra-lava centre
Tip: Use good-quality chocolate here—it’s the star of the show, and its flavour will come through beautifully. I always choose a block of chocolate rather than pre-chopped chips, as it melts more evenly.
How to Make Easy Chocolate Lava Cakes
- Prepare your ramekins. Generously butter the insides of four 180ml ramekins, making sure you get into every corner. Dust each one with cocoa powder, tapping out any excess. This step ensures your cakes will release cleanly—you’ll see a lovely, even coating of cocoa against the butter.
- Melt the chocolate and butter together. Place the chopped chocolate and butter in a heatproof bowl set over a pan of gently simmering water. Do not let the bottom of the bowl touch the water. Stir occasionally with a silicone spatula until the mixture is smooth, glossy, and completely melted—you’ll smell that deep, almost smoky chocolate aroma as it comes together. Remove from the heat and set aside to cool for five minutes.
- Whisk the eggs and sugar. In a large mixing bowl, combine the whole eggs, egg yolks, and golden caster sugar. Using a hand mixer or a stand mixer fitted with the whisk attachment, beat on high speed for about 3-4 minutes. You’re looking for the mixture to become thick, pale, and ribbony—when you lift the whisk, the batter should fall back into the bowl in a slow, lazy ribbon that holds its shape for a second before disappearing.
- Fold the chocolate mixture in. Pour the cooled chocolate-butter mixture into the egg mixture, along with the vanilla extract and a pinch of salt. Using a large metal spoon or a rubber spatula, fold gently but firmly. Cut through the centre of the mixture, then scoop around the edge of the bowl, repeating until just combined. You should see a uniform, dark brown batter with no streaks of egg—stop folding the moment it comes together; overworking will make the cakes dense.
- Sift and fold the flour. Sift the plain flour over the batter. Fold again with the same gentle motion until the flour disappears into the mixture. The batter will be thick, glossy, and smell intensely of chocolate. If you’re adding an extra chocolate square for a more dramatic lava, gently press one square into the centre of the batter in each ramekin at this point.
- Fill and rest. Divide the batter evenly among the four prepared ramekins. You can do this up to 24 hours ahead—cover them with cling film and refrigerate. If baking immediately, let the filled ramekins rest at room temperature for 10 minutes. This resting time allows the batter to settle and ensures a more even bake.
- Bake with precision. Preheat your oven to 200°C (180°C fan) and place a baking tray inside to heat up. Place the ramekins on the hot tray and bake for exactly 12-14 minutes. You’ll know they’re ready when the tops are set and slightly domed, the edges look firm and have pulled away just a little from the ramekin sides, and the centre jiggles ever so slightly when you gently shake the tray. The surface should feel springy to a light touch, but the middle will still be soft beneath.
- Rest and unmould. Remove the ramekins from the oven and let them rest on a wire cooling rack for exactly one minute—no longer, or the lava will set. Run a small, sharp knife around the edge of each cake to loosen it. Place a serving plate upside down over the ramekin, then confidently invert the plate and ramekin together. Lift the ramekin away to reveal a perfectly shaped cake. My kids absolutely devour this every time I make it, so I always have a plate ready and waiting.
Tips From My Kitchen
- Room temperature eggs are non-negotiable: Cold eggs won’t whip to the same volume, and they’ll seize the melted chocolate when you combine them. Take your eggs out of the fridge at least 30 minutes before you start—or, if you forget, place them in a bowl of warm (not hot) water for 10 minutes.
- Trust the jiggle test over the timer: Ovens vary wildly, and the difference between a molten centre and a fully cooked cake is often just 90 seconds. Start checking at the 11-minute mark. The perfect lava cake should have a set, slightly puffed edge and a centre that wobbles like a spoonful of thick custard when you gently shake the baking tray.
- Butter and cocoa powder are better than butter and flour: Using cocoa powder instead of flour to dust your greased ramekins prevents white, floury patches from marring the dark surface of your cakes. It also adds a subtle extra layer of chocolate flavour to the outer crust.
- Chill the filled ramekins for an insurance policy: If you’re nervous about timing, fill your ramekins and refrigerate them for at least 30 minutes before baking. Chilled batter bakes more evenly and gives you a wider window of forgiveness—the centre stays molten for an extra minute or two of bake time.
- Use a metal baking tray, not a ceramic one: A metal tray heats up quickly and delivers intense bottom heat to the ramekins, helping the edges set while the centre stays soft. A ceramic dish or a cold tray will slow down the heat transfer and lead to uneven baking.
Equipment You’ll Need
- Stand mixer or hand mixer
- 4 x 180ml ramekins (or six 120ml ramekins for smaller portions)
- Baking tray (preferably metal)
- Parchment paper (for lining the baking tray, optional)
- Wire cooling rack
- Fine-mesh sieve, for sifting flour and cocoa powder
- Heatproof mixing bowl and a saucepan for the bain-marie
- Silicone spatula or metal spoon for folding
Common Mistakes to Avoid
- Overcrowding the ramekins: Fill each ramekin only three-quarters full. The batter rises as it bakes, and if you fill them too high, the cakes will spill over the edges, creating a mess and losing their signature shape. Leave enough room for the cake to dome slightly without touching the rim.
- Wrong oven temperature: An oven that’s too hot will set the outside before the middle has a chance to warm through, resulting in a raw, cold centre instead of a warm lava. Too cool, and the entire cake bakes through, leaving you with a solid chocolate muffin. Stick to 200°C (180°C fan) and use an oven thermometer if your oven runs hot or cold.
- Skipping the rest time: The 10-minute rest before baking allows the gluten in the flour to relax and the batter to settle. Without this step, the cakes can bake unevenly, with a tougher texture around the edges. If you’ve chilled the filled ramekins, let them sit at room temperature for 15 minutes before baking.
Delicious Variations to Try
- Spiced Chocolate Lava: Add ½ teaspoon of ground cinnamon and a tiny pinch of cayenne pepper to the flour before folding. The warmth of the spices plays beautifully against the rich chocolate, and you’ll smell the cinnamon as the cakes bake—a wonderful, cosy note for a winter afternoon.
- White Chocolate and Raspberry: Replace the dark chocolate with 150g of good-quality white chocolate. After filling the ramekins, press three or four fresh or frozen raspberries into the centre of each one. The tart berries cut through the sweetness, and the juices create a pink-hued lava that’s stunning when you cut into it.
- Mocha Lava Cakes: Dissolve 1 teaspoon of instant coffee granules in 1 tablespoon of hot water and add it to the melted chocolate mixture. The coffee doesn’t make the cakes taste like coffee; it deepens and intensifies the chocolate flavour, making it taste almost smoky and more complex.
What to Serve With Easy Chocolate Lava Cakes
- A generous scoop of vanilla ice cream—the cold, creamy contrast against the warm, molten centre is the whole point.
- A dollop of lightly whipped double cream, perhaps with a tiny splash of vanilla extract stirred in.
- Fresh raspberries or strawberries, scattered around the plate for a bright, sharp counterpoint to the richness.
- A dusting of icing sugar and a few flakes of sea salt, just before serving, for texture and visual appeal.
Still hungry for ideas? You might also love Gooey Chocolate Molten Lava Cakes Quick Easy from our sister kitchens.
Frequently Asked Questions
Easy Chocolate Lava Cakes
Ingredients
Method
-
Prepare your ramekins. Generously butter the insides of four 180ml ramekins, making sure you get into every corner. Dust each one with cocoa powder, tapping out any excess. This step ensures your cakes will release cleanly—you’ll see a lovely, even coating of cocoa against the butter.
-
Melt the chocolate and butter together. Place the chopped chocolate and butter in a heatproof bowl set over a pan of gently simmering water. Do not let the bottom of the bowl touch the water. Stir occasionally with a silicone spatula until the mixture is smooth, glossy, and completely melted—you’ll smell that deep, almost smoky chocolate aroma as it comes together. Remove from the heat and set aside to cool for five minutes.
-
Whisk the eggs and sugar. In a large mixing bowl, combine the whole eggs, egg yolks, and golden caster sugar. Using a hand mixer or a stand mixer fitted with the whisk attachment, beat on high speed for about 3-4 minutes. You’re looking for the mixture to become thick, pale, and ribbony—when you lift the whisk, the batter should fall back into the bowl in a slow, lazy ribbon that holds its shape for a second before disappearing.
-
Fold the chocolate mixture in. Pour the cooled chocolate-butter mixture into the egg mixture, along with the vanilla extract and a pinch of salt. Using a large metal spoon or a rubber spatula, fold gently but firmly. Cut through the centre of the mixture, then scoop around the edge of the bowl, repeating until just combined. You should see a uniform, dark brown batter with no streaks of egg—stop folding the moment it comes together; overworking will make the cakes dense.
-
Sift and fold the flour. Sift the plain flour over the batter. Fold again with the same gentle motion until the flour disappears into the mixture. The batter will be thick, glossy, and smell intensely of chocolate. If you’re adding an extra chocolate square for a more dramatic lava, gently press one square into the centre of the batter in each ramekin at this point.
-
Fill and rest. Divide the batter evenly among the four prepared ramekins. You can do this up to 24 hours ahead—cover them with cling film and refrigerate. If baking immediately, let the filled ramekins rest at room temperature for 10 minutes. This resting time allows the batter to settle and ensures a more even bake.
-
Bake with precision. Preheat your oven to 200°C (180°C fan) and place a baking tray inside to heat up. Place the ramekins on the hot tray and bake for exactly 12-14 minutes. You’ll know they’re ready when the tops are set and slightly domed, the edges look firm and have pulled away just a little from the ramekin sides, and the centre jiggles ever so slightly when you gently shake the tray. The surface should feel springy to a light touch, but the middle will still be soft beneath.
-
Rest and unmould. Remove the ramekins from the oven and let them rest on a wire cooling rack for exactly one minute—no longer, or the lava will set. Run a small, sharp knife around the edge of each cake to loosen it. Place a serving plate upside down over the ramekin, then confidently invert the plate and ramekin together. Lift the ramekin away to reveal a perfectly shaped cake. My kids absolutely devour this every time I make it, so I always have a plate ready and waiting.
Notes
I’d love to hear how your lava cakes turned out—did you try any of the variations, or did you create your own twist? Share your experience in the comments below, and if you’re looking for another sweet weekend project, you might enjoy making my Fudgy Chocolate Brownies For A Crowd Pleasing Dessert or these No Bake Chocolate Peanut Butter Ritz Cookies for an even simpler treat.