Classic Red Velvet Cheesecake
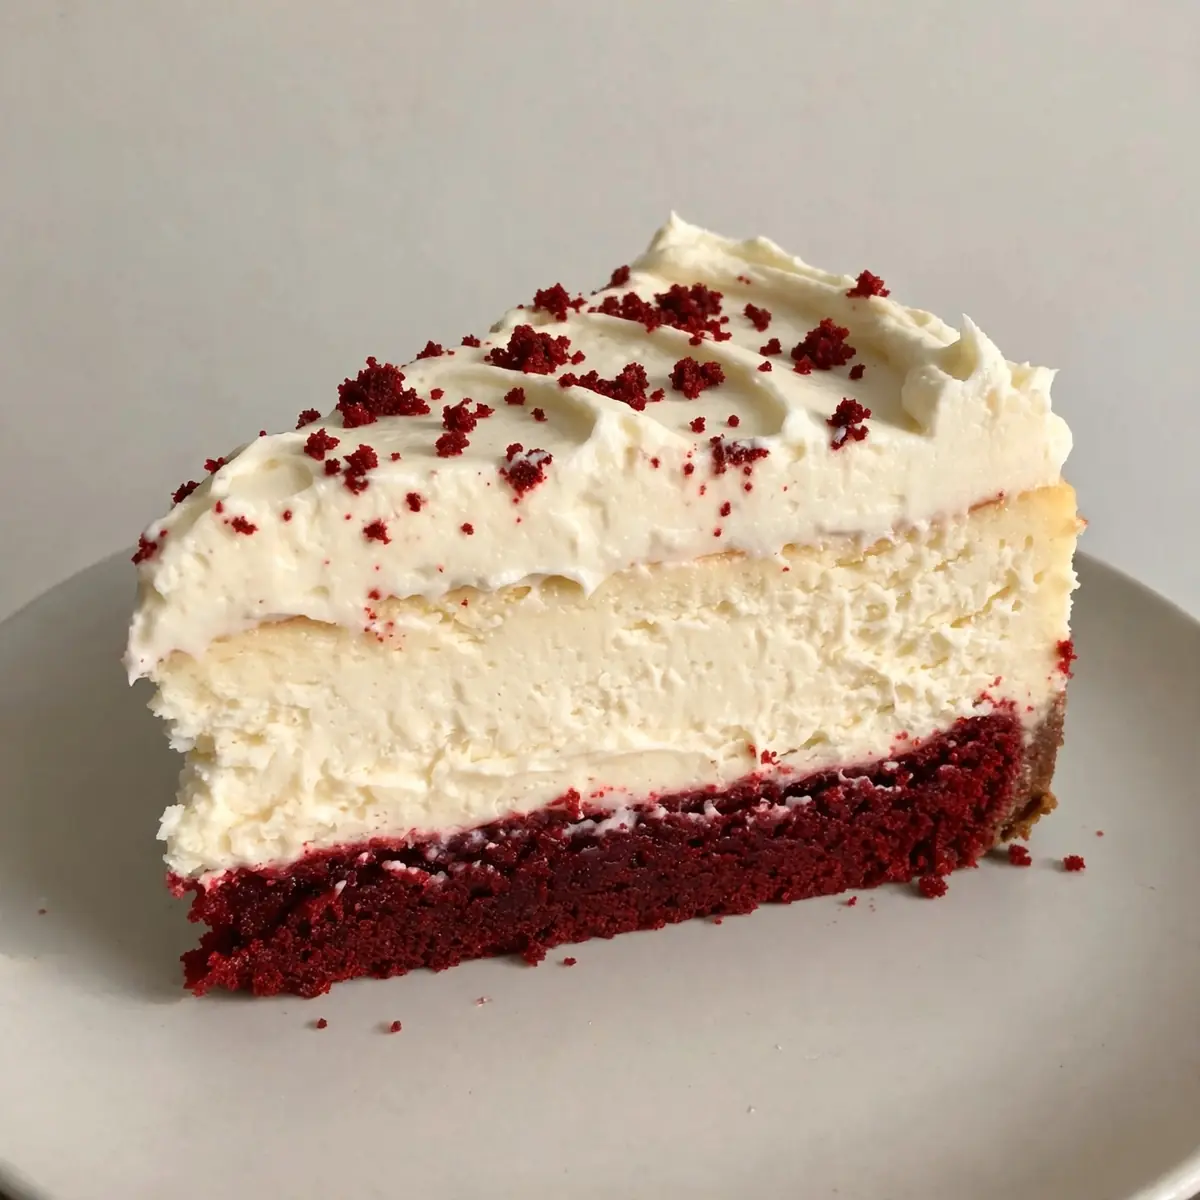
There are weekends for rushing, and then there are weekends for surrendering to the rhythm of a wooden spoon against a mixing bowl. I’ve been making this Classic Red Velvet Cheesecake for over a decade, and it never disappoints; it is the aroma of vanilla and cocoa drifting through the house on a drizzly Saturday afternoon that signals I have finally stopped to breathe. Today, I want to walk you through the slow, deliberate process of building this layered masterpiece — not just as a recipe, but as a gentle project for the soul.
Recipe Overview
- Prep Time: 45 minutes (plus 4 hours chilling)
- Cook Time: 1 hour 10 minutes
- Total Time: 6 hours (including resting and cooling)
- Servings: 12 generous slices
- Difficulty: Intermediate — worth every careful step
Why You’ll Love This Classic Red Velvet Cheesecake
- Two beloved desserts in one: You get the tender, cocoa-kissed crumb of red velvet cake layered over a velvety, tangy cheesecake filling — no choosing sides.
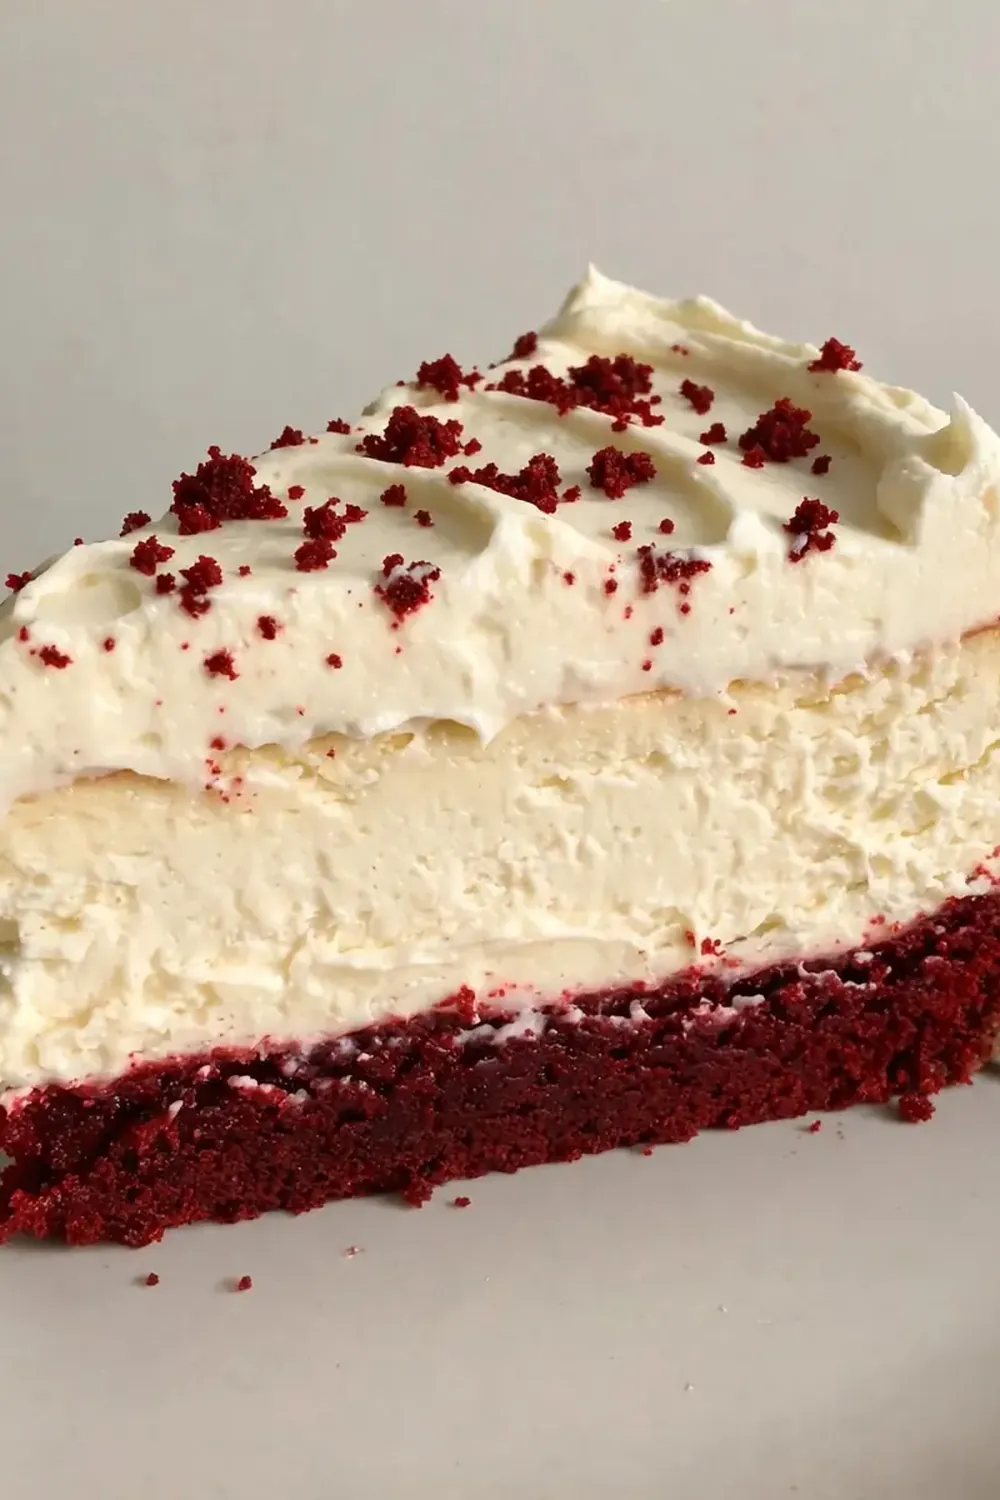
- A sensory journey from start to finish: The scent of buttermilk and vanilla blooming in the oven, the satisfying crackle of the cheesecake surface as it cools, and that first clean slice revealing the striking red and white stripes.
- Perfectly balanced sweetness: The cream cheese frosting isn’t cloying; it has a subtle tang that cuts through the richness, making each bite feel indulgent yet light.
- Weekend-friendly timeline: While it asks for patience, the hands-on work is broken into manageable chunks — perfect for a day when you want to potter about the kitchen with a mug of tea in hand.
- Stunning presentation without fuss: The natural contrast of the deep red cake against the white cheesecake and frosting creates a showstopper that looks far more complicated than it actually is.
Ingredients You’ll Need
- 250g digestive biscuits (or plain shortbread)
- 100g unsalted butter, melted
- 900g full-fat cream cheese, at room temperature
- 200g caster sugar
- 3 large eggs, at room temperature
- 2 tsp vanilla extract
- 200ml double cream
- 200g plain flour
- 25g unsweetened cocoa powder
- 1 tsp bicarbonate of soda
- ½ tsp salt
- 150ml buttermilk, at room temperature
- 1 tbsp red food colouring gel (not liquid, for best colour)
- 1 tsp white vinegar
- 400g full-fat cream cheese, softened (for frosting)
- 100g unsalted butter, softened (for frosting)
- 400g icing sugar, sifted
- 1 tsp vanilla extract (for frosting)
Tip: Getting your cream cheese, eggs, and buttermilk to room temperature is not a suggestion — it is the single most important step for a silky, crack-free cheesecake and a tender cake crumb. Set them out on the counter at least an hour before you begin.
How to Make Classic Red Velvet Cheesecake
- Make the biscuit base: Blitz the digestive biscuits in a food processor until they resemble fine, dark sand. Pour in the melted butter and pulse until the mixture clumps when pressed between your fingers — it should smell deeply of toasted grain. Press this firmly into the base of a 23cm springform tin lined with parchment, using the flat bottom of a glass to compact it evenly. Bake at 160°C (fan) for 10 minutes, until it smells nutty and looks slightly darker at the edges. Set aside to cool completely.
- Prepare the cheesecake filling: In a large bowl, beat the 900g cream cheese with the caster sugar on low speed until just smooth — stop the moment you see no lumps, because over-beating incorporates air that will crack the surface later. Add the eggs one at a time, mixing gently after each until the yolk disappears into the pale mass. Stir in the vanilla and double cream; the mixture should look glossy and thick, like a thick custard that hasn’t yet set. Pour this over the cooled biscuit base.
- Bake the cheesecake layer: Place the springform tin in a deep roasting tray and pour boiling water into the tray until it reaches halfway up the sides of the tin — this gentle steam bath ensures a creamy, even texture. Bake at 150°C (fan) for 50–55 minutes. The edges should look set and slightly puffed, but the centre will wobble like a jelly when you gently shake the tin. Turn the oven off, prop the door open with a wooden spoon, and let the cheesecake rest inside for 1 hour. Transfer to the fridge for at least 4 hours, or overnight — the surface will feel firm and cool to the touch.
- Make the red velvet cake layer: In a medium bowl, whisk together the flour, cocoa powder, bicarbonate of soda, and salt. The cocoa should smell dark and slightly bitter. In a separate jug, mix the buttermilk, red food colouring, and white vinegar — it will bubble faintly and turn a vivid crimson. In a large bowl, cream the remaining 100g butter with 200g caster sugar until pale and fluffy, about 3 minutes. Beat in the egg and vanilla. Now alternate adding the flour mixture and the buttermilk mixture, starting and ending with the flour. Stir only until combined — the batter should be thick, glossy, and a deep ruby red.
- Bake the cake layer: Pour the red velvet batter into a greased and lined 23cm round cake tin. Bake at 170°C (fan) for 25–30 minutes. The cake will have domed slightly and springs back when pressed gently; a skewer inserted into the centre should come out clean or with a few moist crumbs. The smell of warm cocoa and vanilla will fill your kitchen. Let the cake cool in the tin for 10 minutes, then turn it out onto a wire rack to cool completely — it should feel light and spongey.
- Assemble the cheesecake: Once both layers are completely cool, carefully remove the chilled cheesecake from the springform tin. Place the red velvet cake layer on top of the cheesecake — it should sit flush. If the cake has domed, level it with a serrated knife first. Wrap the entire layered cake in cling film and refrigerate for another hour to set the union.
- Make the frosting and finish: Beat the softened cream cheese and butter together until smooth and creamy — no lumps should remain. Gradually add the sifted icing sugar, beating on low to avoid a cloud of white dust, then add the vanilla. Increase speed to medium and whip for 2 minutes until the frosting is fluffy, pale, and spreadable. Frost the top and sides of the assembled cake in thick, sweeping swirls. The contrast of the white frosting against the deep red cake should be striking. Chill for 30 minutes before slicing with a hot, dry knife for clean edges.
Tips From My Kitchen
- Room temperature is non-negotiable: Cold cream cheese creates lumps that no amount of beating will fully smooth out, and cold eggs can cause the batter to split. I take everything out of the fridge at least 90 minutes before I start — the cream cheese should feel soft and give slightly when pressed with a finger.
- Use a water bath for the cheesecake: The steam from the hot water bath keeps the oven moist and the cheesecake from drying out or cracking. Wrap the base of your springform tin in two layers of foil first to prevent any water seeping in — I learned this the hard way after a soggy biscuit base.
- Don’t overmix the red velvet batter: Overworking the flour develops gluten, which makes the cake tough rather than tender. Mix just until the streaks of flour disappear — the batter should be thick but not stiff. A few tiny lumps are perfectly fine.
- Patience with cooling is key: A sudden drop in temperature shocks the cheesecake and causes cracks. I always leave it in the turned-off oven with the door ajar for a full hour, then let it come to room temperature on the counter before refrigerating. This slow transition ensures a flawless surface.
- Chill before slicing: A thoroughly chilled cheesecake cuts cleanly without smearing. I run my knife under hot water, dry it, and slice — wiping the blade between each cut. The result is those beautiful, Instagram-worthy layers that make all the waiting worthwhile.
Equipment You’ll Need
- Stand mixer or hand mixer
- 23cm springform cake tin
- 23cm round cake tin
- Deep roasting tray (for the water bath)
- Parchment paper
- Wire cooling rack
- Food processor (or a rolling pin and a sturdy bag for crushing biscuits)
- Serrated knife for levelling the cake
Common Mistakes to Avoid
- Overbeating the cheesecake batter: Whipping too much air into the cream cheese mixture creates bubbles that rise and then burst, leaving unsightly cracks on the surface. Mix on low speed and stop as soon as the ingredients are just combined — the texture should be dense and smooth, not fluffy.
- Skipping the foil wrap on the springform tin: Water from the bath can seep through the seam of the tin and turn your biscuit base into a soggy mess. I wrap the base tightly in two layers of heavy-duty foil, bringing it up the sides, and I always check for any tears before placing it in the water.
- Rushing the cooling process: If you move the cheesecake from a hot oven directly into the fridge, the drastic temperature change will almost certainly cause a large crack to form down the centre. The gradual cooling — oven off, door open, counter, then fridge — is what gives you that perfectly smooth, unblemished top.
Delicious Variations to Try
- Spiced Red Velvet Cheesecake: Add 1 teaspoon of ground cinnamon and ¼ teaspoon of ground nutmeg to the flour mixture for the cake layer. The warmth of the spices complements the cocoa beautifully — perfect for autumn weekends.
- White Chocolate Drizzle: After frosting the cake, melt 100g of good-quality white chocolate with 2 tablespoons of double cream and drizzle it over the top in a zigzag pattern. The extra sweetness and creamy texture add a lovely contrast to the tangy cream cheese.
- Individual Mini Cheesecakes: Divide the biscuit base and cheesecake mixture into a 12-hole muffin tin lined with paper cases. Bake the cheesecakes for 20 minutes, then top with a small disc of red velvet cake and a dollop of frosting. These are perfect for portion control and take less time to chill.
What to Serve With Classic Red Velvet Cheesecake
- A dollop of lightly whipped double cream, barely sweetened, to echo the creaminess of the cheesecake layer.
- Fresh raspberries or strawberries — their tartness cuts through the richness and the red colour ties everything together.
- A strong cup of black coffee or a milky latte; the bitterness balances the sweetness without overwhelming the palate.
- For a truly cosy weekend spread, serve alongside a batch of Soft Pumpkin Breakfast Cookies For Fall Mornings for a contrasting texture.
Still hungry for ideas? You might also love Red Velvet Oreo Cheesecake, Cheesecake Factory Red Velvet Cheesecake Copycat from our sister kitchens.
Frequently Asked Questions
Classic Red Velvet Cheesecake
Ingredients
Method
-
Make the biscuit base: Blitz the digestive biscuits in a food processor until they resemble fine, dark sand. Pour in the melted butter and pulse until the mixture clumps when pressed between your fingers — it should smell deeply of toasted grain. Press this firmly into the base of a 23cm springform tin lined with parchment, using the flat bottom of a glass to compact it evenly. Bake at 160°C (fan) for 10 minutes, until it smells nutty and looks slightly darker at the edges. Set aside to cool completely.
-
Prepare the cheesecake filling: In a large bowl, beat the 900g cream cheese with the caster sugar on low speed until just smooth — stop the moment you see no lumps, because over-beating incorporates air that will crack the surface later. Add the eggs one at a time, mixing gently after each until the yolk disappears into the pale mass. Stir in the vanilla and double cream; the mixture should look glossy and thick, like a thick custard that hasn’t yet set. Pour this over the cooled biscuit base.
-
Bake the cheesecake layer: Place the springform tin in a deep roasting tray and pour boiling water into the tray until it reaches halfway up the sides of the tin — this gentle steam bath ensures a creamy, even texture. Bake at 150°C (fan) for 50–55 minutes. The edges should look set and slightly puffed, but the centre will wobble like a jelly when you gently shake the tin. Turn the oven off, prop the door open with a wooden spoon, and let the cheesecake rest inside for 1 hour. Transfer to the fridge for at least 4 hours, or overnight — the surface will feel firm and cool to the touch.
-
Make the red velvet cake layer: In a medium bowl, whisk together the flour, cocoa powder, bicarbonate of soda, and salt. The cocoa should smell dark and slightly bitter. In a separate jug, mix the buttermilk, red food colouring, and white vinegar — it will bubble faintly and turn a vivid crimson. In a large bowl, cream the remaining 100g butter with 200g caster sugar until pale and fluffy, about 3 minutes. Beat in the egg and vanilla. Now alternate adding the flour mixture and the buttermilk mixture, starting and ending with the flour. Stir only until combined — the batter should be thick, glossy, and a deep ruby red.
-
Bake the cake layer: Pour the red velvet batter into a greased and lined 23cm round cake tin. Bake at 170°C (fan) for 25–30 minutes. The cake will have domed slightly and springs back when pressed gently; a skewer inserted into the centre should come out clean or with a few moist crumbs. The smell of warm cocoa and vanilla will fill your kitchen. Let the cake cool in the tin for 10 minutes, then turn it out onto a wire rack to cool completely — it should feel light and spongey.
-
Assemble the cheesecake: Once both layers are completely cool, carefully remove the chilled cheesecake from the springform tin. Place the red velvet cake layer on top of the cheesecake — it should sit flush. If the cake has domed, level it with a serrated knife first. Wrap the entire layered cake in cling film and refrigerate for another hour to set the union.
-
Make the frosting and finish: Beat the softened cream cheese and butter together until smooth and creamy — no lumps should remain. Gradually add the sifted icing sugar, beating on low to avoid a cloud of white dust, then add the vanilla. Increase speed to medium and whip for 2 minutes until the frosting is fluffy, pale, and spreadable. Frost the top and sides of the assembled cake in thick, sweeping swirls. The contrast of the white frosting against the deep red cake should be striking. Chill for 30 minutes before slicing with a hot, dry knife for clean edges.
Notes
I’d love to hear how your weekend baking project turns out — drop a comment below and tell me about the moment you sliced into that first perfect piece. And if you’re looking for another comforting treat to fill your kitchen with warmth, my Fudgy Small Batch Brownies With Crunchy Nuts are waiting for you.