
Quick Weeknight No-Bake Chocolate Peanut Butter Pie
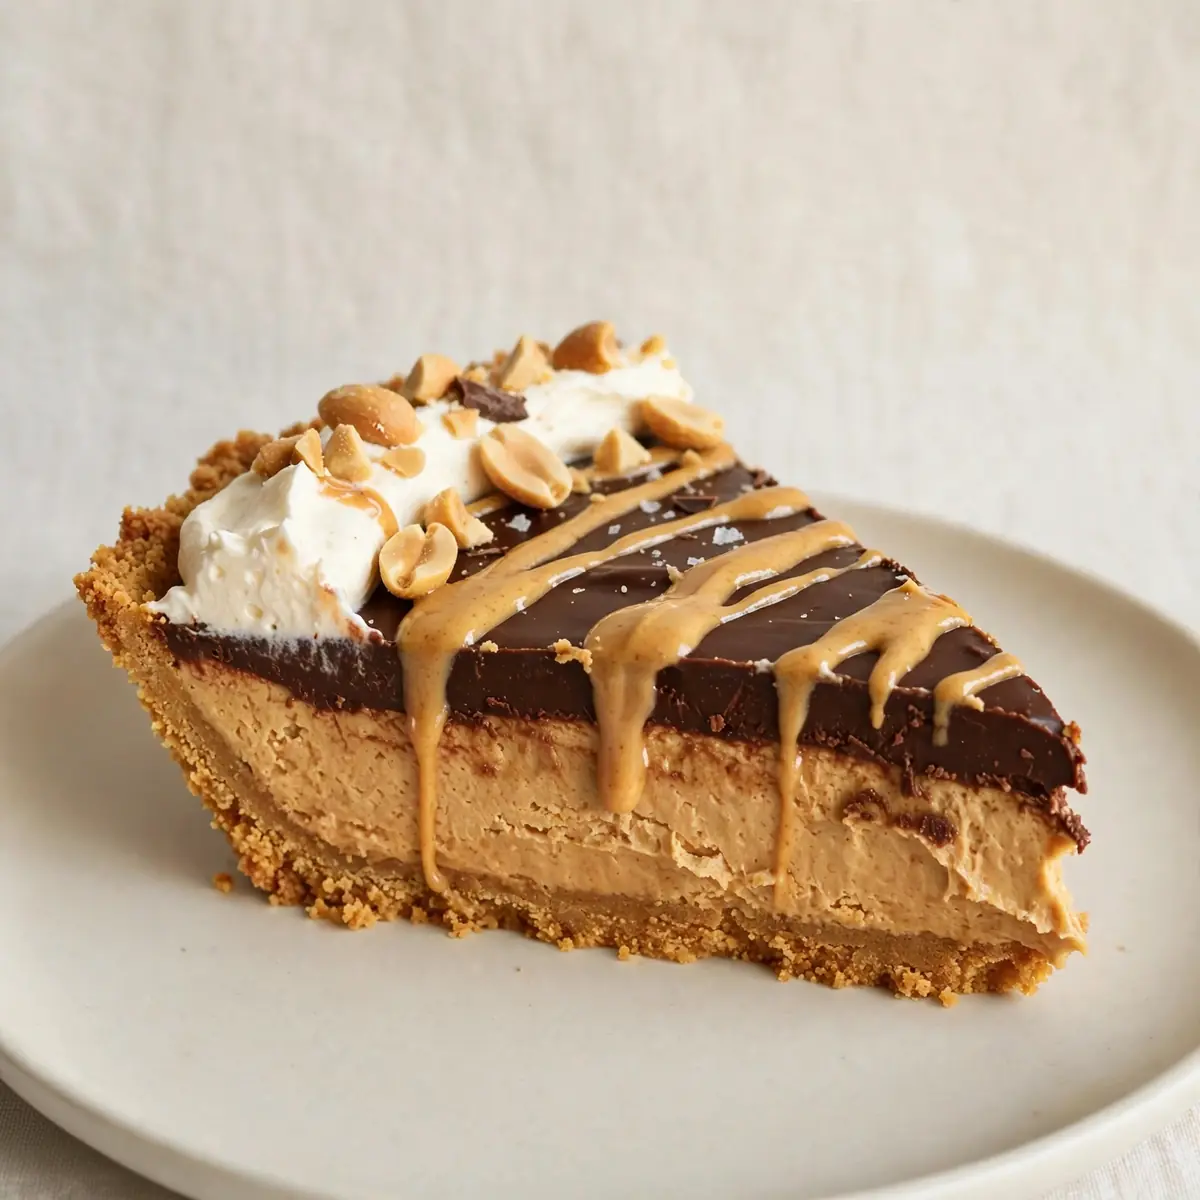
After a long day of school runs, homework battles, and after-school clubs, the last thing I want to do is spend an hour wrestling with a hot oven and a sink full of dirty bowls. That is precisely why this No-Bake Chocolate Peanut Butter Pie was born in my kitchen on a frantic Tuesday evening, and it has been my secret weapon for a stress-free dessert ever since.
Recipe Overview
- Prep time: 20 minutes
- Cook time: 0 minutes
- Chill time: 4 hours (or overnight)
- Total time: 4 hours 20 minutes
- Servings: 8 generous slices
- Difficulty: Easy
Why You’ll Love This No-Bake Chocolate Peanut Butter Pie
- Zero oven time: No preheating, no waiting, and no risk of a burnt crust. Perfect for warm evenings when you cannot face turning on the oven.
- Minimal washing up: You only need one bowl, a whisk, and a pie dish. I can have the kitchen spotless before the pie even sets in the fridge.
- Make-ahead magic: This pie actually tastes better after a full night in the fridge. You can prepare it the night before a busy day and simply slice and serve.
- Kid-friendly assembly: My seven-year-old can help press the crust into the dish and stir the filling. It is a lovely way to get little hands involved without any sharp knives or hot surfaces.
- Budget-friendly ingredients: Everything comes from the standard grocery run. No fancy extracts or imported chocolate — just good old-fashioned pantry staples.
Ingredients You’ll Need
- 250g digestive biscuits (or Hobnobs for extra crunch)
- 100g unsalted butter, melted
- 2 tablespoons golden caster sugar
- 300g full-fat cream cheese, at room temperature
- 150g smooth peanut butter (no added sugar or salt, if possible)
- 100g icing sugar, sifted
- 200ml double cream
- 1 teaspoon vanilla extract
- 150g dark chocolate (70% cocoa solids)
- 100ml double cream (for the topping)
- 30g salted peanuts, roughly chopped, for garnish
- Flaky sea salt, for finishing
Tip: Take your cream cheese out of the fridge at least 30 minutes before you start. Cold cream cheese makes the filling lumpy, and nobody wants a bumpy pie. I learned this the hard way after testing this recipe five times, I finally got it just right.
How to Make No-Bake Chocolate Peanut Butter Pie
- Make the biscuit crust. Place the digestive biscuits in a sealed plastic bag and crush them with a rolling pin until you have fine crumbs with a few slightly larger pieces — you want a texture that feels like damp sand. Pour the crumbs into a medium bowl, add the melted butter and golden caster sugar, and stir until every crumb is coated. The mixture should clump together when you squeeze a handful.
- Press the crust into the dish. Tip the buttery crumbs into a 23cm loose-bottomed tart tin or pie dish. Press the mixture firmly into the base and up the sides using the flat bottom of a drinking glass. You should hear a gentle crunch as the crumbs compact. Pop the dish into the fridge to firm up for 15 minutes while you make the filling.
- Beat the cream cheese and peanut butter. In a large mixing bowl, beat the room-temperature cream cheese with an electric hand mixer until it is smooth and glossy — about 1 minute. Add the peanut butter and beat again until fully combined. Stop to scrape down the sides of the bowl; you should see a pale, fluffy mixture with no streaks of cream cheese remaining.
- Add the sugar and vanilla. Sift the icing sugar into the bowl and add the vanilla extract. Beat on low speed at first to prevent a sugar cloud, then increase to medium speed for 30 seconds. The mixture will thicken slightly and smell wonderfully sweet and nutty.
- Fold in the whipped cream. In a separate clean bowl, whip the 200ml double cream until soft peaks form — when you lift the whisk, the cream should hold a gentle curl that flops over. Gently fold this whipped cream into the peanut butter mixture using a spatula. Do not stir vigorously; you want to keep the air in the cream. The final filling should be light, mousse-like, and a pale caramel colour.
- Assemble the pie. Spoon the filling into the chilled biscuit crust and spread it evenly with the back of a spoon. Tap the dish gently on the counter to settle the filling and remove any air pockets. Cover the pie loosely with cling film and refrigerate for at least 4 hours, but overnight is best. The surface should feel firm and slightly springy to the touch when set.
- Make the chocolate topping. About 30 minutes before serving, make the topping. Place the dark chocolate in a heatproof bowl. Heat the 100ml double cream in a small saucepan until it just begins to simmer — you will see tiny bubbles around the edge of the pan, but do not let it boil. Pour the hot cream over the chocolate and let it sit for 2 minutes. Stir gently in one direction until you have a smooth, glossy ganache that coats the back of a spoon.
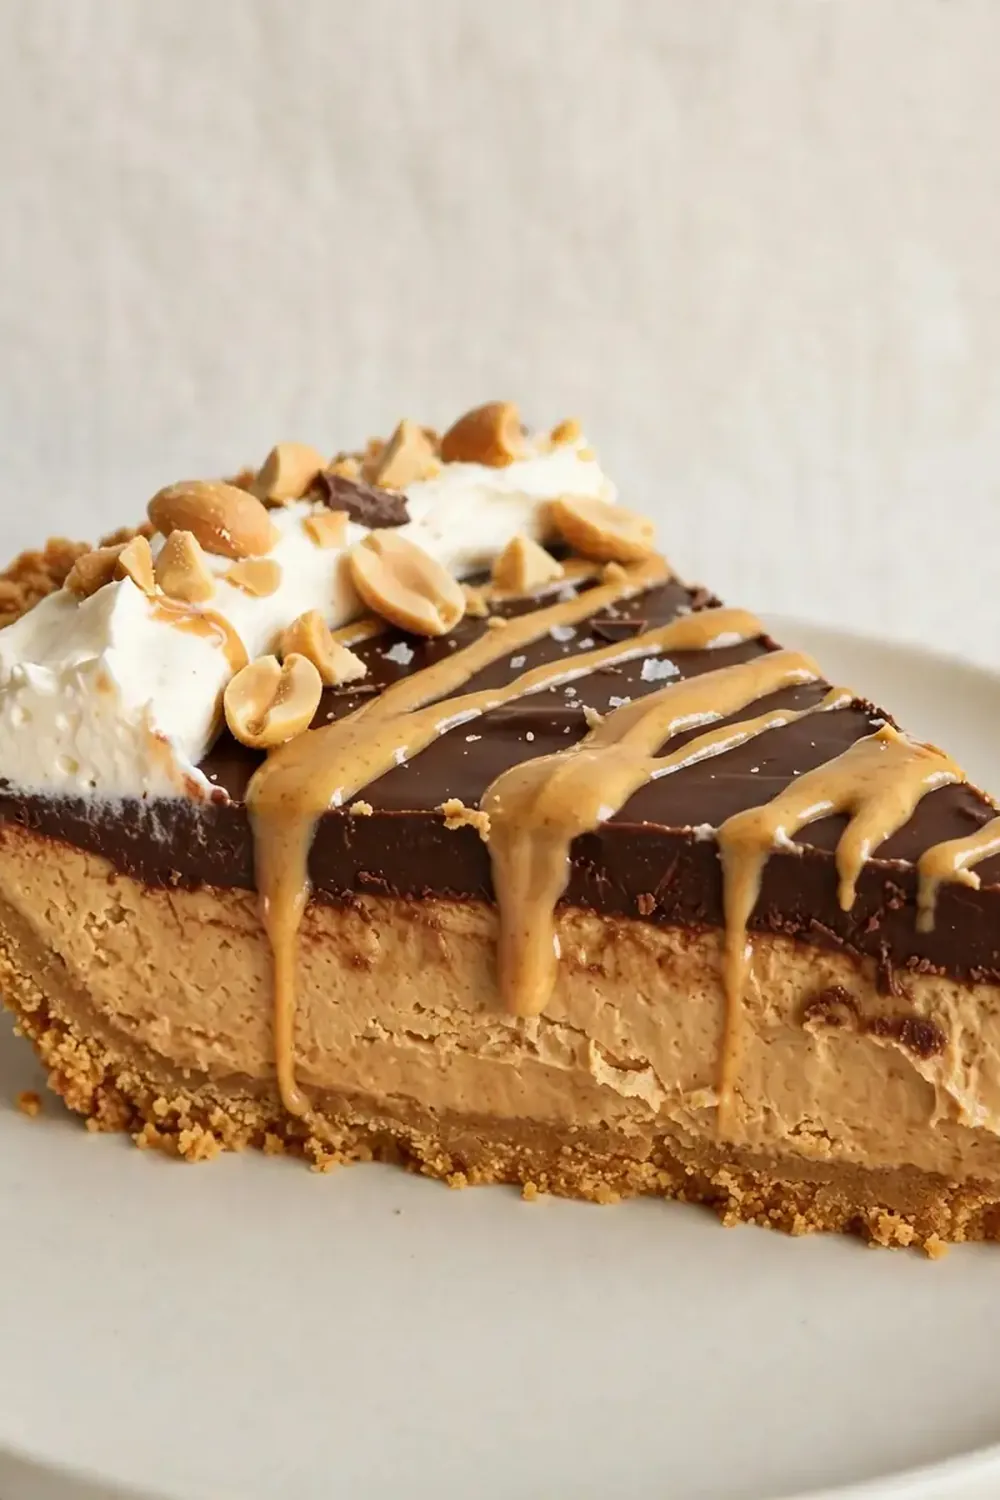
- Finish and serve. Pour the ganache over the set pie and tilt the dish gently so it covers the entire surface in an even layer. Sprinkle the chopped peanuts and a pinch of flaky sea salt over the top. Return the pie to the fridge for 15 minutes to set the ganache. Slice with a warm knife for clean, sharp edges — the crust will shatter slightly as you cut, and the filling will be velvety smooth.
Tips From My Kitchen
- Warm your knife for clean slices: Run your knife under hot water, dry it with a tea towel, then slice. Repeat between each cut. This prevents the filling from dragging and gives you those lovely, clean slices you see in magazines. The warm blade glides through the cold ganache without cracking it.
- Use full-fat cream cheese, not the spreadable kind: Low-fat cream cheese contains more water and stabilisers, which can make your filling runny and prevent it from setting properly. Full-fat blocks give you that dense, creamy texture that holds its shape beautifully when sliced.
- Chill the bowl and whisk for the cream: Pop your metal bowl and whisk beaters in the fridge for 10 minutes before whipping the double cream. Cold equipment helps the cream whip faster and hold its shape better. You are looking for firm peaks that stand upright when you lift the whisk.
- Don’t skip the salt on top: Flaky sea salt is not just for decoration. It cuts through the richness of the chocolate and peanut butter, making each bite taste more balanced. Just a tiny pinch per slice makes a world of difference.
- Make it the night before your busiest day: This is my go-to recipe when I need something quick but impressive. Make the pie after dinner, let it set overnight, and you have a ready-to-serve dessert for the next evening. It actually develops a deeper, more cohesive flavour after 12 hours in the fridge. If you love make-ahead desserts, you might also enjoy these No Bake Keto Cheesecake Bites for another fuss-free option.
Equipment You’ll Need
- Electric hand mixer or stand mixer
- 23cm loose-bottomed tart tin or pie dish
- Rolling pin (or a sturdy wine bottle works in a pinch)
- Large mixing bowl
- Medium heatproof bowl for the ganache
- Spatula for folding
- Small saucepan
Delicious Variations to Try
- Spicy Version: Add ½ teaspoon of cayenne pepper and 1 teaspoon of ground cinnamon to the biscuit crust. The warmth of the spices plays beautifully against the cool, creamy filling. Top with a drizzle of honey and a pinch more cayenne for a sweet-heat finish.
- Vegan Option: Use a vegan cream cheese block, a plant-based double cream alternative, and coconut oil instead of butter in the crust. Use a good-quality dark chocolate that is labelled vegan for the ganache. The texture will be slightly firmer but just as delicious.
- Different Protein: Swap the peanut butter for almond butter or cashew butter. If you use almond butter, add an extra tablespoon of icing sugar to balance the slightly bitter notes. You could also try a sunflower seed butter for a nut-free version that still delivers that rich, savoury-sweet flavour. For another no-bake treat with a similar vibe, check out these No Bake Chocolate Peanut Butter Ritz Cookies.
What to Serve With No-Bake Chocolate Peanut Butter Pie
- A generous dollop of softly whipped double cream — unsweetened, to balance the sweetness of the pie
- A scoop of vanilla bean ice cream for an extra cold, creamy contrast
- A handful of fresh raspberries or sliced strawberries on the side for a tart, fruity pop
- A strong espresso or a glass of cold oat milk to cut through the richness
Still hungry for ideas? You might also love No Bake Peanut Butter Protein Balls, No Bake Chocolate Trifle With Whipped Cream from our sister kitchens.
Frequently Asked Questions
No-Bake Chocolate Peanut Butter Pie
Ingredients
Method
- Make the biscuit crust. Place the digestive biscuits in a sealed plastic bag and crush them with a rolling pin until you have fine crumbs with a few slightly larger pieces — you want a texture that feels like damp sand. Pour the crumbs into a medium bowl, add the melted butter and golden caster sugar, and stir until every crumb is coated. The mixture should clump together when you squeeze a handful.
- Press the crust into the dish. Tip the buttery crumbs into a 23cm loose-bottomed tart tin or pie dish. Press the mixture firmly into the base and up the sides using the flat bottom of a drinking glass. You should hear a gentle crunch as the crumbs compact. Pop the dish into the fridge to firm up for 15 minutes while you make the filling.
- Beat the cream cheese and peanut butter. In a large mixing bowl, beat the room-temperature cream cheese with an electric hand mixer until it is smooth and glossy — about 1 minute. Add the peanut butter and beat again until fully combined. Stop to scrape down the sides of the bowl; you should see a pale, fluffy mixture with no streaks of cream cheese remaining.
- Add the sugar and vanilla. Sift the icing sugar into the bowl and add the vanilla extract. Beat on low speed at first to prevent a sugar cloud, then increase to medium speed for 30 seconds. The mixture will thicken slightly and smell wonderfully sweet and nutty.
- Fold in the whipped cream. In a separate clean bowl, whip the 200ml double cream until soft peaks form — when you lift the whisk, the cream should hold a gentle curl that flops over. Gently fold this whipped cream into the peanut butter mixture using a spatula. Do not stir vigorously; you want to keep the air in the cream. The final filling should be light, mousse-like, and a pale caramel colour.
- Assemble the pie. Spoon the filling into the chilled biscuit crust and spread it evenly with the back of a spoon. Tap the dish gently on the counter to settle the filling and remove any air pockets. Cover the pie loosely with cling film and refrigerate for at least 4 hours, but overnight is best. The surface should feel firm and slightly springy to the touch when set.
- Make the chocolate topping. About 30 minutes before serving, make the topping. Place the dark chocolate in a heatproof bowl. Heat the 100ml double cream in a small saucepan until it just begins to simmer — you will see tiny bubbles around the edge of the pan, but do not let it boil. Pour the hot cream over the chocolate and let it sit for 2 minutes. Stir gently in one direction until you have a smooth, glossy ganache that coats the back of a spoon.
- Finish and serve. Pour the ganache over the set pie and tilt the dish gently so it covers the entire surface in an even layer. Sprinkle the chopped peanuts and a pinch of flaky sea salt over the top. Return the pie to the fridge for 15 minutes to set the ganache. Slice with a warm knife for clean, sharp edges — the crust will shatter slightly as you cut, and the filling will be velvety smooth.
Notes
There you have it — a proper weeknight dessert that does not demand your entire evening. This No-Bake Chocolate Peanut Butter Pie has saved me on countless chaotic Tuesdays, and I hope it brings the same calm to your kitchen. Have you tried it yet? I would love to hear how it turned out for your family — drop a comment below and let me know what you thought.






