
No Bake Cheesecake In A Jar With Raspberry Sauce
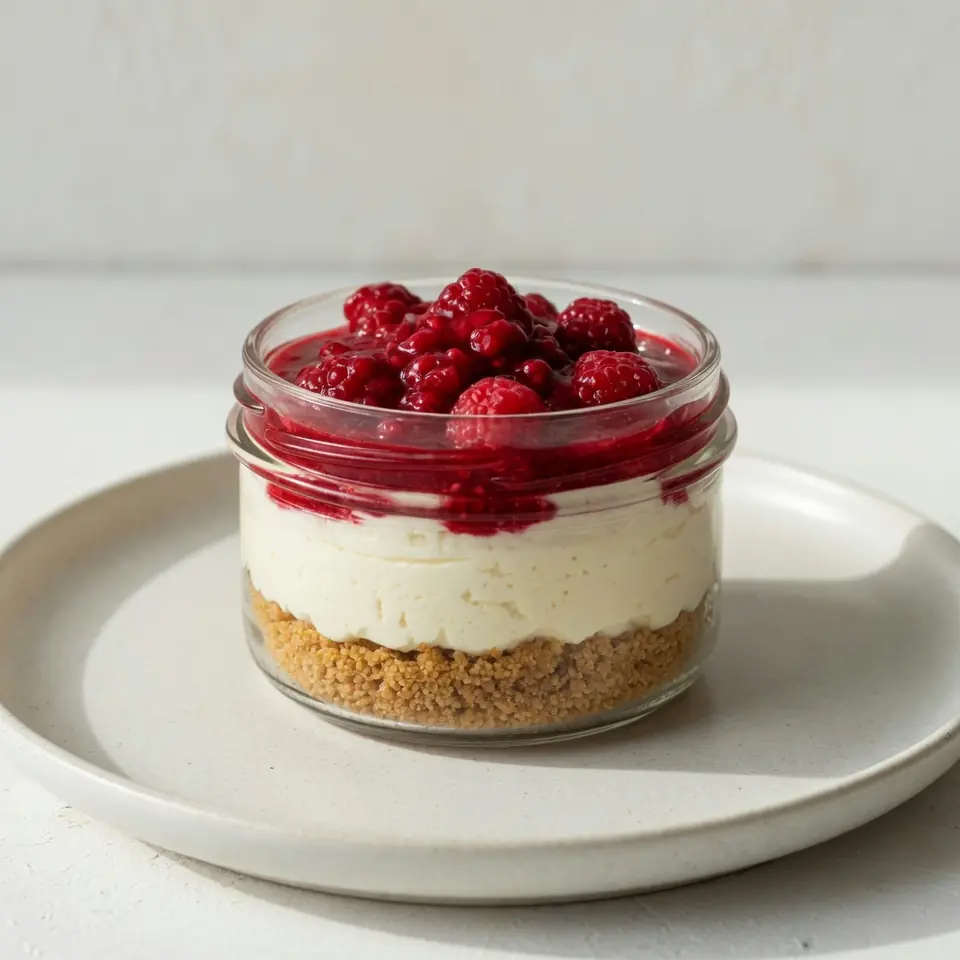
Weeknights can feel like a marathon, can’t they? Between school runs, homework, dinner prep, and a desperate search for five minutes of calm, dessert often feels like an impossible dream. But what if I told you that a truly delightful, show-stopping dessert could be whipped up with minimal fuss and even less washing up?
Recipe Overview
- Prep time: 25 minutes
- Chill time: 2-4 hours (or overnight)
- Total time: 2 hours 25 minutes (active + minimum chill)
- Servings: 6-8 individual jars
- Difficulty: Easy
Why You’ll Love This No Bake Cheesecake in a Jar with Raspberry Sauce
As a busy mum and home cook, I’ve had my fair share of chaotic evenings. There have been countless times I’ve wanted to offer my family something special after dinner, but the thought of another pan to scrub or a complicated recipe to follow just felt too much. That’s why this No Bake Cheesecake in a Jar with Raspberry Sauce has become a true lifesaver in my kitchen. It’s not just a dessert; it’s a little beacon of calm and joy on the busiest of days.
- Effortless Elegance for Weeknights: This recipe delivers a dessert that looks like you’ve spent hours fussing, but in reality, it comes together in under half an hour of active work. The individual jars mean no slicing, no plating, and a beautiful presentation that brightens any dinner table, even a Tuesday night one.
- Minimal Cleanup, Maximum Enjoyment: The beauty of a no-bake recipe is the drastic reduction in washing up. No oven trays, no elaborate mixing bowls to soak – just a few bowls and a whisk, and you’re done. This means more time with your family and less time scrubbing at the sink.
- Perfect for Make-Ahead Meals: This cheesecake is a dream for meal prepping. You can assemble the jars a day or two in advance, store them in the fridge, and pull them out when you’re ready to serve. In fact, I find the flavours deepen and the texture sets even better with a good overnight chill, making dinner parties and family gatherings incredibly stress-free. Friends always ask me for this recipe after trying it at dinner parties, purely for its simplicity and stunning outcome.
- Customisable and Family-Friendly: While raspberries are a firm favourite in our house, the beauty of this recipe is its adaptability. You can easily swap out the fruit for whatever is in season or what your family prefers, making it a dessert that never gets boring. It’s a fantastic way to get children involved in a simple kitchen task too, letting them layer their own jars.
- A Taste of Pure Indulgence, Without the Guilt: The rich, creamy texture of the cheesecake paired with the vibrant, slightly tart raspberry sauce creates a truly satisfying dessert. It feels utterly luxurious, yet because it’s portioned in jars, it helps with mindful enjoyment. It’s that little moment of indulgence that everyone deserves after a long day.
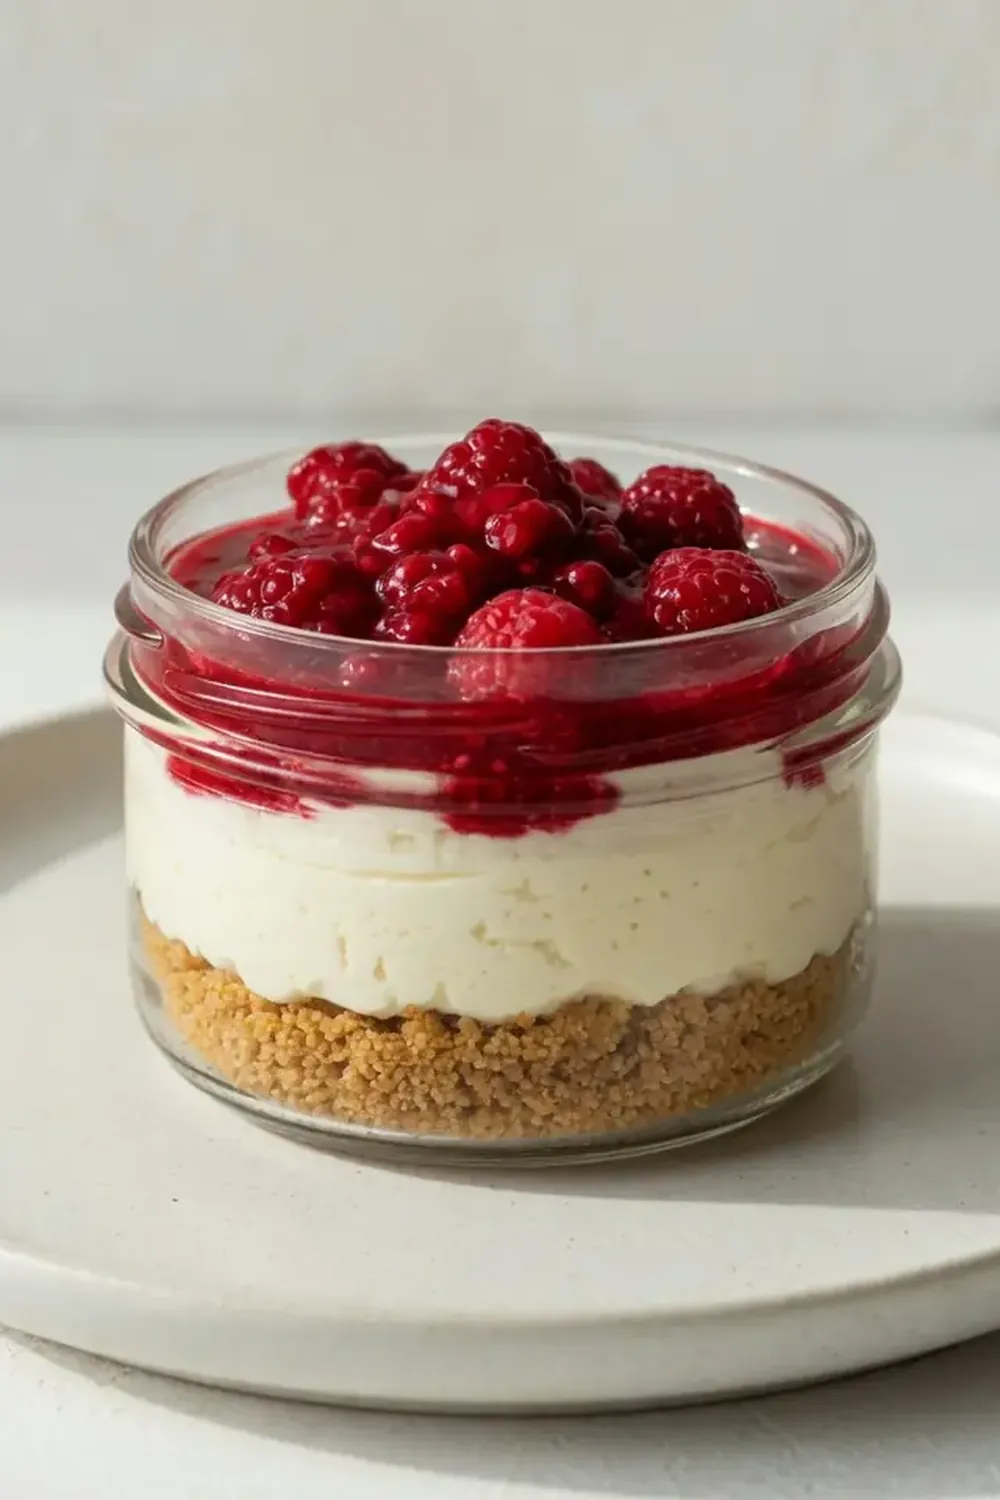
Ingredients You’ll Need
- 200g digestive biscuits
- 75g unsalted butter, melted
- 500g full-fat cream cheese, softened
- 100g icing sugar (sifted)
- 1 teaspoon vanilla extract
- 300ml double cream
- 300g fresh or frozen raspberries
- 50g caster sugar (for the sauce)
- 1 tablespoon lemon juice (for the sauce)
- Optional: Fresh mint leaves for garnish
Tip: Ensure your cream cheese is at room temperature. This is crucial for achieving a smooth, lump-free cheesecake filling. Cold cream cheese will result in a clumpy mixture that’s hard to incorporate evenly.
How to Make No Bake Cheesecake in a Jar with Raspberry Sauce
- Prepare the Biscuit Base: Place the digestive biscuits into a freezer bag and bash them with a rolling pin until they resemble fine crumbs, like coarse sand. Alternatively, blitz them in a food processor for a quicker, more uniform result. Melt the butter gently in a small saucepan over a low heat until it’s a clear, golden liquid, or in the microwave. Pour the melted butter over the biscuit crumbs in a bowl and stir well until every crumb is coated and glistening. The mixture should clump together when pressed.
- Layer the Base: Divide the biscuit mixture evenly among 6-8 small jars (about 200ml capacity each). Use the back of a spoon or a small pestle to press the crumbs down firmly into an even layer at the bottom of each jar. You’ll notice the crumbs compacting and becoming darker in colour as you press. Place the jars in the fridge to chill while you prepare the filling.
- Whip the Cream Cheese Mixture: In a large mixing bowl, beat the softened cream cheese with the sifted icing sugar and vanilla extract using a stand mixer or a hand mixer on medium speed. Continue mixing until the mixture is completely smooth and pale, with no visible lumps, and has a light, airy texture. Scrape down the sides of the bowl to ensure everything is incorporated.
- Whip the Double Cream: In a separate, clean bowl, pour in the double cream. Whisk the cream on medium-high speed until it forms soft peaks, meaning it holds its shape but the tips curl over gently. Be careful not to over-whisk, as it can quickly turn grainy. The cream will smell subtly sweet and milky.
- Combine and Fill: Gently fold the whipped cream into the cream cheese mixture using a spatula. Use a light hand to maintain the airiness of the cream. Continue folding until just combined and streak-free, creating a thick, creamy, pale ivory mixture. Spoon or pipe the cheesecake filling into the prepared jars, filling them almost to the top. The filling should look perfectly smooth and inviting.
- Prepare the Raspberry Sauce: In a small saucepan, combine the raspberries (fresh or frozen), caster sugar, and lemon juice. Heat over a medium heat, stirring occasionally, until the raspberries break down and the sugar dissolves. This usually takes about 5-7 minutes. The mixture will turn a vibrant, deep crimson colour and you’ll hear it gently bubbling. If you prefer a smooth sauce, press it through a fine-mesh sieve to remove the seeds. Allow the sauce to cool completely until it’s no longer steaming and has thickened slightly.
- Assemble and Chill: Once the raspberry sauce is cool, spoon a generous dollop over the cheesecake filling in each jar. You can swirl it gently with a skewer for a marbled effect if you like, or leave it as a distinct layer. Cover the jars and refrigerate for at least 2-4 hours, or ideally overnight, to allow the cheesecake to set properly. When fully chilled, the cheesecake will be firm to the touch and the sauce slightly gelled.
Tips From My Kitchen
- Room Temperature Cream Cheese is Key: I used to struggle with this dish until I discovered this technique. Always, always ensure your full-fat cream cheese is at room temperature before you start. If it’s cold, it will be lumpy and difficult to incorporate smoothly, leading to a grainy texture in your final cheesecake. Take it out of the fridge at least an hour before you plan to bake. This allows it to soften and blend effortlessly into a silky-smooth mixture.
- Don’t Over-Mix the Cream: When whipping your double cream, keep a close eye on it. As soon as it reaches soft peaks – where it holds its shape but the tips gently flop – stop. Over-whipping can quickly turn it grainy and stiff, making your cheesecake heavy rather than light and airy. The goal is to incorporate air, not to make butter!
- Firmly Press the Biscuit Base: A well-compacted biscuit base is essential for a stable foundation. Use the back of a spoon, or even a small, flat-bottomed glass, to really press those buttered crumbs down. This prevents the base from crumbling too easily when you dig in and ensures each spoonful has that satisfying crunch.
- Chill Time is Not Optional: While it’s tempting to dive in, the chilling time is absolutely crucial for a no-bake cheesecake. It allows the cream cheese and cream mixture to set properly and firm up, giving you that classic cheesecake texture. If you try to eat it too soon, it will be too soft and runny. An overnight chill truly yields the best results, letting all the flavours meld beautifully.
- Make Your Raspberry Sauce Ahead: The raspberry sauce can be made a day or two in advance and stored in an airtight container in the fridge. This saves you valuable time on the day of assembly and ensures the sauce is perfectly chilled when you add it to the cheesecake, preventing it from melting the cream cheese layer. Plus, the flavours often deepen with a little time.
- Personalise Your Jars: While this recipe is fantastic as is, don’t be afraid to personalise it. You could add a layer of fresh raspberries between the biscuit and cheesecake, or a sprinkle of white chocolate shavings on top. For another sweet treat, why not try making these alongside my Beautiful Strawberry Pastries For A Sweet Occasion?
Equipment You’ll Need
- Stand mixer or hand mixer
- Small saucepan (for melting butter and making sauce)
- Mixing bowls (2-3)
- Rubber spatula
- Measuring cups and spoons
- 6-8 small dessert jars (approx. 200ml capacity)
- Rolling pin or food processor (for biscuits)
- Fine-mesh sieve (optional, for smooth sauce)
Common Mistakes to Avoid
- Using Low-Fat Cream Cheese: This is a common pitfall. Low-fat cream cheese has a higher water content and won’t set as firmly, leading to a runny cheesecake. Always opt for full-fat cream cheese for the best texture and rich flavour.
- Not Chilling Long Enough: As mentioned in the tips, patience is a virtue here! Rushing the chilling process will result in a soft, unset cheesecake that lacks the desired firm, creamy texture. Give it the full 2-4 hours minimum, or ideally overnight, for optimal results.
- Over-processing the Biscuit Base: While you want fine crumbs, be careful not to turn your digestive biscuits into a powder. A slightly coarser crumb provides a better texture and a bit of bite. Stop blitzing when it resembles coarse sand, not flour.
Delicious Variations to Try
- Citrus Burst Version: For a zesty twist, add the finely grated zest of one lemon or lime to the cream cheese mixture. You could also swap the raspberry sauce for a vibrant lemon curd or a passion fruit coulis.
- Chocolate Indulgence Option: Replace some of the digestive biscuits with chocolate digestives for the base. Melt 50g of good quality dark chocolate and fold it into the cream cheese mixture for a rich chocolate cheesecake. You could top this with a drizzle of chocolate ganache or even some chocolate shavings. For another chocolatey treat, check out these Festive Christmas Chocolate Cupcakes Recipe.
- Seasonal Fruit Swap: While raspberries are fantastic, this recipe is incredibly versatile. Try a blueberry compote, a mixed berry sauce, or even a stewed apple and cinnamon topping for an autumnal feel. In summer, a fresh strawberry puree would be delightful.
What to Serve With No Bake Cheesecake in a Jar with Raspberry Sauce
- A strong cup of freshly brewed coffee or a delicate herbal tea.
- A few extra fresh raspberries or a sprig of mint for garnish.
- A small sprinkle of white chocolate curls for added elegance.
Frequently Asked Questions
No Bake Cheesecake in a Jar with Raspberry Sauce
Ingredients
Method
- Prepare the Biscuit Base: Place the digestive biscuits into a freezer bag and bash them with a rolling pin until they resemble fine crumbs, like coarse sand. Alternatively, blitz them in a food processor for a quicker, more uniform result. Melt the butter gently in a small saucepan over a low heat until it's a clear, golden liquid, or in the microwave. Pour the melted butter over the biscuit crumbs in a bowl and stir well until every crumb is coated and glistening. The mixture should clump together when pressed.
- Layer the Base: Divide the biscuit mixture evenly among 6-8 small jars (about 200ml capacity each). Use the back of a spoon or a small pestle to press the crumbs down firmly into an even layer at the bottom of each jar. You'll notice the crumbs compacting and becoming darker in colour as you press. Place the jars in the fridge to chill while you prepare the filling.
- Whip the Cream Cheese Mixture: In a large mixing bowl, beat the softened cream cheese with the sifted icing sugar and vanilla extract using a stand mixer or a hand mixer on medium speed. Continue mixing until the mixture is completely smooth and pale, with no visible lumps, and has a light, airy texture. Scrape down the sides of the bowl to ensure everything is incorporated.
- Whip the Double Cream: In a separate, clean bowl, pour in the double cream. Whisk the cream on medium-high speed until it forms soft peaks, meaning it holds its shape but the tips curl over gently. Be careful not to over-whisk, as it can quickly turn grainy. The cream will smell subtly sweet and milky.
- Combine and Fill: Gently fold the whipped cream into the cream cheese mixture using a spatula. Use a light hand to maintain the airiness of the cream. Continue folding until just combined and streak-free, creating a thick, creamy, pale ivory mixture. Spoon or pipe the cheesecake filling into the prepared jars, filling them almost to the top. The filling should look perfectly smooth and inviting.
- Prepare the Raspberry Sauce: In a small saucepan, combine the raspberries (fresh or frozen), caster sugar, and lemon juice. Heat over a medium heat, stirring occasionally, until the raspberries break down and the sugar dissolves. This usually takes about 5-7 minutes. The mixture will turn a vibrant, deep crimson colour and you'll hear it gently bubbling. If you prefer a smooth sauce, press it through a fine-mesh sieve to remove the seeds. Allow the sauce to cool completely until it's no longer steaming and has thickened slightly.
- Assemble and Chill: Once the raspberry sauce is cool, spoon a generous dollop over the cheesecake filling in each jar. You can swirl it gently with a skewer for a marbled effect if you like, or leave it as a distinct layer. Cover the jars and refrigerate for at least 2-4 hours, or ideally overnight, to allow the cheesecake to set properly. When fully chilled, the cheesecake will be firm to the touch and the sauce slightly gelled.
Notes
And there you have it – a truly delightful dessert that brings a little spark of joy to even the most hectic of evenings. This No Bake Cheesecake in a Jar with Raspberry Sauce isn’t just about the taste; it’s about reclaiming a moment of peace and pleasure in your busy life, proving that deliciousness doesn’t have to come with a side of stress. I hope you and your family enjoy this recipe as much as mine does. Do let me know in the comments below if you try it, or if you have any favourite variations!






