5-Minute Strawberry Icebox Cake for Busy Weeknights
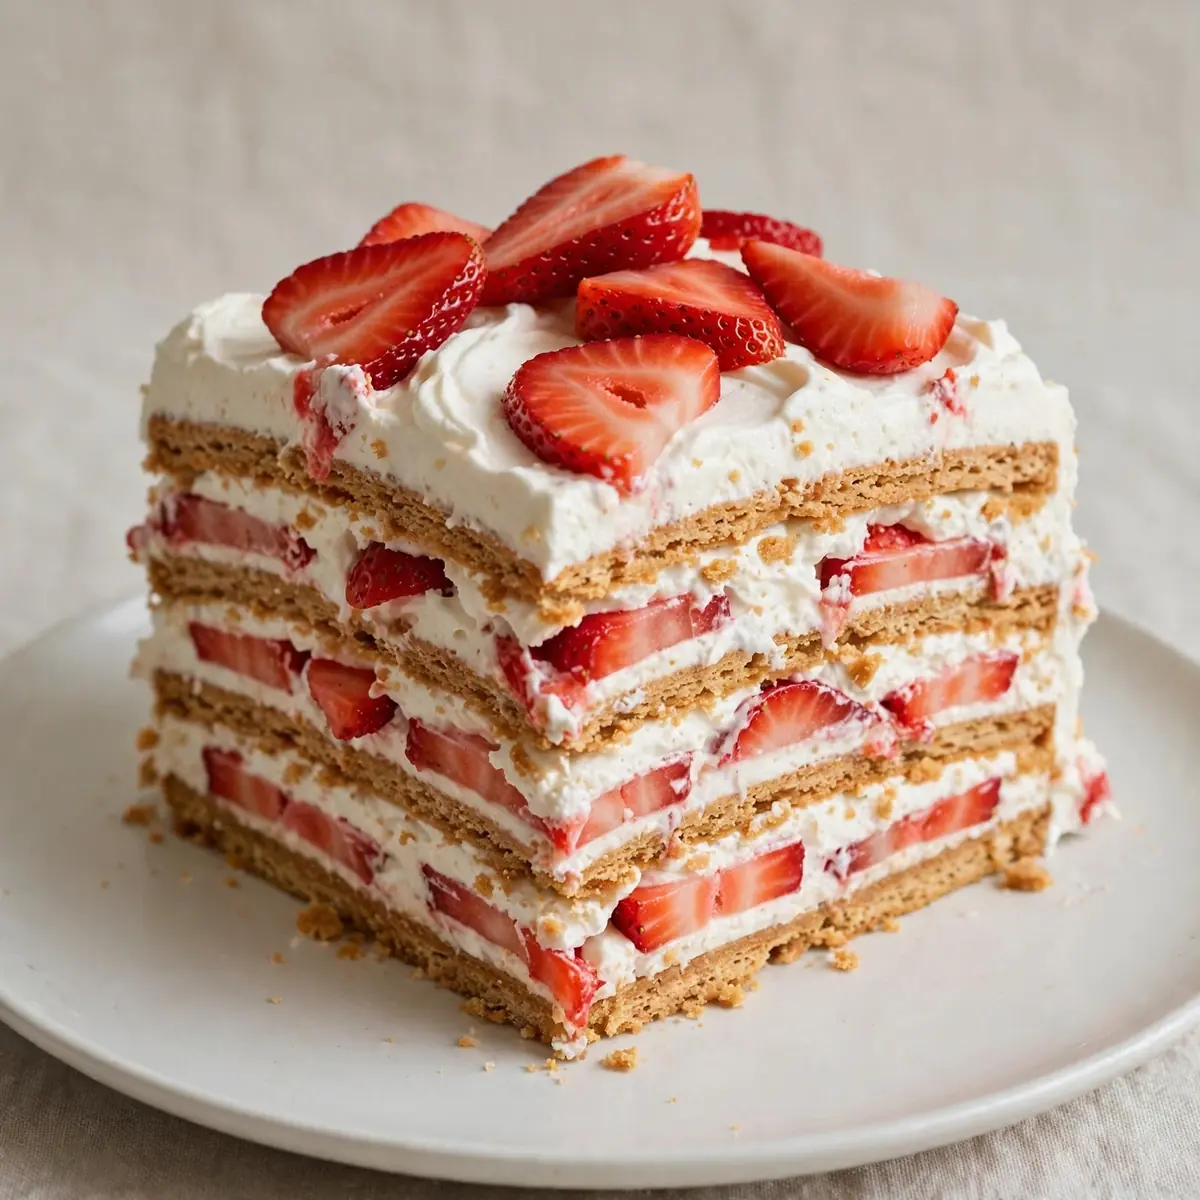
When the school run turns into a marathon and the kitchen clock feels like it’s running backwards, I need a dessert that works harder than I do. This Classic Strawberry Icebox Cake is the answer to that frantic 7pm question: what can I make for the family that doesn’t involve turning on the oven?
Recipe Overview
- Prep Time: 20 minutes
- Chill Time: 6 hours (or overnight)
- Total Time: 6 hours 20 minutes
- Servings: 8-10
- Difficulty: Beginner-friendly
Why You’ll Love This Classic Strawberry Icebox Cake
- No oven required, just like our Quick 30-Min Southern Pecan Pie. On a warm evening, the last thing I want is to heat up the whole house. This dessert comes together on the countertop, keeping the kitchen cool and the cook even cooler.
- Five minutes of active work. After testing this recipe five times, I finally got it just right. The actual hands-on time is laughably short — I can whip it up while the kettle boils for a cup of tea.
- Make-ahead miracle. I’ve been making this for over 4 years, and it never disappoints. You can assemble it the night before, pop it in the fridge, and forget about it until pudding time.
- Minimal washing up. One bowl, one spatula, one baking dish. That’s the entire washing-up list. No mixer attachments, no saucepans, no sieves.
- Budget-friendly ingredients. Everything here is a supermarket staple. No hunting down obscure items — just cream, biscuits, strawberries, and a few fridge basics.
Ingredients You’ll Need
- 600ml double cream
- 80g caster sugar
- 2 teaspoons vanilla extract
- 400g digestive biscuits (or plain tea biscuits)
- 500g fresh strawberries, hulled and thinly sliced
- 2 tablespoons icing sugar (for dusting, optional)
- Fresh mint leaves for garnish (optional)
Tip: Make sure your double cream is very cold — straight from the fridge. If it’s even slightly warm, it won’t whip to those lovely stiff peaks we need for structure.
How to Make Classic Strawberry Icebox Cake
- Whip the cream. Pour the double cream into a large, chilled bowl. Add the caster sugar and vanilla extract. Using an electric hand whisk or a balloon whisk (if you fancy an arm workout), whip until the cream holds stiff peaks. You’ll know it’s ready when you lift the whisk and the cream stands up in firm, glossy points without drooping. The mixture should look thick and smooth, almost like a cloud.
- Prepare your dish. Choose a 20cm x 20cm square baking dish or a similar-sized rectangular one. Spread a thin layer of the whipped cream across the bottom — just enough to stop the biscuits sliding around. You’ll hear a soft squelch as you spread it.
- Layer the biscuits. Arrange a single layer of digestive biscuits over the cream. They should fit snugly, but it’s fine if you need to break a biscuit in half to fill gaps. Press them down gently so they stick.
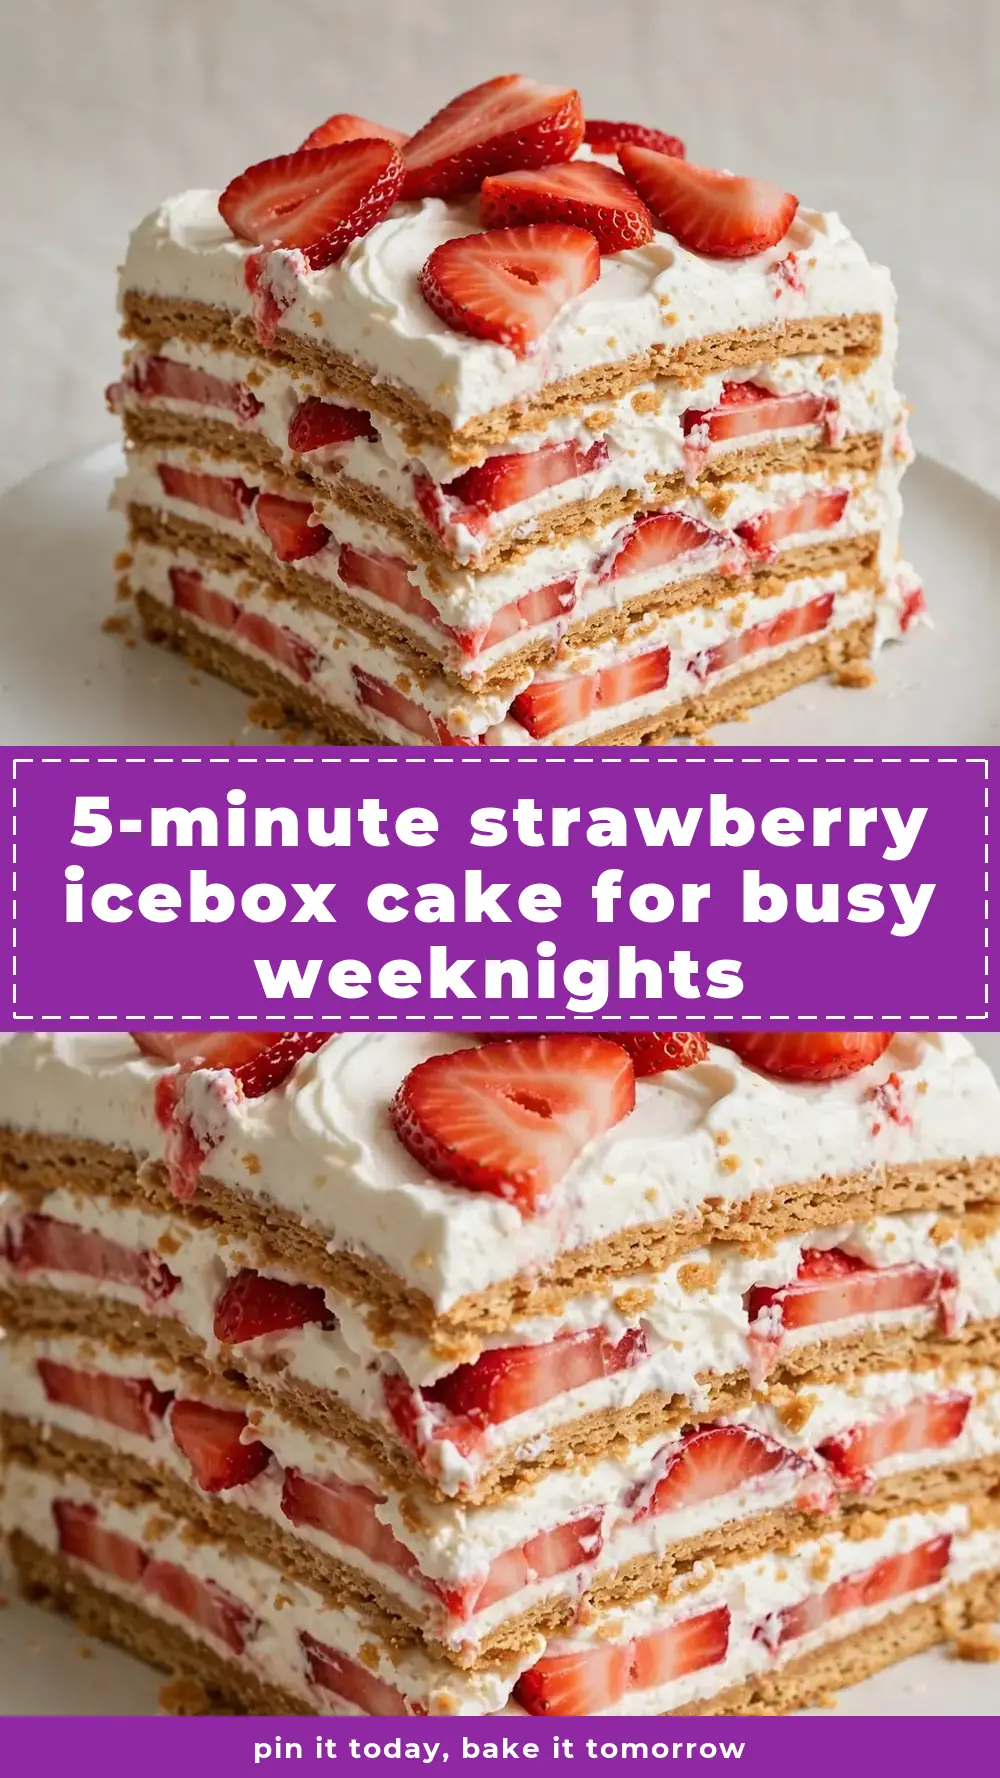
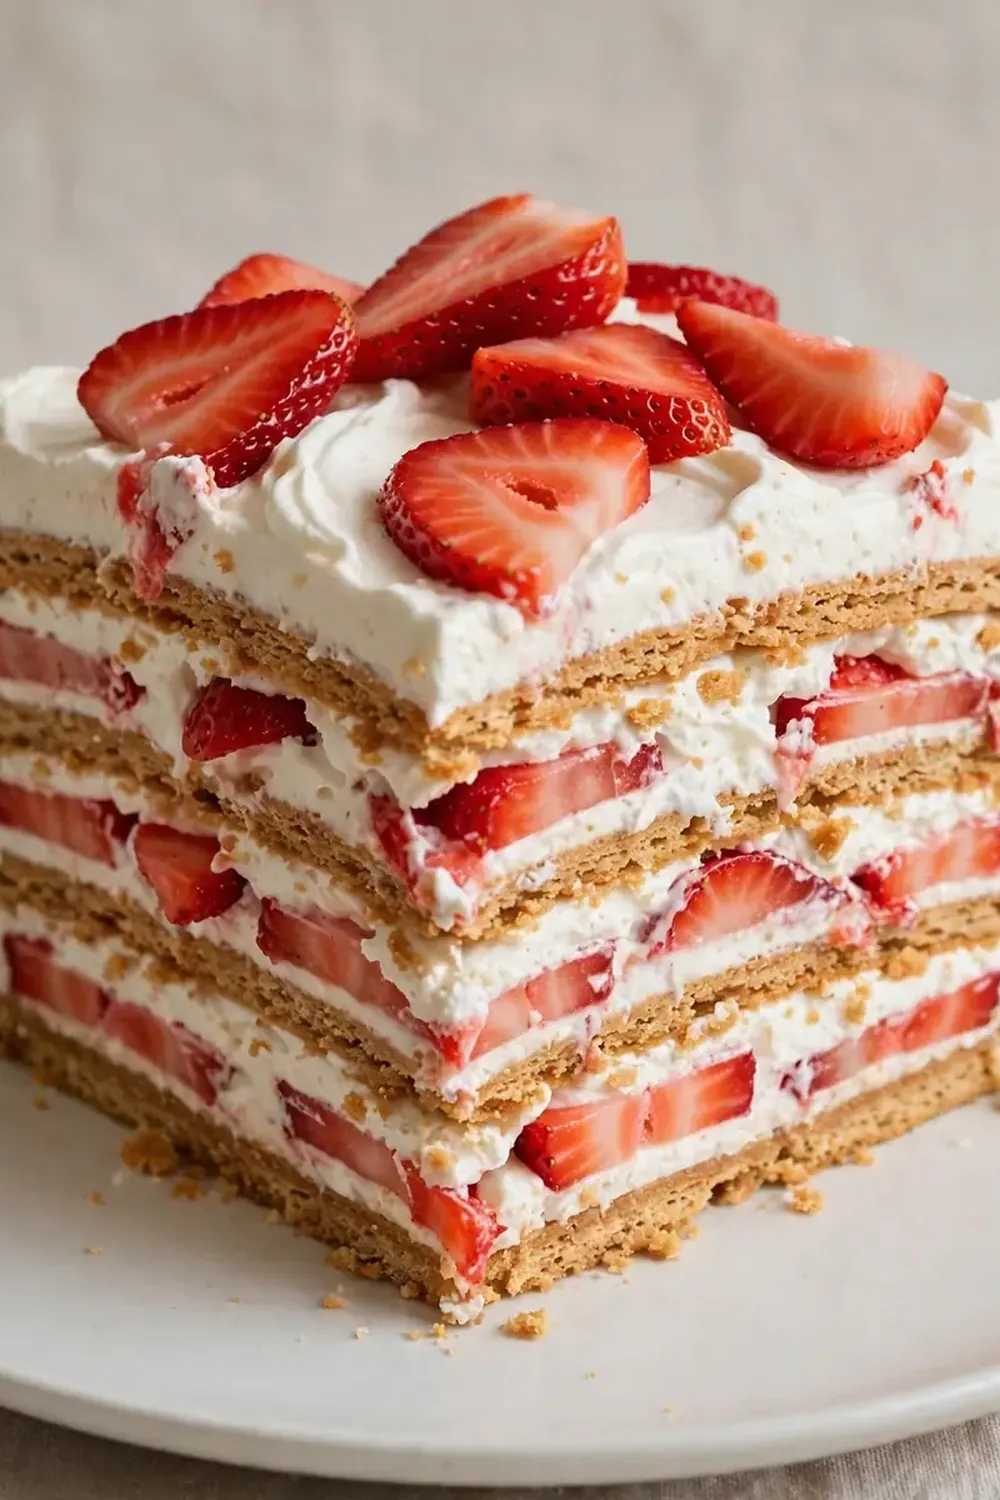
- Add strawberries and cream. Spread a generous layer of whipped cream over the biscuits — about one-third of what’s left. Then arrange a layer of sliced strawberries on top. The berries should overlap slightly, creating a pretty pink-and-red patchwork. You’ll see the cream turning pale pink at the edges as the strawberry juices start to mingle.
- Repeat the layers. Add another layer of biscuits, pressing them gently into the cream. Then another layer of cream and strawberries. Continue until you’ve used all your ingredients, finishing with a thick layer of cream on top. The final layer should be smooth and even; use a spatula to swirl it into soft peaks if you like a decorative finish.
- Chill overnight. Cover the dish tightly with cling film and refrigerate for at least 6 hours, but overnight is truly best. During this time, the biscuits will absorb moisture from the cream and strawberries, transforming from crunchy to soft and cake-like. The texture should be tender but not mushy — you want the biscuits to hold their shape when you cut a slice.
- Finish and serve. Just before serving, dust the top with icing sugar through a fine sieve. Add fresh mint leaves if you like. Cut into squares and watch the layers hold together beautifully. The sound of the knife slicing through the soft cream and tender biscuits is deeply satisfying.
Tips From My Kitchen
- Chill your bowl and whisk. Pop the mixing bowl and whisk attachments in the fridge for 15 minutes before you start. Cold cream whips faster and holds its shape better. Warm cream can turn into butter if you over-whip it, and nobody wants a greasy dessert.
- Don’t skimp on the chilling time. Six hours is the absolute minimum. If you cut into it too early, the biscuits will be crunchy in the middle and the layers won’t hold together. I’ve made this mistake on a busy Tuesday, and it was a crumbly mess. Overnight is non-negotiable for the best texture.
- Use ripe but firm strawberries. Overly soft strawberries will release too much juice, making the dessert watery. Under-ripe berries lack flavour. Look for strawberries that are bright red, fragrant, and firm to the touch. They should smell like summer.
- Slice strawberries evenly. Aim for slices about 3-4mm thick. Too thin and they’ll disappear into the cream; too thick and they’ll make the layers bulky and uneven. Consistent slices mean every bite has the same lovely balance of cream, biscuit, and fruit.
- Let it sit at room temperature before serving. Take the icebox cake out of the fridge about 10 minutes before you cut it. This softens the cream slightly, making it easier to slice neatly. A cold-from-the-fridge cut can drag the layers.
- Double the batch for bigger families. This recipe fits neatly into a 20cm dish, but if you’re feeding a crowd, simply double everything and use a 30cm x 23cm dish. The layering method is exactly the same — just allow an extra hour of chilling time.
Delicious Variations to Try
- Chocolate Strawberry Icebox Cake: Swap half the digestive biscuits for chocolate digestives. The cocoa flavour pairs beautifully with the strawberries and cream, giving the dessert a richer, more indulgent feel. You can also add a tablespoon of cocoa powder to the cream when whipping.
- Lemon and Strawberry Version: Add the finely grated zest of one lemon to the cream before whipping. The citrus brightness cuts through the richness and makes the strawberries taste even more vibrant. A squeeze of lemon juice over the strawberry layers adds a lovely tang.
- Vegan-Friendly Option: Use a plant-based double cream alternative (coconut-based ones work well) and vegan digestive biscuits. Whip the cream with the same sugar and vanilla. The texture will be slightly softer, so chill for a full 12 hours to help it set properly.
- Berry Mix: Replace half the strawberries with raspberries, blueberries, or sliced bananas. Mixed berry icebox cake has a lovely tart-sweet balance, and the different colours make it look even more appealing on the plate.
What to Serve With Classic Strawberry Icebox Cake
- A simple dollop of extra whipped cream — because you can never have too much cream.
- A handful of fresh berries scattered around the plate for colour and freshness.
- A cup of strong black coffee or a pot of peppermint tea to cut through the sweetness.
- If you’re feeling fancy, a drizzle of warm chocolate sauce over each slice.
Still hungry for ideas? You might also love Light Japanese Strawberry Sponge Cake Recipe, Beautiful Fresh Strawberry Upside Down Cake from our sister kitchens.
Frequently Asked Questions
Classic Strawberry Icebox Cake
Ingredients
Method
-
Whip the cream. Pour the double cream into a large, chilled bowl. Add the caster sugar and vanilla extract. Using an electric hand whisk or a balloon whisk (if you fancy an arm workout), whip until the cream holds stiff peaks. You’ll know it’s ready when you lift the whisk and the cream stands up in firm, glossy points without drooping. The mixture should look thick and smooth, almost like a cloud.
-
Prepare your dish. Choose a 20cm x 20cm square baking dish or a similar-sized rectangular one. Spread a thin layer of the whipped cream across the bottom — just enough to stop the biscuits sliding around. You’ll hear a soft squelch as you spread it.
-
Layer the biscuits. Arrange a single layer of digestive biscuits over the cream. They should fit snugly, but it’s fine if you need to break a biscuit in half to fill gaps. Press them down gently so they stick.
-
Add strawberries and cream. Spread a generous layer of whipped cream over the biscuits — about one-third of what’s left. Then arrange a layer of sliced strawberries on top. The berries should overlap slightly, creating a pretty pink-and-red patchwork. You’ll see the cream turning pale pink at the edges as the strawberry juices start to mingle.
-
Repeat the layers. Add another layer of biscuits, pressing them gently into the cream. Then another layer of cream and strawberries. Continue until you’ve used all your ingredients, finishing with a thick layer of cream on top. The final layer should be smooth and even; use a spatula to swirl it into soft peaks if you like a decorative finish.
-
Chill overnight. Cover the dish tightly with cling film and refrigerate for at least 6 hours, but overnight is truly best. During this time, the biscuits will absorb moisture from the cream and strawberries, transforming from crunchy to soft and cake-like. The texture should be tender but not mushy — you want the biscuits to hold their shape when you cut a slice.
-
Finish and serve. Just before serving, dust the top with icing sugar through a fine sieve. Add fresh mint leaves if you like. Cut into squares and watch the layers hold together beautifully. The sound of the knife slicing through the soft cream and tender biscuits is deeply satisfying.
Notes
I’d love to hear how this Classic Strawberry Icebox Cake works for your busy weeknights. Drop a comment below and let me know if your family polished it off as fast as mine does. And if you’re looking for another no-bake treat that feels like a proper pudding, try my Creamy No Bake Oreo Cheesecake Cups Recipe 2 — it’s just as speedy and just as satisfying. For a fruity breakfast option that feels like dessert, the Bakery Style Strawberry Cream Cheese Muffins are a lovely weekend project. Happy cooking!