
30-Min Prep Biscoff Cookie Butter Cheesecake
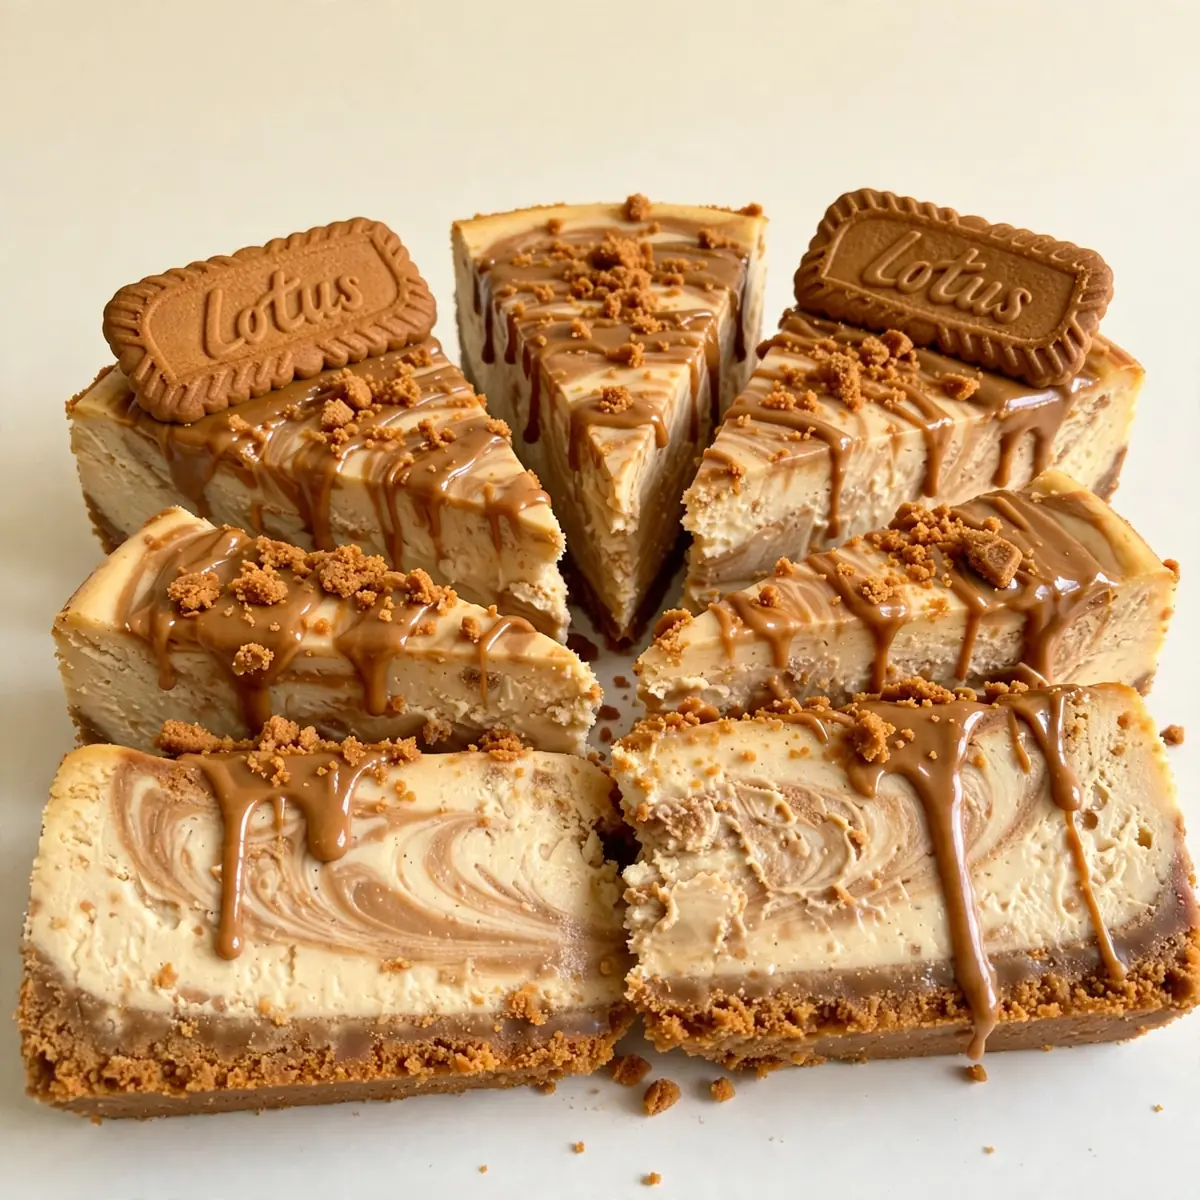
When I first made this Biscoff Cookie Butter Cheesecake, it was purely out of desperation for a quick dessert that wouldn’t leave my kitchen looking like a flour bomb had hit it. I stumbled upon this combination by accident, and it’s been a hit ever since — a no-bake wonder that slides together while you’re sorting out homework and clearing the dinner plates.
Recipe Overview
- Prep Time: 20 minutes
- Chill Time: 4 hours (or overnight)
- Total Time: 4 hours 20 minutes
- Servings: 10–12 slices
- Difficulty: Easy
Why You’ll Love This Biscoff Cookie Butter Cheesecake
- No oven required: This cheesecake sets in the fridge, so you’re not heating up the house or waiting for the oven to preheat. It’s a genuine weeknight win.
- Minimal washing up: One bowl, a spatula, and a springform tin are all you need to dirty. I used to struggle with this dish until I discovered this technique, and now cleanup takes under five minutes.
- Make-ahead magic: You can assemble this the night before a busy day, and it’s ready to slice and serve straight from the fridge. No last-minute panic.
- Store-cupboard heroes: Aside from the cream cheese, almost everything comes from your pantry. Biscoff biscuits and cookie butter keep for ages, making this a reliable fallback.
- Kids adore it: The spiced, caramelised flavour of Biscoff is universally loved, and the creamy texture is a total crowd-pleaser without any fussy ingredients.
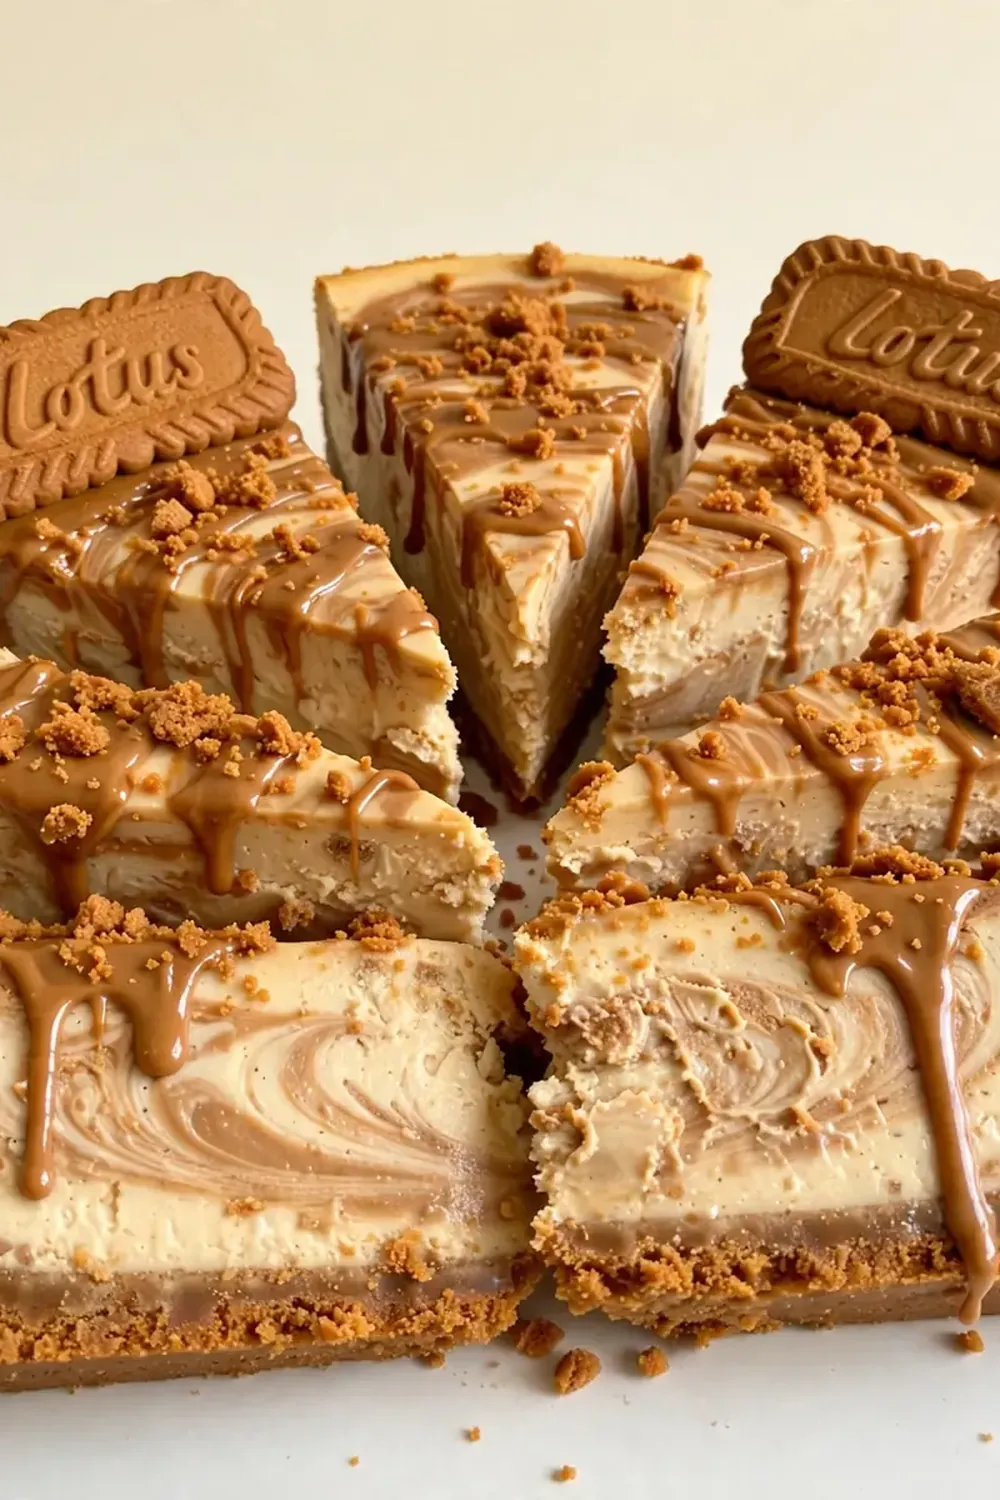
Ingredients You’ll Need
- 250g Biscoff biscuits (for the base)
- 100g unsalted butter, melted
- 600g full-fat cream cheese, at room temperature
- 100g caster sugar
- 1 tsp vanilla extract
- 300ml double cream
- 200g Biscoff cookie butter (smooth, not crunchy)
- 2 tbsp icing sugar (optional, for stabilising the cream)
- 50ml whole milk (if the cookie butter is too stiff to swirl)
- Extra Biscoff biscuits for decoration (optional)
Tip: Let your cream cheese sit on the counter for at least 30 minutes before you begin. Cold cream cheese will leave you with a lumpy filling, and nobody wants that.
How to Make Biscoff Cookie Butter Cheesecake
- Crush the biscuits for the base: Place the Biscoff biscuits in a sealed freezer bag and bash them with a rolling pin until they resemble fine sand. You want a uniform crumb — no jagged chunks. The texture should feel like damp beach sand when you pinch it.
- Combine with melted butter: Pour the melted butter over the biscuit crumbs and stir with a fork until every grain is coated. The mixture should clump together when pressed between your fingers, feeling slightly greasy but holding its shape.
- Press into the tin: Tip the buttery crumbs into a 20cm springform tin lined with parchment paper. Press them down firmly using the flat base of a glass or a measuring cup. The base should feel compact and solid, with no loose crumbs rattling around. Pop it in the fridge to set while you make the filling.
- Beat the cream cheese and sugar: In a large mixing bowl, beat the cream cheese with an electric mixer until it’s completely smooth and silky — about 2 minutes. You should see no lumps, and the mixture should look glossy and pale. Add the caster sugar and vanilla, then beat for another minute until the sugar has dissolved and the mixture feels light and airy.
- Whip the double cream: In a separate bowl, whip the double cream with the icing sugar until soft peaks form. When you lift the whisk, the cream should hold a gentle peak that flops over slightly at the tip. Be careful not to over-whip, or you’ll end up with butter.
- Fold everything together: Gently fold the whipped cream into the cream cheese mixture using a spatula. Use a figure-of-eight motion, scraping the bottom of the bowl. The batter should be thick, mousse-like, and completely uniform in colour — no streaks of white or yellow.
- Layer and swirl the cookie butter: Spread half the cheesecake filling over the chilled base. Warm the Biscoff cookie butter in the microwave for 10–15 seconds until it’s runny but not hot. Drop spoonfuls of the warm cookie butter over the filling, then add the remaining cheesecake mixture on top. Use a skewer or a knife to swirl the cookie butter through the top layer — aim for ribbons of brown running through the pale cream. The surface should look marbled, with distinct swirls.
- Chill until firm: Cover the tin with cling film and refrigerate for at least 4 hours, but overnight is better. The cheesecake should feel set to the touch — when you gently jiggle the tin, the centre should wobble only slightly, like a firm jelly. The edges should be completely solid.
- Serve and decorate: Run a hot knife around the edge of the tin before releasing the springform. Slice with a clean, sharp knife, wiping it between cuts for neat pieces. Top with crumbled Biscoff biscuits or a drizzle of extra cookie butter if you fancy. The slice should hold its shape cleanly, with a creamy, dense texture that melts on the tongue.
Tips From My Kitchen
- Use room-temperature cream cheese: Cold cream cheese creates lumps that no amount of beating will fully remove. Let it sit out for 30–45 minutes. You’ll know it’s ready when you press a finger into it and it leaves a soft indent without resistance.
- Don’t skip the chilling time: Four hours is the absolute minimum, but overnight gives the cheesecake a firmer, cleaner slice. If you’re in a rush, pop it in the freezer for 2 hours instead — just check it doesn’t freeze solid.
- Warm the cookie butter for swirling: Cold cookie butter is too thick to swirl elegantly. A quick 10-second blast in the microwave makes it drizzle-able. If it’s still stiff, add a splash of milk and stir until smooth.
- Line the tin with parchment: Cutting a circle of parchment for the base and strips for the sides means you can lift the cheesecake out without any wrestling. It also makes cleanup almost non-existent.
- Make it in advance for busy weeks: This cheesecake keeps beautifully in the fridge for up to 3 days. I often make two at once — one for tonight and one for later in the week. It’s a lifesaver when you know a hectic evening is coming.
Equipment You’ll Need
- Stand mixer or hand mixer
- 20cm springform cake tin
- Parchment paper
- Rolling pin or food processor (for crushing biscuits)
- Large mixing bowl
- Spatula
- Sharp knife for slicing
Common Mistakes to Avoid
- Overcrowding the pan: If you use a tin smaller than 20cm, the cheesecake will be too tall and may not set evenly in the centre. Stick to the recommended size so the filling has room to chill properly and the texture stays consistent from edge to middle.
- Wrong temperature: Cream cheese that’s too cold creates a grainy, lumpy filling. Cream that’s too warm won’t whip properly. Aim for ingredients at room temperature unless specified otherwise. If you forget to take the cream cheese out, cut it into small cubes and let it sit for 15 minutes.
- Skipping the rest time: Cutting into a cheesecake that hasn’t fully set is a recipe for a mess. The filling will ooze out, the base will crumble, and your slices will look sad. Be patient — the fridge does the hard work for you.
Delicious Variations to Try
- Spiced Chocolate Version: Add 2 tablespoons of cocoa powder to the biscuit base and swirl melted dark chocolate (70% cocoa) through the filling along with the cookie butter. The bitterness of the chocolate balances the sweet Biscoff beautifully.
- Vegan Option: Use a plant-based cream cheese (like Violife or Nush) and coconut cream in place of double cream. Chill the coconut cream tin overnight first, then scoop out the solid top layer and whip it. The texture will be slightly lighter but still creamy.
- Different Protein: For a savoury-sweet twist, serve each slice with a dollop of thick Greek yoghurt and a sprinkle of toasted pistachios. It adds a protein boost and a lovely crunch that contrasts with the smooth cheesecake.
What to Serve With Biscoff Cookie Butter Cheesecake
- A dollop of lightly whipped cream — unsweetened, to cut through the sweetness
- Fresh berries, like raspberries or sliced strawberries, for a tart contrast
- A strong cup of black coffee or espresso to balance the caramel notes
- A drizzle of extra warmed Biscoff cookie butter over each slice
Still hungry for ideas? You might also love Chocolate Cheesecake Cookie Bars A Decadent Treat from our sister kitchens.
Frequently Asked Questions
Biscoff Cookie Butter Cheesecake
Ingredients
Method
- Crush the biscuits for the base: Place the Biscoff biscuits in a sealed freezer bag and bash them with a rolling pin until they resemble fine sand. You want a uniform crumb — no jagged chunks. The texture should feel like damp beach sand when you pinch it.
- Combine with melted butter: Pour the melted butter over the biscuit crumbs and stir with a fork until every grain is coated. The mixture should clump together when pressed between your fingers, feeling slightly greasy but holding its shape.
- Press into the tin: Tip the buttery crumbs into a 20cm springform tin lined with parchment paper. Press them down firmly using the flat base of a glass or a measuring cup. The base should feel compact and solid, with no loose crumbs rattling around. Pop it in the fridge to set while you make the filling.
- Beat the cream cheese and sugar: In a large mixing bowl, beat the cream cheese with an electric mixer until it's completely smooth and silky — about 2 minutes. You should see no lumps, and the mixture should look glossy and pale. Add the caster sugar and vanilla, then beat for another minute until the sugar has dissolved and the mixture feels light and airy.
- Whip the double cream: In a separate bowl, whip the double cream with the icing sugar until soft peaks form. When you lift the whisk, the cream should hold a gentle peak that flops over slightly at the tip. Be careful not to over-whip, or you'll end up with butter.
- Fold everything together: Gently fold the whipped cream into the cream cheese mixture using a spatula. Use a figure-of-eight motion, scraping the bottom of the bowl. The batter should be thick, mousse-like, and completely uniform in colour — no streaks of white or yellow.
- Layer and swirl the cookie butter: Spread half the cheesecake filling over the chilled base. Warm the Biscoff cookie butter in the microwave for 10–15 seconds until it's runny but not hot. Drop spoonfuls of the warm cookie butter over the filling, then add the remaining cheesecake mixture on top. Use a skewer or a knife to swirl the cookie butter through the top layer — aim for ribbons of brown running through the pale cream. The surface should look marbled, with distinct swirls.
- Chill until firm: Cover the tin with cling film and refrigerate for at least 4 hours, but overnight is better. The cheesecake should feel set to the touch — when you gently jiggle the tin, the centre should wobble only slightly, like a firm jelly. The edges should be completely solid.
- Serve and decorate: Run a hot knife around the edge of the tin before releasing the springform. Slice with a clean, sharp knife, wiping it between cuts for neat pieces. Top with crumbled Biscoff biscuits or a drizzle of extra cookie butter if you fancy. The slice should hold its shape cleanly, with a creamy, dense texture that melts on the tongue.
Notes
I’d love to hear how this Biscoff Cookie Butter Cheesecake works in your kitchen. Drop a comment below and tell me if you made it for a busy Tuesday or a lazy Sunday — and what you served alongside it. Happy baking, friends.






