Elegant Mini Chocolate Desserts For Gatherings
I remember the panic of a Tuesday evening last autumn. The school run had run late, the dog had needed an emergency bath, and I’d promised to bring a small treat to a neighbour’s book club gathering. I had about twenty minutes, a handful of dark chocolate buttons, and a deep desire not to turn up empty-handed. That night, I threw together the first version of what I now call my emergency chocolate pots, and they were gone before I could even explain the recipe. This is that recipe, refined and ready for your busiest weeks.
Recipe Overview
- Prep time: 10 minutes
- Cook time: 5 minutes
- Chill time: 30 minutes (or overnight)
- Total time (active): 15 minutes
- Servings: Makes 6 small pots or 8 shot-glass servings
- Difficulty: Easy (no baking required)
Why You’ll Love This Elegant Mini Chocolate Desserts for Gatherings
- It’s a weeknight miracle: You can go from zero to dessert in fifteen minutes flat, using one saucepan and a whisk. There’s no oven to preheat, no stand mixer to haul out, and the only bowl you’ll dirty is the one you eat from.
- Make-ahead champion: These little pots actually improve after a night in the fridge. The texture sets into a silky, mousse-like consistency that feels far more complex than the effort it took to make them. I make a batch on Sunday and have them ready for the whole week.
- Minimal cleanup, maximum impact: Because everything happens in one pan, you’re left with a single saucepan and a whisk to wash. No baking trays, no piping bags, no fuss. I make this at least once a week – it’s become a family favourite for after-school treats and last-minute hostess gifts alike.
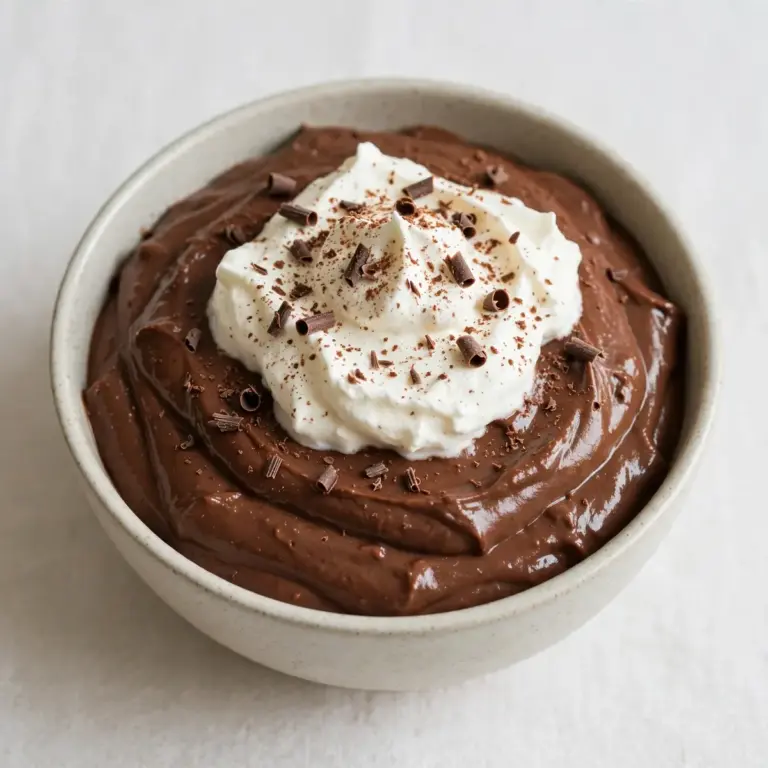
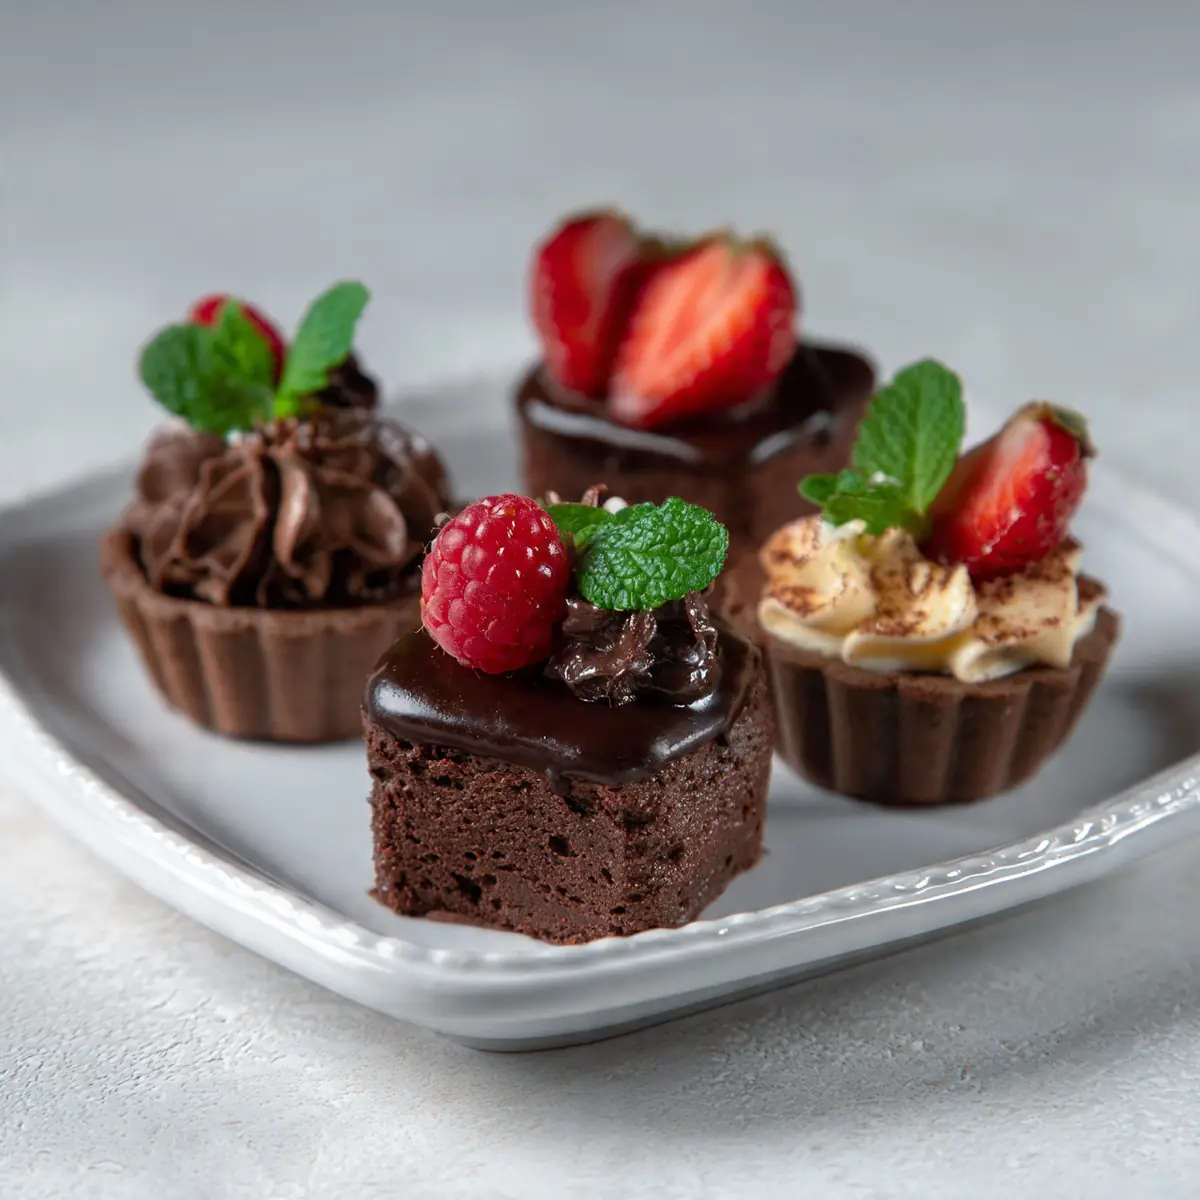
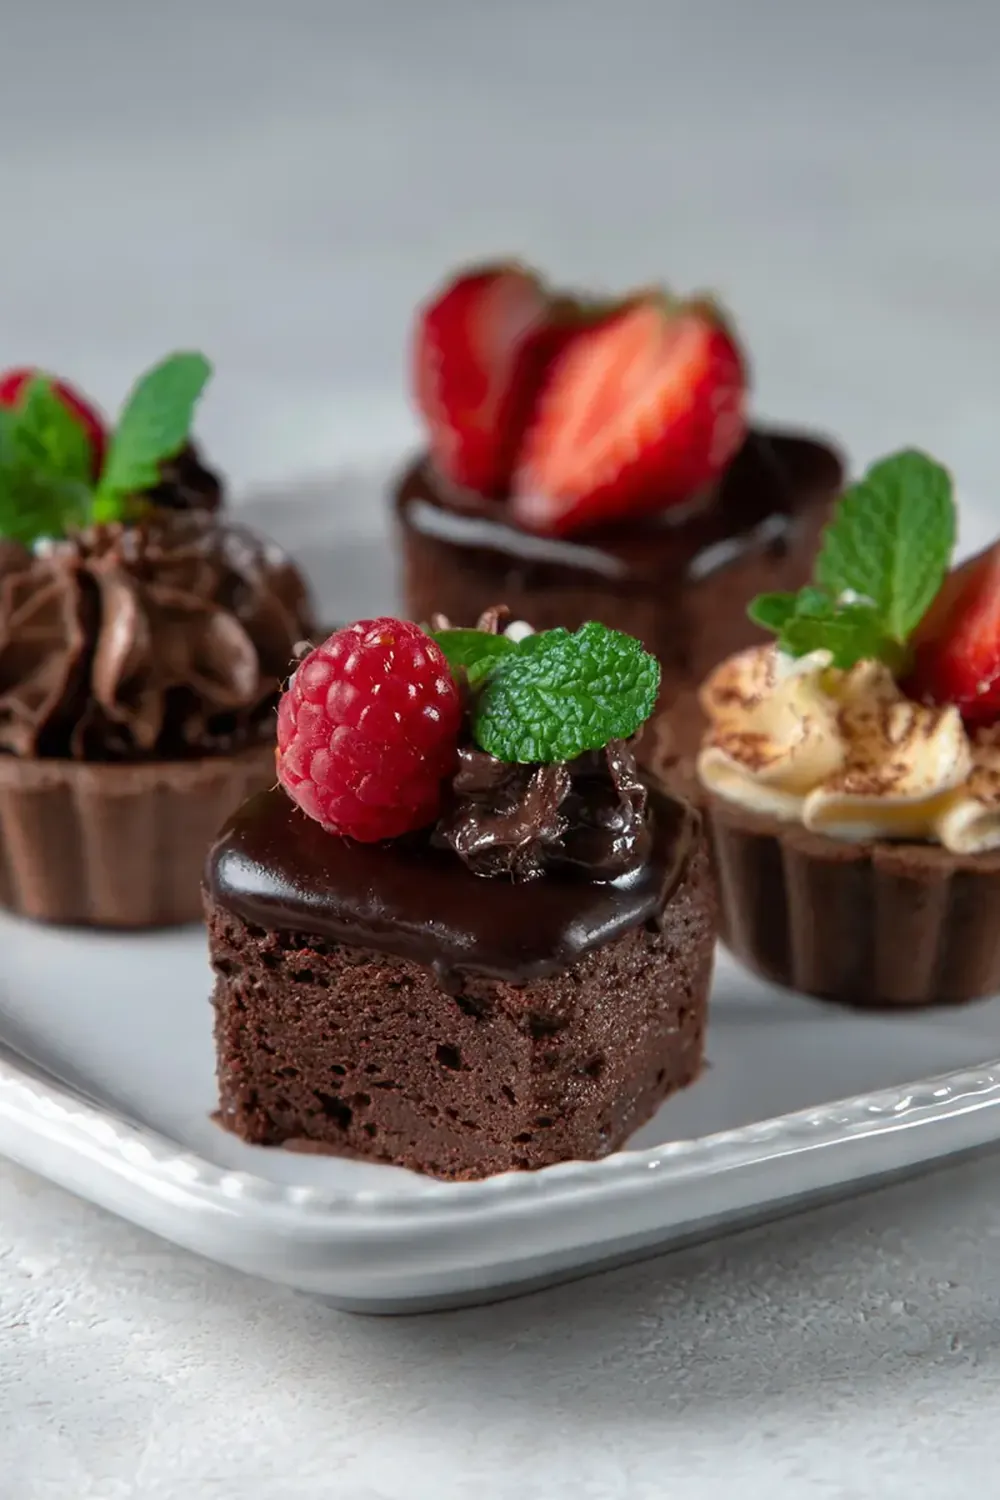
- Naturally elegant presentation: Served in small glasses, espresso cups, or even cleaned-out jam jars, these mini desserts look like they came from a patisserie. A tiny pinch of sea salt or a single raspberry on top transforms them into something truly special.
- Endlessly adaptable: You can switch the chocolate, add a pinch of cinnamon, or fold in a spoonful of peanut butter. The base recipe is so forgiving that you can customise it based on whatever you have in the cupboard.
Ingredients You’ll Need
- 200ml double cream (full fat, please)
- 100ml whole milk
- 2 tablespoons golden caster sugar
- 1 teaspoon vanilla extract (use the good stuff, not essence)
- 200g dark chocolate (70% cocoa solids), finely chopped
- 2 large egg yolks, at room temperature
- A tiny pinch of sea salt flakes for finishing
Tip: For the silkiest texture, use a chocolate you genuinely enjoy eating plain. Cheap chocolate often contains too much sugar and not enough cocoa butter, which can leave the dessert grainy. I use a supermarket own-brand 70% bar and it works beautifully.
How to Make Elegant Mini Chocolate Desserts for Gatherings
- Warm the cream and milk: Pour the double cream, whole milk, and golden caster sugar into a medium saucepan. Place over a medium heat and stir gently with a wooden spoon. You’re looking for small bubbles to appear around the edge of the pan — that’s when the liquid is hot but not boiling. The mixture will look pale and slightly frothy. Do not let it come to a rolling boil, or the cream might split.
- Melt the chocolate: While the cream warms, put the finely chopped dark chocolate into a heatproof bowl. The chocolate pieces should be no bigger than a pea so they melt evenly. When the cream mixture is hot, pour it over the chocolate. Let it sit untouched for one minute — this allows the heat to begin melting the chocolate from the bottom up. The air will smell deeply of cocoa.
- Whisk until glossy: After the minute is up, whisk gently in one direction. You’ll see the mixture transform from a pale, speckled liquid into a dark, glossy ganache. Continue whisking until every last piece of chocolate has dissolved and the mixture looks like liquid velvet. It should coat the back of a spoon thickly.
- Temper the egg yolks: In a separate small bowl, lightly beat the egg yolks with a fork until they are uniformly yellow and slightly thickened. While whisking the chocolate mixture continuously, drizzle the egg yolks into the pan in a slow, steady stream. This step is crucial — adding the yolks too quickly can scramble them. The mixture will thicken noticeably and become even glossier, almost like a pudding.
- Cook gently: Return the saucepan to the lowest possible heat. Stir constantly with a wooden spoon or heatproof spatula for about two minutes. You’ll feel the mixture thicken against the spoon, and it will start to steam gently. Do not let it bubble. The texture should be like a thick custard that coats the spoon heavily. When you drag your finger across the back of the spoon, it should leave a clean trail.
- Strain and pour: Set a fine-mesh sieve over a large jug or a bowl with a pouring lip. Pour the chocolate mixture through the sieve to catch any tiny bits of cooked egg. Press it through with the back of a spatula. The strained mixture will be impossibly smooth and silky. Divide it evenly among six small glasses, espresso cups, or small ramekins. Tap each glass gently on the counter to release any air bubbles.
- Chill until set: Place the pots in the refrigerator, uncovered, for at least 30 minutes. After 30 minutes, the surface should be firm to the touch but still wobbly underneath. For a firmer, mousse-like texture, chill for at least 4 hours or overnight. The surface will look matte and set like a dense pudding.
- Finish and serve: Just before serving, sprinkle a tiny pinch of sea salt flakes over each pot. The salt crystals will glisten against the dark chocolate surface. If you like, top with a single raspberry, a few chopped hazelnuts, or a tiny dollop of whipped cream. Serve straight from the fridge; they are best enjoyed cold.
Tips From My Kitchen
- Chop the chocolate finely: The smaller the pieces, the faster and more evenly they melt. If you use large chunks, the cream may cool down before the chocolate has fully melted, leaving you with a gritty texture. I usually chop my chocolate on a cutting board with a serrated knife — the serrations grip the chocolate and prevent it from slipping.
- Never let the cream boil: Boiling cream can cause it to separate, leaving you with a greasy, grainy dessert. Watch for the small bubbles around the edge of the pan — that visual cue is your signal to remove it from the heat immediately. If you accidentally let it boil, don’t panic; just let it cool for 30 seconds before pouring over the chocolate.
- Take the chill off the eggs: Cold egg yolks can seize the chocolate mixture and create a lumpy texture. Let your eggs sit on the counter for 15 minutes before you start. If you’re in a hurry, place the whole eggs in a bowl of warm water for 5 minutes. The yolks should feel room-temperature to the touch.
- Don’t skip the straining step: Even if you think you whisked perfectly, there can be tiny bits of cooked egg white or undissolved chocolate. Straining through a fine-mesh sieve guarantees a dessert that is silky-smooth, not grainy. It takes ten seconds and makes a world of difference.
- Make it ahead for better texture: These pots taste best after at least four hours in the fridge, and they’re even better the next day. The starches in the egg yolks continue to absorb liquid, creating a denser, creamier texture. I often make a double batch on Monday and serve them throughout the week for an effortless dessert.
- Use good vanilla: Vanilla extract adds a floral note that lifts the chocolate. Avoid vanilla essence, which can taste artificial and chemical. A good-quality extract or vanilla bean paste is worth the slightly higher cost.
- Portion for your crowd: These are intensely rich, so small servings are best. Shot glasses or espresso cups are ideal for parties — they look elegant and prevent overindulgence. For a larger gathering, you can also pour the mixture into one large serving dish and let people spoon it out.
Equipment You’ll Need
- Medium saucepan (about 2-litre capacity)
- Wooden spoon or heatproof silicone spatula
- Balloon whisk
- Fine-mesh sieve
- Small mixing bowl
- 6 small serving glasses (espresso cups, shot glasses, or small ramekins)
- Sharp knife and cutting board for chopping chocolate
Common Mistakes to Avoid
- Overcrowding the pan: This recipe is designed for a single saucepan, so don’t double the batch in the same pan. If you want to make more, use a larger pan or make two separate batches. Overcrowding means the mixture takes too long to heat, which can lead to curdling. Stick to the quantities listed for the best results.
- Wrong temperature: The cream should be hot, not boiling. If you boil it, the fat can separate. Similarly, when you cook the mixture with the egg yolks, keep the heat on the lowest setting. High heat will scramble the eggs, leaving you with a lumpy, unpleasant texture. A gentle steam is all you need.
- Skipping the rest time: These pots need at least 30 minutes in the fridge to set. If you serve them too soon, they will be runny and loose, more like a warm sauce than a dessert. The chilling time allows the cocoa butter to firm up and the starches to stabilise, giving you that perfect mousse-like consistency.
Delicious Variations to Try
- Spicy Version: Add a pinch of cayenne pepper and a pinch of ground cinnamon to the cream mixture before heating. The warmth of the spices contrasts beautifully with the rich chocolate. A tiny pinch of smoked paprika also works wonderfully, adding a subtle earthiness.
- Vegan Option: Replace the double cream and milk with full-fat coconut cream (from a chilled can) and use a high-quality dairy-free dark chocolate. Omit the egg yolks entirely — the coconut cream provides enough fat and body to set the dessert. The result is slightly more coconut-flavoured but still wonderfully decadent.
- Different Protein: For a nutty variation, stir 2 tablespoons of smooth peanut butter or almond butter into the warm cream mixture before pouring it over the chocolate. Whisk until fully combined. The nut butter adds a savoury depth and a slight protein boost, making this a more filling dessert after a busy day.
What to Serve With Elegant Mini Chocolate Desserts for Gatherings
- A small glass of cold milk or oat milk
- A few fresh raspberries or strawberries on the side
- A tiny scoop of vanilla ice cream (optional, but lovely)
- A cup of strong black coffee or espresso
- A simple shortbread biscuit for a textural contrast
Frequently Asked Questions
Elegant Mini Chocolate Desserts for Gatherings
Ingredients
Method
- Warm the cream and milk: Pour the double cream, whole milk, and golden caster sugar into a medium saucepan. Place over a medium heat and stir gently with a wooden spoon. You’re looking for small bubbles to appear around the edge of the pan — that’s when the liquid is hot but not boiling. The mixture will look pale and slightly frothy. Do not let it come to a rolling boil, or the cream might split.
- Melt the chocolate: While the cream warms, put the finely chopped dark chocolate into a heatproof bowl. The chocolate pieces should be no bigger than a pea so they melt evenly. When the cream mixture is hot, pour it over the chocolate. Let it sit untouched for one minute — this allows the heat to begin melting the chocolate from the bottom up. The air will smell deeply of cocoa.
- Whisk until glossy: After the minute is up, whisk gently in one direction. You’ll see the mixture transform from a pale, speckled liquid into a dark, glossy ganache. Continue whisking until every last piece of chocolate has dissolved and the mixture looks like liquid velvet. It should coat the back of a spoon thickly.
- Temper the egg yolks: In a separate small bowl, lightly beat the egg yolks with a fork until they are uniformly yellow and slightly thickened. While whisking the chocolate mixture continuously, drizzle the egg yolks into the pan in a slow, steady stream. This step is crucial — adding the yolks too quickly can scramble them. The mixture will thicken noticeably and become even glossier, almost like a pudding.
- Cook gently: Return the saucepan to the lowest possible heat. Stir constantly with a wooden spoon or heatproof spatula for about two minutes. You’ll feel the mixture thicken against the spoon, and it will start to steam gently. Do not let it bubble. The texture should be like a thick custard that coats the spoon heavily. When you drag your finger across the back of the spoon, it should leave a clean trail.
- Strain and pour: Set a fine-mesh sieve over a large jug or a bowl with a pouring lip. Pour the chocolate mixture through the sieve to catch any tiny bits of cooked egg. Press it through with the back of a spatula. The strained mixture will be impossibly smooth and silky. Divide it evenly among six small glasses, espresso cups, or small ramekins. Tap each glass gently on the counter to release any air bubbles.
- Chill until set: Place the pots in the refrigerator, uncovered, for at least 30 minutes. After 30 minutes, the surface should be firm to the touch but still wobbly underneath. For a firmer, mousse-like texture, chill for at least 4 hours or overnight. The surface will look matte and set like a dense pudding.
- Finish and serve: Just before serving, sprinkle a tiny pinch of sea salt flakes over each pot. The salt crystals will glisten against the dark chocolate surface. If you like, top with a single raspberry, a few chopped hazelnuts, or a tiny dollop of whipped cream. Serve straight from the fridge; they are best enjoyed cold.
Notes
I hope this recipe brings a little bit of calm to your busy evenings. It’s become my secret weapon for gatherings, school bake sales, and those nights when I need a small victory at the end of a long day. If you give it a try, I’d love to hear how you got on — drop a comment below and tell me what variation you chose, or if you have a favourite topping I haven’t mentioned. Happy cooking, friends.