Weeknight Fast Homemade Toaster Pastries
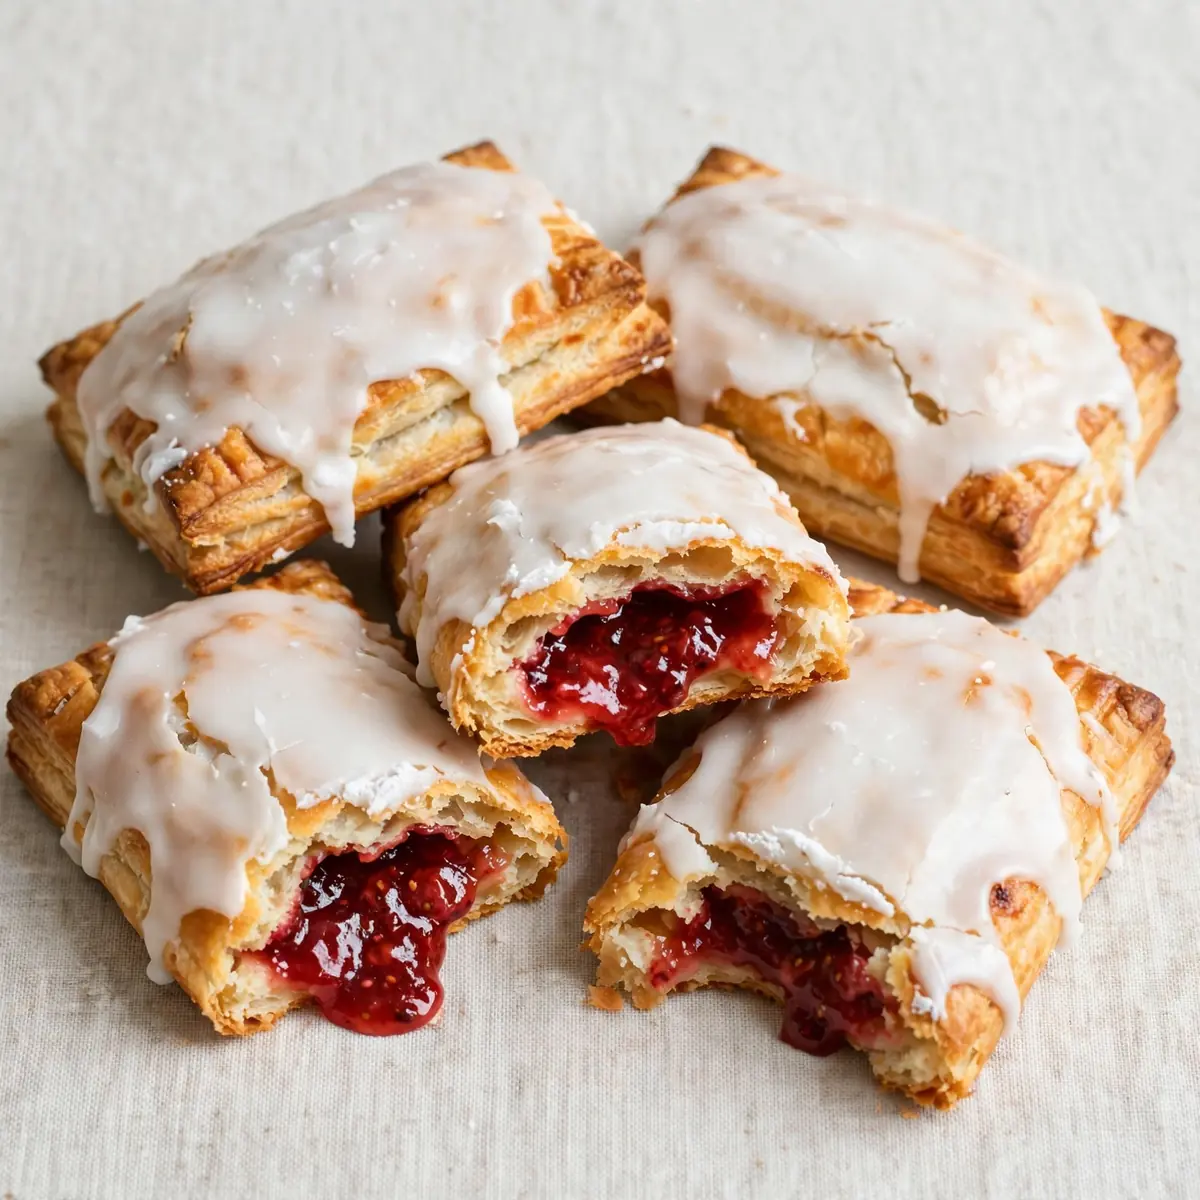
After a long day of school runs and after-school clubs, I needed a homemade breakfast option that felt special but didn’t demand hours in the kitchen. These homemade toaster pastries with a gelatin-free icing have become our Tuesday night ritual, prepped in under 30 minutes and ready to grab from the freezer all week long.
Recipe Overview
- Prep time: 20 minutes
- Cook time: 12 minutes
- Total time: 32 minutes
- Servings: 8 pastries
- Difficulty: Easy
Why You’ll Love This Homemade Toaster Pastries (Gelatin-Free Icing)
- Weeknight speed: From mixing bowl to freezer in just over half an hour — I make this at least once a week, it’s become a family favourite.
- Minimal cleanup: One bowl, one baking sheet, and a rolling pin are all you need to wash up afterwards.
- Make-ahead magic: These freeze beautifully for up to three months, meaning you can batch-bake on a Sunday and enjoy them all month.
- Gelatin-free icing: No need for special ingredients or setting agents — this glossy icing sets firm without a trace of gelatine.
- Customisable fillings: Swap the jam for chocolate spread, apple compote, or even savoury fillings for a lunchbox twist.
Ingredients You’ll Need
- 250g plain flour
- 1 tablespoon caster sugar
- 1 teaspoon baking powder
- ½ teaspoon salt
- 115g cold unsalted butter, cubed
- 120ml cold milk
- 1 large egg, beaten (for egg wash)
- 200g strawberry jam (or your favourite fruit jam)
- 150g icing sugar
- 2 tablespoons milk (for the icing)
- ½ teaspoon vanilla extract
- Sprinkles or coloured sugar (optional, for decoration)
Tip: Keep your butter and milk as cold as possible — this ensures the pastry stays flaky rather than dense. I pop my cubed butter in the freezer for 10 minutes before starting.
How to Make Homemade Toaster Pastries (Gelatin-Free Icing)
- Make the pastry dough: In a large mixing bowl, whisk together the flour, caster sugar, baking powder, and salt. Add the cold cubed butter and rub it into the flour using your fingertips until the mixture resembles coarse breadcrumbs — you should see small, pea-sized pieces of butter remaining. Add the cold milk and stir with a wooden spoon until a shaggy dough forms. The dough should feel cool to the touch and hold together when pinched.
- Chill and roll: Turn the dough onto a lightly floured surface and bring it together into a rectangle. Wrap in cling film and refrigerate for 15 minutes — this resting time relaxes the gluten and keeps the pastry tender. After resting, roll the dough into a large rectangle about 3mm thick. The dough should feel smooth and slightly firm, not sticky.
- Cut and fill: Using a sharp knife or pastry wheel, cut the dough into 8 equal rectangles (about 10cm by 12cm each). Spoon 1 tablespoon of jam into the centre of 4 rectangles, leaving a 1cm border around the edges. Brush the edges of these bottom rectangles with beaten egg — you’ll see the egg wash glisten on the dough. Place the remaining 4 rectangles on top and press the edges firmly to seal. Press the tines of a fork along the sealed edges to create a decorative crimp; this also ensures the filling stays inside during baking.
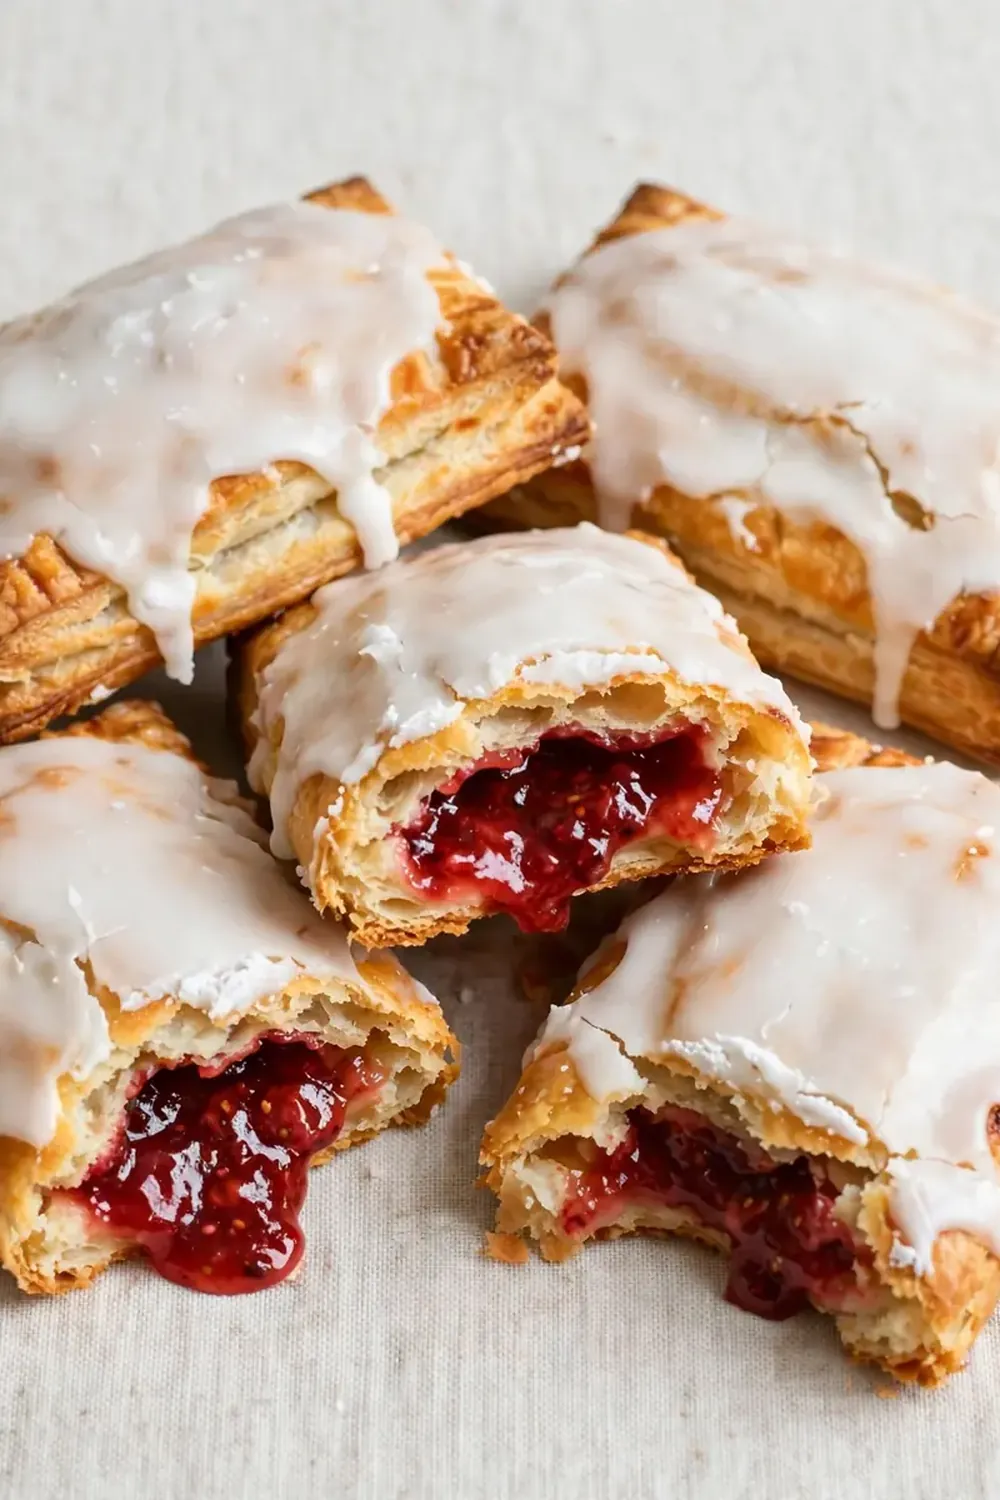
- Bake until golden: Preheat your oven to 190°C (fan-assisted). Place the pastries on a baking sheet lined with parchment paper, spacing them about 3cm apart. Brush the tops with the remaining beaten egg — this gives them a deep golden-brown sheen. Bake for 12–14 minutes, rotating the tray halfway through. The pastries are ready when they’re puffed up and the bottoms make a hollow sound when tapped. The edges should be a rich golden brown and the tops glossy from the egg wash.
- Cool completely: Transfer the pastries to a wire rack and let them cool for at least 20 minutes. The pastries need to be completely cool to the touch before icing — if they’re even slightly warm, the icing will slide right off. You should hear a slight crackle as they cool on the rack.
- Prepare the gelatin-free icing: In a small bowl, whisk together the icing sugar, 2 tablespoons of milk, and vanilla extract until smooth. The icing should be thick enough to coat the back of a spoon but runny enough to drizzle — if it’s too thick, add a drop more milk; if too thin, add a little more icing sugar. The texture should look like thick double cream and feel silky when stirred.
- Ice and decorate: Spoon the icing over the cooled pastries, using the back of the spoon to spread it evenly to the edges. The icing will set within 10 minutes, forming a smooth, glossy shell that cracks slightly when bitten. Add sprinkles immediately after icing, before it sets. Let the icing set completely for another 15 minutes before serving or storing.
Tips From My Kitchen
- Freeze individually on a tray: After baking and cooling, place the un-iced pastries on a baking sheet in the freezer for 1 hour. Once frozen solid, transfer them to a freezer bag. This stops them from sticking together and means you can grab one at a time. After testing this recipe five times, I finally got it just right — this method keeps them separate and easy to access.
- Toast from frozen, not thawed: Pop a frozen pastry straight into the toaster on a medium setting for 2–3 minutes. If you thaw them first, the pastry becomes soggy. Straight from the freezer, the pastry crisps up beautifully while the inside stays soft and warm.
- Use a ruler for even pastries: Measure your rectangles before cutting — uneven sizes mean uneven baking. A quick measure with a ruler ensures all pastries are the same thickness and bake at the same rate. I use a 10cm by 12cm template cut from cardboard for perfect uniformity.
- Don’t overfill: It’s tempting to add extra jam, but too much filling will leak during baking and burn on the tray. One tablespoon per pastry is the perfect amount — the jam should sit in the centre without spreading to the edges.
- Chill the dough twice for extra flakiness: If you have time, chill the rolled-out dough for another 10 minutes before cutting. This second chill firms up the butter again, creating steam pockets during baking that result in lighter, flakier layers.
- Seal with water if eggs are scarce: If you don’t have an egg for the wash, brush the edges with cold water instead. The seal won’t be quite as strong, but it still works — just press the fork tines firmly to ensure a good crimp.
Equipment You’ll Need
- Large mixing bowl
- Rolling pin
- Sharp knife or pastry wheel
- Baking sheet lined with parchment paper
- Wire cooling rack
- Pastry brush
- Small whisk or fork for icing
Common Mistakes to Avoid
- Overcrowding the pan: Placing pastries too close together traps steam, making them soft rather than crisp. Space them at least 3cm apart so hot air circulates evenly around each pastry, giving you that golden, flaky exterior all over.
- Wrong temperature: If your oven is too cool, the butter melts before the pastry sets, resulting in dense, greasy pastries. If it’s too hot, the outside burns before the inside cooks through. Stick to 190°C fan-assisted and use an oven thermometer if your oven runs hot or cold.
- Skipping the rest time: The 15-minute chill in the fridge isn’t just for show — it relaxes the gluten so the pastry stays tender, and it firms up the butter so you get those beautiful flaky layers. Rushing this step leads to tough, chewy pastries that spread during baking.
- Icing while warm: I’ve done this in a hurry and regretted it every time. Warm pastries turn the icing into a runny mess that pools on the tray rather than setting into that perfect glossy shell. Wait until the pastries are completely cool to the touch — about 20 minutes on a wire rack.
Delicious Variations to Try
- Spicy Version: Add ½ teaspoon of ground cinnamon and ¼ teaspoon of ground ginger to the flour mixture for a warming spice note. Fill with apple compote or pumpkin butter for an autumn twist that pairs beautifully with a cup of tea.
- Vegetarian/Vegan Option: Replace the butter with cold coconut oil or a plant-based block butter, and use oat milk in both the dough and icing. For the egg wash, brush the pastries with a mixture of 1 tablespoon of maple syrup and 1 tablespoon of oat milk — it gives the same golden sheen without any animal products.
- Different Protein: For a savoury breakfast version, fill the pastries with a mixture of cooked shredded chicken and cream cheese, seasoned with a pinch of smoked paprika. Omit the icing and sprinkle with sesame seeds before baking — these are brilliant for lunchboxes alongside some Healthy Peanut Butter Banana Muffins.
What to Serve With Homemade Toaster Pastries (Gelatin-Free Icing)
- A bowl of fresh berries or sliced banana for a fresh contrast to the sweet pastry
- A dollop of Greek yoghurt or thick natural yoghurt to balance the sweetness
- A glass of cold milk or a warm mug of herbal tea for a calming breakfast
- For a more substantial spread, serve alongside scrambled eggs or a simple frittata
- If you’re feeling indulgent, these pastries are lovely with a scoop of vanilla ice cream for an impromptu dessert — similar in spirit to the Elegant Mini Chocolate Desserts For Gatherings I make when we have company
Frequently Asked Questions
Can I use a different type of jam or filling?
Absolutely — any fruit jam works well, though I’d avoid very runny jams like marmalade as they tend to leak during baking. For a thicker filling, try lemon curd, chocolate spread, or even a spoonful of Nutella. If using fresh fruit, cook it down with a little sugar and cornflour first to thicken it, otherwise the moisture will make the pastry soggy.
How do I store these toaster pastries?
Once fully cooled and the icing has set, store the pastries in an airtight container at room temperature for up to 3 days. For longer storage, freeze them un-iced on a tray, then transfer to a freezer bag — they’ll keep for up to 3 months. Add the icing after defrosting and toasting for the best texture and appearance.
Why did my icing turn out runny or not set?
Runny icing usually means you’ve added too much milk — start with 1½ tablespoons and add more drop by drop until you reach the right consistency. If the icing refuses to set, your pastries might have been slightly warm when you applied it. Let the pastries cool completely on a wire rack for at least 20 minutes before icing.
Can I make the dough ahead of time?
Yes, you can prepare the dough up to 2 days in advance. Wrap it tightly in cling film and keep it in the fridge. When you’re ready to use it, let it sit at room temperature for 5 minutes to soften slightly before rolling — if it’s too cold, it will crack and be difficult to roll out evenly.
My pastries leaked jam during baking — what went wrong?
This usually happens when the edges aren’t sealed properly or when too much filling is used. Make sure to brush the edges with egg wash and press firmly with a fork to create a tight seal. Also, don’t overfill — one tablespoon per pastry is the sweet spot. If your jam is particularly runny, stir in a teaspoon of cornflour before spooning it onto the dough.
Homemade Toaster Pastries (Gelatin-Free Icing)
Flaky, buttery homemade toaster pastries filled with strawberry jam and topped with a glossy, gelatin-free vanilla icing. A fun and delicious breakfast or snack that can be customized with your favorite jam and sprinkles.
Ingredients
Method
- Make the pastry dough: In a large mixing bowl, whisk together the flour, caster sugar, baking powder, and salt. Add the cold cubed butter and rub it into the flour using your fingertips until the mixture resembles coarse breadcrumbs — you should see small, pea-sized pieces of butter remaining. Add the cold milk and stir with a wooden spoon until a shaggy dough forms. The dough should feel cool to the touch and hold together when pinched.
- Chill and roll: Turn the dough onto a lightly floured surface and bring it together into a rectangle. Wrap in cling film and refrigerate for 15 minutes — this resting time relaxes the gluten and keeps the pastry tender. After resting, roll the dough into a large rectangle about 3mm thick. The dough should feel smooth and slightly firm, not sticky.
- Cut and fill: Using a sharp knife or pastry wheel, cut the dough into 8 equal rectangles (about 10cm by 12cm each). Spoon 1 tablespoon of jam into the centre of 4 rectangles, leaving a 1cm border around the edges. Brush the edges of these bottom rectangles with beaten egg — you'll see the egg wash glisten on the dough. Place the remaining 4 rectangles on top and press the edges firmly to seal. Press the tines of a fork along the sealed edges to create a decorative crimp; this also ensures the filling stays inside during baking.
- Bake until golden: Preheat your oven to 190°C (fan-assisted). Place the pastries on a baking sheet lined with parchment paper, spacing them about 3cm apart. Brush the tops with the remaining beaten egg — this gives them a deep golden-brown sheen. Bake for 12–14 minutes, rotating the tray halfway through. The pastries are ready when they're puffed up and the bottoms make a hollow sound when tapped. The edges should be a rich golden brown and the tops glossy from the egg wash.
- Cool completely: Transfer the pastries to a wire rack and let them cool for at least 20 minutes. The pastries need to be completely cool to the touch before icing — if they're even slightly warm, the icing will slide right off. You should hear a slight crackle as they cool on the rack.
- Prepare the gelatin-free icing: In a small bowl, whisk together the icing sugar, 2 tablespoons of milk, and vanilla extract until smooth. The icing should be thick enough to coat the back of a spoon but runny enough to drizzle — if it's too thick, add a drop more milk; if too thin, add a little more icing sugar. The texture should look like thick double cream and feel silky when stirred.
- Ice and decorate: Spoon the icing over the cooled pastries, using the back of the spoon to spread it evenly to the edges. The icing will set within 10 minutes, forming a smooth, glossy shell that cracks slightly when bitten. Add sprinkles immediately after icing, before it sets. Let the icing set completely for another 15 minutes before serving or storing.
Notes
Ensure the pastries are completely cool before icing to prevent the icing from sliding off. The dough must stay cold for best texture. The nutrition values are estimates and may vary based on exact ingredients used.
I’d love to hear how these turn out in your kitchen — drop a comment below and let me know which filling you chose, or if you came up with a clever variation of your own. Happy baking!