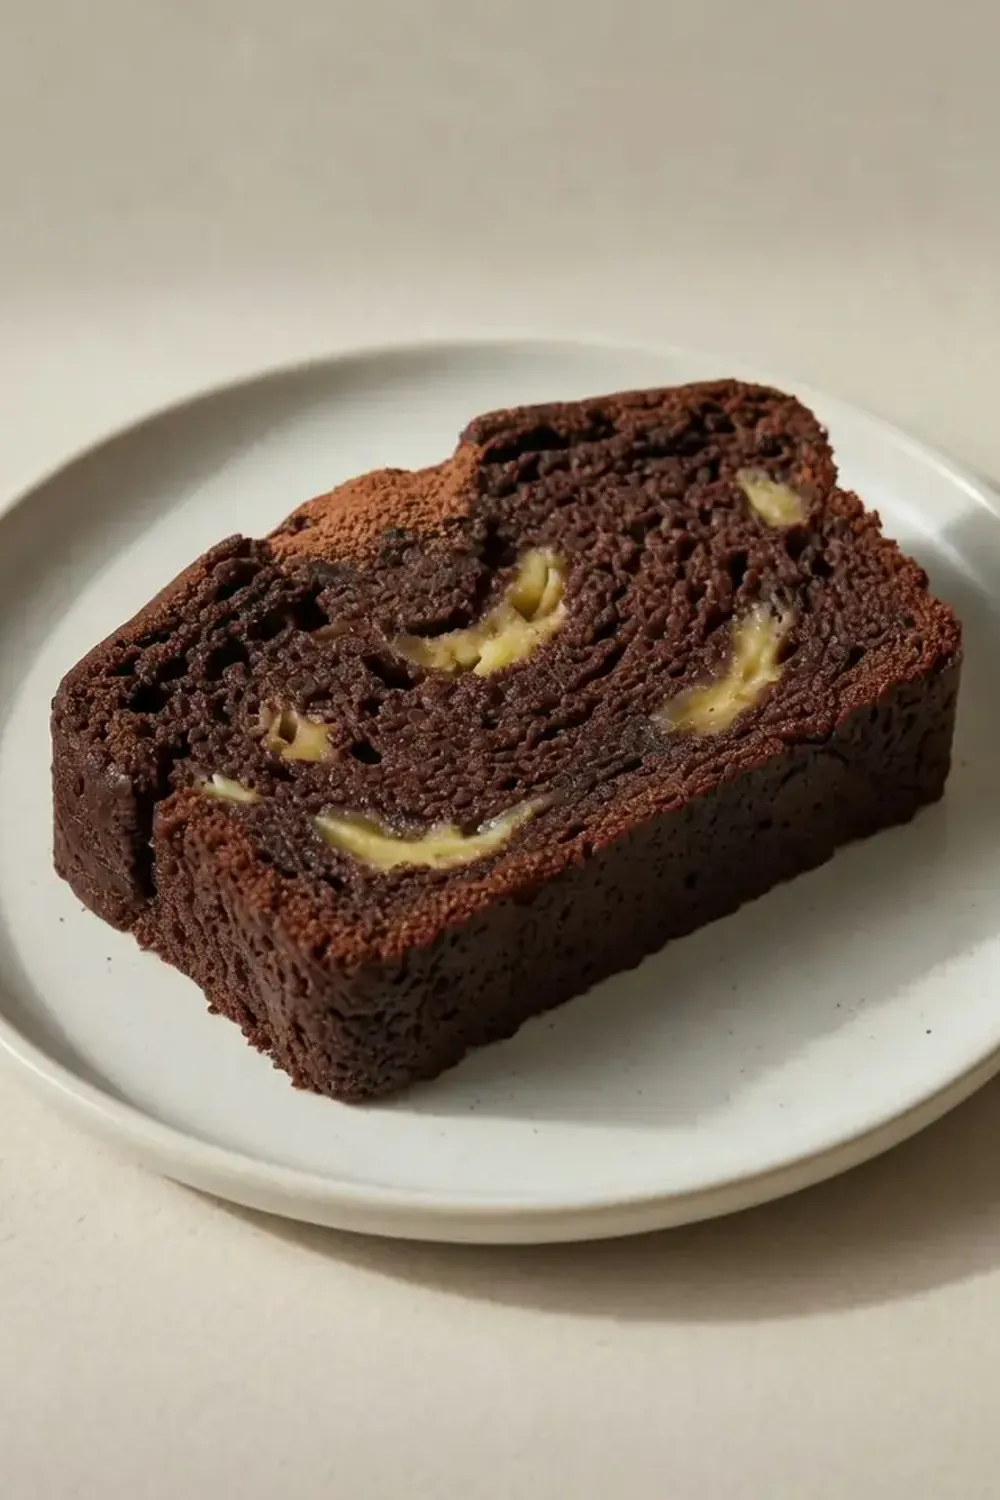
Rich Chocolate Banana Bread For A Sweet Snack
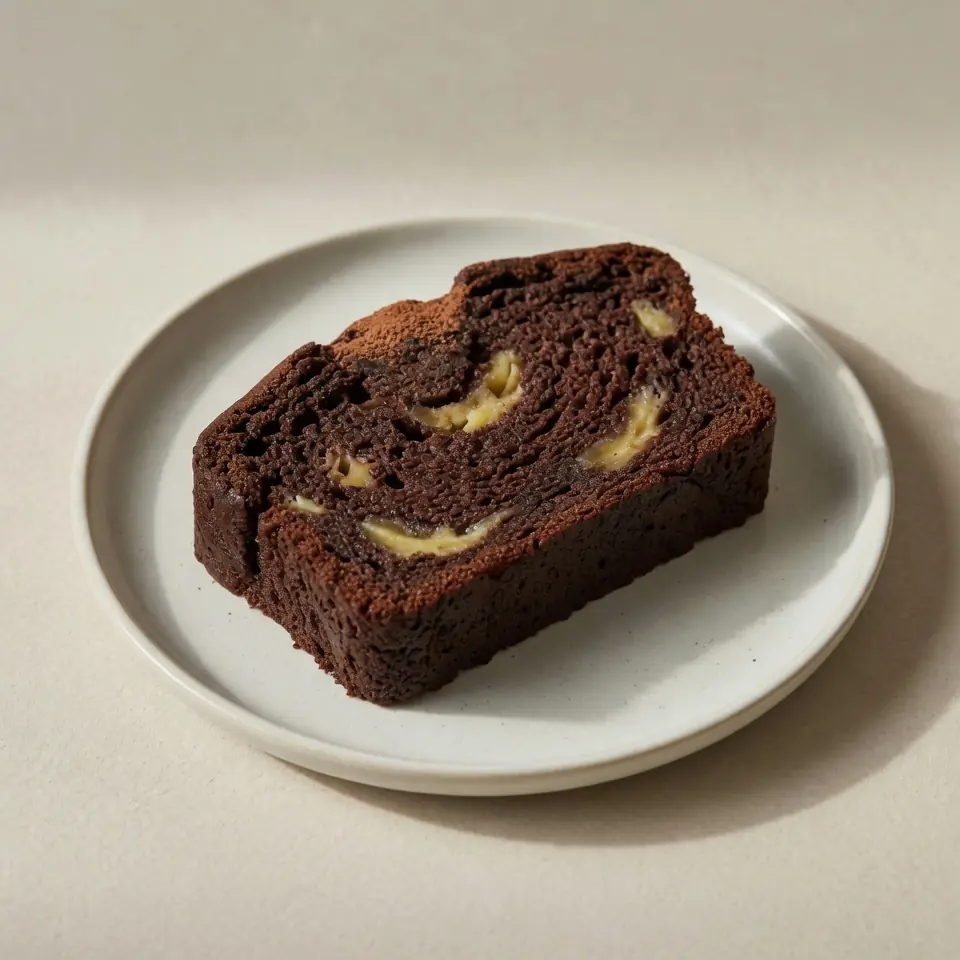
Last Tuesday, after a chaotic day of school runs, football practice, and a last-minute work deadline, I threw this rich chocolate banana bread together in under fifteen minutes. My kids absolutely devour this every time I make it, and the fact that I can mix it in one bowl while they finish their homework is a lifesaver.
Recipe Overview
- Prep Time: 10 minutes
- Cook Time: 50 minutes
- Total Time: 1 hour
- Servings: 10 generous slices
- Difficulty: Easy
Why You’ll Love This Rich Chocolate Banana Bread for a Sweet Snack
- One-bowl mixing: You only need a single mixing bowl, which means less washing up after a busy evening.
- Uses up spotty bananas: Those overripe bananas sitting on your counter finally have a glorious purpose — they add natural sweetness and moisture without extra sugar.
- Make-ahead champion: Bake it on Sunday, and you have ready-to-go snacks for the entire school and work week.
- No fancy equipment required: A fork, a bowl, and a loaf tin are all you need — no stand mixer necessary if you do not own one.
- Freezes beautifully: Double the recipe, freeze one loaf whole, and you will always have a sweet snack ready when the week gets hectic.
Ingredients You’ll Need
- 3 large ripe bananas (about 350g total with skins on)
- 80ml vegetable oil or melted unsalted butter
- 150g caster sugar
- 2 large eggs
- 1 teaspoon vanilla extract
- 190g plain flour
- 60g good-quality cocoa powder
- 1 teaspoon bicarbonate of soda
- ½ teaspoon baking powder
- ½ teaspoon salt
- 100g dark chocolate chips (plus extra for scattering on top)
- 120ml plain yoghurt or buttermilk
Tip: For the richest flavour, use bananas that are heavily speckled with brown spots — they mash more easily and provide deeper sweetness. If your bananas are not quite ripe enough, pop them in a warm oven (120°C) for ten minutes to soften.
How to Make Rich Chocolate Banana Bread for a Sweet Snack
- Preheat your oven to 180°C (160°C fan). Grease a 2lb loaf tin and line it with a strip of parchment paper, leaving an overhang on two sides — this makes lifting the baked loaf out effortless later. You should hear a faint hum from the oven as it reaches temperature.
- Mash the bananas in a large mixing bowl. Use a fork to break them down until you have a lumpy, wet purée with no large chunks remaining. The bananas should smell intensely sweet and feel almost slippery against the fork tines.
- Add the oil, sugar, eggs, vanilla, and yoghurt. Whisk everything together until the mixture is smooth and glossy, with a pale brown colour. You should see small bubbles forming on the surface as the ingredients emulsify.
- Sift the flour, cocoa powder, bicarbonate of soda, baking powder, and salt into the wet mixture. Fold gently with a rubber spatula — stop as soon as you see no more streaks of white flour. The batter will look thick, dark, and slightly shiny, with a texture like a rich chocolate milkshake.
- Fold in the chocolate chips. Reserve a small handful for the top. The batter should feel heavy and smell deeply of cocoa and banana. Do not overmix, or your bread will turn out tough rather than tender.
- Pour the batter into the prepared loaf tin. Spread it evenly with the spatula, then scatter the reserved chocolate chips on top. The surface should be level and slightly domed in the centre.
- Bake for 45 to 55 minutes. After 40 minutes, check by inserting a skewer into the centre — it should emerge with a few moist crumbs clinging to it, not wet batter. The top should be cracked and firm to a light touch, and the kitchen will smell like a cosy bakery.
- Cool in the tin for fifteen minutes. Lift the bread out using the parchment overhang and transfer to a wire rack. You will hear a slight crackling sound as the crust settles. Let it cool completely before slicing — this takes about an hour but is essential for clean slices.
Tips From My Kitchen
- Use room-temperature ingredients: Cold eggs and yoghurt can cause the batter to seize up, resulting in a dense, uneven crumb. Take everything out of the fridge twenty minutes before you start mixing — the batter will come together much more smoothly and produce a loftier rise.
- Do not overmix the batter: Once you add the dry ingredients, you are building the structure of the bread. Overmixing develops gluten, which makes the loaf tough and rubbery rather than soft and tender. Fold only until the flour disappears — a few small lumps are perfectly fine and will bake out.
- Check your cocoa powder: Not all cocoa powders are created equal. Dutch-processed cocoa gives a darker, more mellow flavour, while natural cocoa is lighter and more acidic. Either works, but adjust the leavening accordingly — natural cocoa needs the bicarbonate of soda to neutralise its acidity, so do not swap them without adjusting.
- Line your tin properly: I used to struggle with this dish until I discovered the parchment overhang technique. It saves you from the frustration of torn slices and stuck bottoms. Cut the parchment wide enough to cover the base and two long sides, leaving a few centimetres extra for gripping.
- Test for doneness with your senses: The skewer test is reliable, but also pay attention to the smell. When the bread is nearly done, the aroma shifts from raw batter to a deep, toasted chocolate scent. The top will also spring back when you press it gently with your fingertip.
- Slice with a serrated knife: A sharp, serrated knife cuts through the crust cleanly without squashing the soft interior. Use a gentle sawing motion rather than pressing down hard — this keeps each slice intact and presentable.
Equipment You’ll Need
- Stand mixer or hand mixer (optional — a whisk and strong arm work just as well)
- Large mixing bowl
- Rubber spatula or wooden spoon
- 2lb loaf tin
- Parchment paper
- Wire cooling rack
- Serrated knife for slicing
Common Mistakes to Avoid
- Overcrowding the pan: If you try to bake all the batter in a smaller tin, the centre will remain raw while the edges burn. Always use a properly sized 2lb loaf tin, and never fill it more than two-thirds full. If you only have a smaller tin, divide the batter between two mini loaf tins and reduce the baking time to 30 minutes.
- Wrong temperature: Baking at too high a temperature will give you a burnt crust and a gooey, undercooked middle. Stick to 180°C (160°C fan) and use an oven thermometer if your oven runs hot — many home ovens are off by as much as 20 degrees.
- Skipping the rest time: Cutting into warm banana bread is tempting, but the crumb needs time to set. Slicing too early will result in a gummy, falling-apart mess. Let the loaf cool completely on a wire rack — about one hour — before you even think about picking up that knife.
Delicious Variations to Try
- Spicy Version: Add ½ teaspoon of ground cinnamon and a pinch of cayenne pepper to the dry ingredients. The warmth of the spice complements the dark chocolate beautifully without overwhelming the banana flavour.
- Vegetarian/Vegan Option: Replace the eggs with two flax eggs (2 tablespoons ground flaxseed mixed with 5 tablespoons water, left to thicken for ten minutes). Swap the yoghurt for a plant-based alternative, and use coconut oil instead of butter. The texture will be slightly denser but equally delicious.
- Different Protein: Swap 30g of the plain flour for chocolate protein powder for a more filling snack that still tastes indulgent. You may need to add an extra tablespoon of yoghurt to maintain the right moisture level.
What to Serve With Rich Chocolate Banana Bread for a Sweet Snack
- A generous spread of salted butter or nut butter for extra richness
- A glass of cold milk or a warm mug of tea for dunking
- A dollop of Greek yoghurt and a drizzle of honey for a more substantial breakfast
- A scoop of vanilla ice cream for an impromptu dessert after dinner
Frequently Asked Questions
Rich Chocolate Banana Bread for a Sweet Snack
Ingredients
Method
-
Preheat your oven to 180°C (160°C fan). Grease a 2lb loaf tin and line it with a strip of parchment paper, leaving an overhang on two sides — this makes lifting the baked loaf out effortless later. You should hear a faint hum from the oven as it reaches temperature.
-
Mash the bananas in a large mixing bowl. Use a fork to break them down until you have a lumpy, wet purée with no large chunks remaining. The bananas should smell intensely sweet and feel almost slippery against the fork tines.
-
Add the oil, sugar, eggs, vanilla, and yoghurt. Whisk everything together until the mixture is smooth and glossy, with a pale brown colour. You should see small bubbles forming on the surface as the ingredients emulsify.
-
Sift the flour, cocoa powder, bicarbonate of soda, baking powder, and salt into the wet mixture. Fold gently with a rubber spatula — stop as soon as you see no more streaks of white flour. The batter will look thick, dark, and slightly shiny, with a texture like a rich chocolate milkshake.
-
Fold in the chocolate chips. Reserve a small handful for the top. The batter should feel heavy and smell deeply of cocoa and banana. Do not overmix, or your bread will turn out tough rather than tender.
-
Pour the batter into the prepared loaf tin. Spread it evenly with the spatula, then scatter the reserved chocolate chips on top. The surface should be level and slightly domed in the centre.
-
Bake for 45 to 55 minutes. After 40 minutes, check by inserting a skewer into the centre — it should emerge with a few moist crumbs clinging to it, not wet batter. The top should be cracked and firm to a light touch, and the kitchen will smell like a cosy bakery.
-
Cool in the tin for fifteen minutes. Lift the bread out using the parchment overhang and transfer to a wire rack. You will hear a slight crackling sound as the crust settles. Let it cool completely before slicing — this takes about an hour but is essential for clean slices.
Notes
I hope this rich chocolate banana bread becomes a regular fixture in your weeknight rotation, just as it has in mine. If you give it a try, I would love to hear how it turned out for your family — drop a comment below and let me know what variations you experimented with. For more sweet snack ideas that fit into a busy schedule, have a look at our Strawberry Cheesecake Danish For A Sweet Brunch Treat or browse our Breakfast Recipes for more inspiration. Happy baking, friends.
