30-Min No-Bake Oreo Cheesecake for Busy Nights
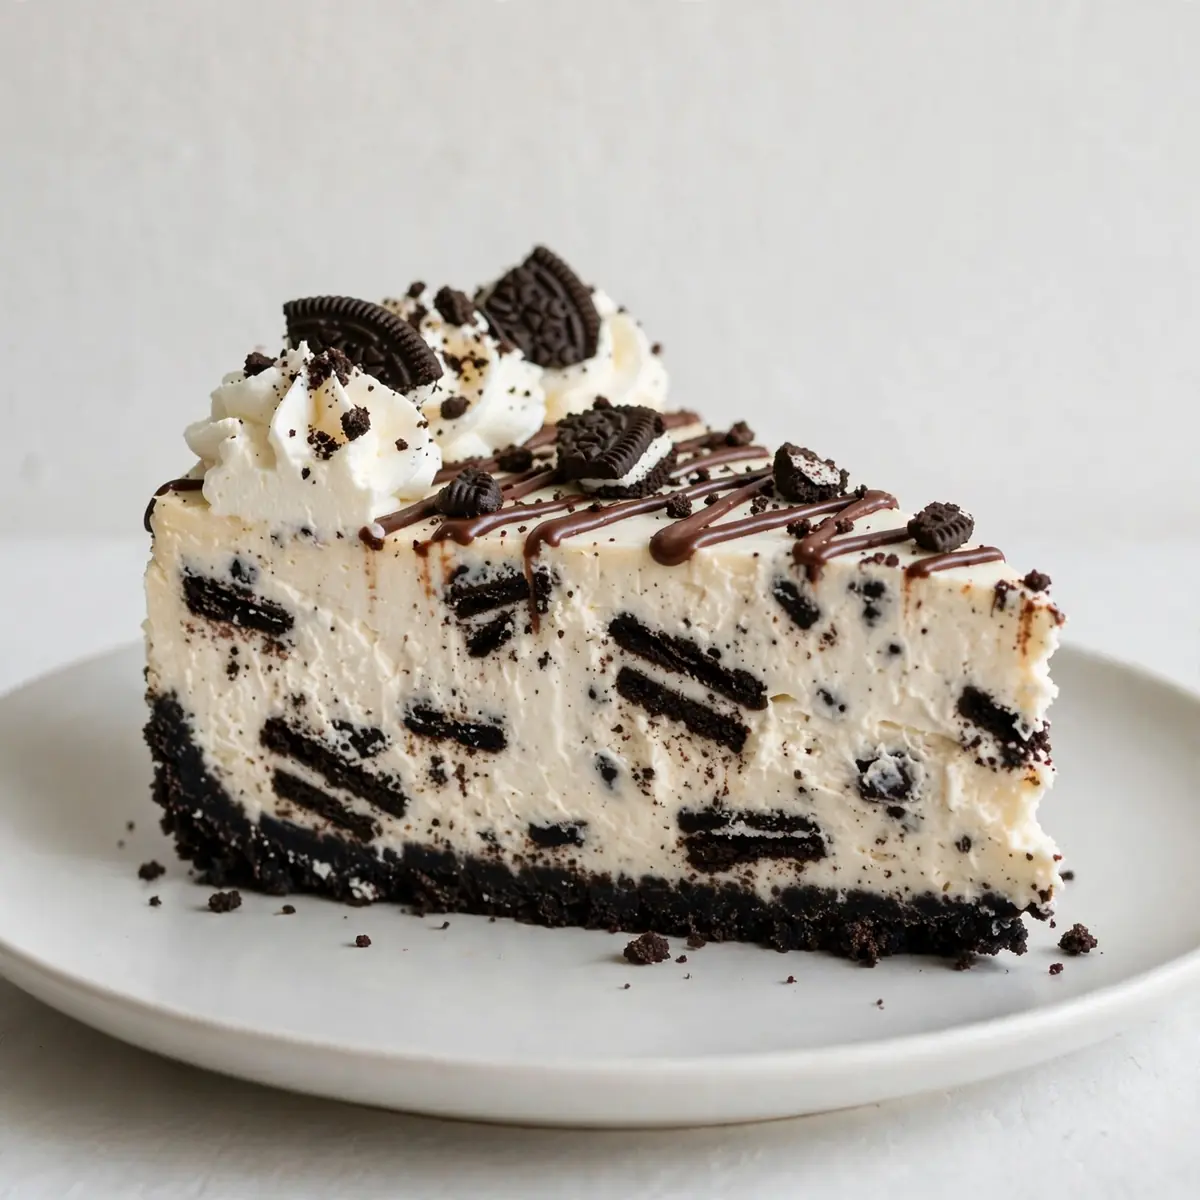
After a long day of school runs, homework battles, and after-school clubs, the last thing I want is a sink full of dishes and an hour of oven time. This No-Bake Oreo Cheesecake is my secret weapon for a weeknight dessert that feels like a triumph but requires almost no effort, leaving me free to put my feet up.
Recipe Overview
- Preparation Time: 20 minutes
- Chilling Time: 4 hours (or overnight for best results)
- Total Time: 4 hours 20 minutes
- Servings: 10-12 slices
- Difficulty: Easy
Why You’ll Love This No-Bake Oreo Cheesecake
- No Oven Required: This keeps your kitchen cool on warm evenings and frees up the oven for the main meal, like a roasted chicken or lasagne.
- Minimal Washing Up: You only need one bowl for the filling, a food processor or a bag and rolling pin for the base, and a springform tin. That’s it.
- Make-Ahead Champion: You can assemble this entire cheesecake the night before or even two days in advance. It actually tastes better after a full chill in the fridge.
- Quick Assembly: From starting to scrape the cream cheese to pressing the base into the tin takes under twenty minutes. This is faster than most takeaway deliveries.
- Kid-Friendly Task: This is a brilliant recipe to get little hands involved. They can crush the biscuits, stir the mixture, and arrange the topping without any hot surfaces or sharp knives.
Ingredients You’ll Need
- 300g Oreo biscuits (standard pack, filling included)
- 80g unsalted butter, melted
- 500g full-fat cream cheese, softened to room temperature
- 100g caster sugar
- 1 teaspoon vanilla extract
- 300ml double cream
- 80g icing sugar, sifted
- 10-12 extra Oreo biscuits, roughly chopped (for folding through and decoration)
Tip: For the creamiest texture, ensure your cream cheese is truly at room temperature. If you forget to take it out of the fridge, place the sealed block in a bowl of warm (not hot) water for ten minutes to soften it gently.
Equipment You’ll Need
- Food processor or a sturdy zip-lock bag and a rolling pin
- 20cm (8-inch) springform tin
- Large mixing bowl
- Electric hand mixer or stand mixer with whisk attachment
- Spatula
- Small saucepan or microwave-safe bowl
How to Make No-Bake Oreo Cheesecake
- Make the biscuit base: Place 300g of Oreo biscuits (filling and all) into your food processor. Blitz until you have a fine, dark crumb that resembles damp sand. If you haven’t got a processor, put the biscuits in a zip-lock bag and bash them with a rolling pin until they are uniformly crushed. You want the texture to be consistent, with no large chunks remaining. The crumbs should feel slightly claggy when you press them between your fingers.
- Bind the base: Pour the melted butter over the biscuit crumbs and stir with a fork until every crumb is coated. The mixture should look like wet, dark soil and hold together when you squeeze a handful. Tip the mixture into your springform tin and press it down firmly and evenly using the bottom of a glass or a flat measuring cup. The base should feel solid and compact, not loose and crumbly. Place this in the fridge to firm up while you make the filling.
- Whip the cream: In a large, clean bowl, pour in the double cream and sifted icing sugar. Using your electric mixer, whisk on a medium speed until the cream holds soft peaks. You’ll know it’s ready when you lift the beaters and the cream forms a gentle peak that flops over at the tip. The cream should look glossy and thick, not grainy or stiff. Set this bowl aside.
- Make the cream cheese mixture: In a separate large bowl, beat the softened cream cheese with the caster sugar and vanilla extract. Beat on a medium speed until the mixture is completely smooth, silky, and lump-free. Scrape down the sides of the bowl at least once. The texture should be like a thick, luscious mousse, with no gritty sugar remaining. I used to struggle with this step until I discovered the importance of truly softened cream cheese; cold cheese will leave you with lumps.
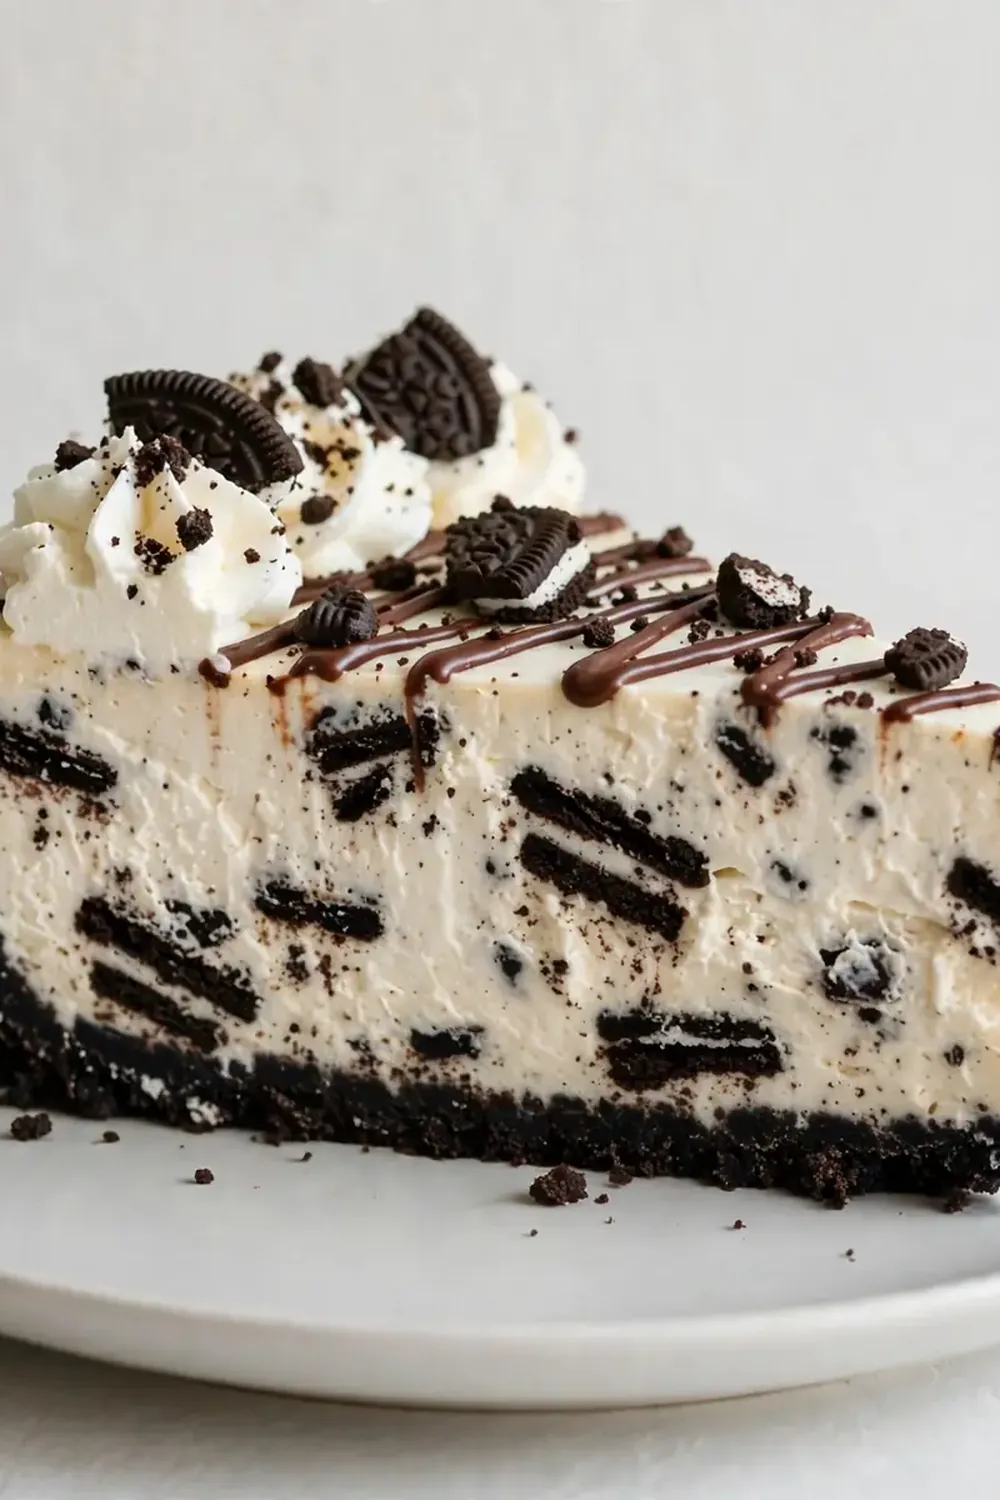
- Fold everything together: Take a large spoonful of the whipped cream and fold it into the cream cheese mixture to loosen it. This is called ‘lightening the mix’. Then, gently fold the remaining whipped cream into the cream cheese until just combined. The mixture should be pale, airy, and voluminous. Finally, fold in the roughly chopped Oreo pieces. You want them evenly distributed throughout the pale filling, creating a lovely speckled effect. I stumbled upon this combination by accident, and it’s been a hit ever since.
- Assemble and chill: Spoon the filling onto the chilled biscuit base. Use a spatula to spread it evenly, right to the edges. Gently tap the tin on the worktop a couple of times to release any air bubbles. The surface should be smooth and flat. Cover the tin with cling film or foil and place it in the refrigerator for a minimum of 4 hours, though overnight is far better. The cheesecake should feel firm to the touch and set cleanly when sliced.
- Serve and decorate: Once set, run a warm, dry knife around the edge of the tin before releasing the springform clasp. Slice the cheesecake with a sharp knife, wiping the blade clean between each cut for neat, clean slices. Decorate with extra whole or halved Oreos and a light dusting of icing sugar just before serving.
Tips From My Kitchen
- Room Temperature Cream Cheese is Non-Negotiable: Cold cream cheese will not blend smoothly, leaving you with a lumpy, gritty filling. It also won’t whip up to the same volume as soft cheese. Set it out on the counter for at least an hour before you start, or use the warm water trick mentioned above. The difference in texture is night and day.
- Don’t Over-Whip the Cream: Whipped cream is the backbone of this no-bake structure. Over-whip it and you’ll end up with a grainy, buttery mess that will separate as it chills. Stop at soft peaks – the cream should be thick enough to hold its shape but still look silky and soft. If you see it start to look slightly lumpy, you’ve gone too far.
- Press the Biscuit Base Firmly: A loose base will crumble when you try to slice the cheesecake. Use a flat-bottomed glass or a measuring cup to really compact the crumbs. The pressure is key. You want the base to feel like a solid, dense slab, not a pile of loose sand. This is your foundation.
- Chill for a Full 4 Hours (or Overnight): This is not a recipe you can rush. The filling needs time to set properly so it slices cleanly. A half-set cheesecake will be a sloppy mess. I always make mine the night before I plan to serve it. The extended chill time allows the flavours to meld and the texture to become perfectly creamy and firm.
- Use a Springform Tin for Easy Removal: A standard cake tin will make it very difficult to get the cheesecake out in one piece. A springform tin with a removable base is essential. Line the bottom with a circle of parchment paper for extra insurance – it makes sliding the first slice off the base effortless.
What to Serve With No-Bake Oreo Cheesecake
- A dollop of lightly whipped cream and a scattering of fresh raspberries, as the sharpness cuts through the richness.
- A drizzle of warm chocolate sauce or a spoonful of salted caramel.
- A strong cup of black coffee or a glass of cold milk for the children.
- For a lighter option, serve alongside a bowl of fresh strawberries or a simple fruit salad.
Still hungry for ideas? You might also love No Bake Mango Cheesecake, No Bake Pasta Salad Chickpeas from our sister kitchens.
Frequently Asked Questions
No-Bake Oreo Cheesecake
Ingredients
Method
- Make the biscuit base: Place 300g of Oreo biscuits (filling and all) into your food processor. Blitz until you have a fine, dark crumb that resembles damp sand. If you haven't got a processor, put the biscuits in a zip-lock bag and bash them with a rolling pin until they are uniformly crushed. You want the texture to be consistent, with no large chunks remaining. The crumbs should feel slightly claggy when you press them between your fingers.
- Bind the base: Pour the melted butter over the biscuit crumbs and stir with a fork until every crumb is coated. The mixture should look like wet, dark soil and hold together when you squeeze a handful. Tip the mixture into your springform tin and press it down firmly and evenly using the bottom of a glass or a flat measuring cup. The base should feel solid and compact, not loose and crumbly. Place this in the fridge to firm up while you make the filling.
- Whip the cream: In a large, clean bowl, pour in the double cream and sifted icing sugar. Using your electric mixer, whisk on a medium speed until the cream holds soft peaks. You'll know it's ready when you lift the beaters and the cream forms a gentle peak that flops over at the tip. The cream should look glossy and thick, not grainy or stiff. Set this bowl aside.
- Make the cream cheese mixture: In a separate large bowl, beat the softened cream cheese with the caster sugar and vanilla extract. Beat on a medium speed until the mixture is completely smooth, silky, and lump-free. Scrape down the sides of the bowl at least once. The texture should be like a thick, luscious mousse, with no gritty sugar remaining. I used to struggle with this step until I discovered the importance of truly softened cream cheese; cold cheese will leave you with lumps.
- Fold everything together: Take a large spoonful of the whipped cream and fold it into the cream cheese mixture to loosen it. This is called 'lightening the mix'. Then, gently fold the remaining whipped cream into the cream cheese until just combined. The mixture should be pale, airy, and voluminous. Finally, fold in the roughly chopped Oreo pieces. You want them evenly distributed throughout the pale filling, creating a lovely speckled effect. I stumbled upon this combination by accident, and it's been a hit ever since.
- Assemble and chill: Spoon the filling onto the chilled biscuit base. Use a spatula to spread it evenly, right to the edges. Gently tap the tin on the worktop a couple of times to release any air bubbles. The surface should be smooth and flat. Cover the tin with cling film or foil and place it in the refrigerator for a minimum of 4 hours, though overnight is far better. The cheesecake should feel firm to the touch and set cleanly when sliced.
- Serve and decorate: Once set, run a warm, dry knife around the edge of the tin before releasing the springform clasp. Slice the cheesecake with a sharp knife, wiping the blade clean between each cut for neat, clean slices. Decorate with extra whole or halved Oreos and a light dusting of icing sugar just before serving.
Notes
I hope this becomes your go-to for a stress-free, impressive dessert that fits into even the busiest of weeks. If you give this a try, I’d love to hear how it went for you. Have you tried our No Bake Peach Cobbler Cheesecake Cups or the Creamy Individual Cheesecake Cups With Berries for another quick fix? Let me know in the comments below.