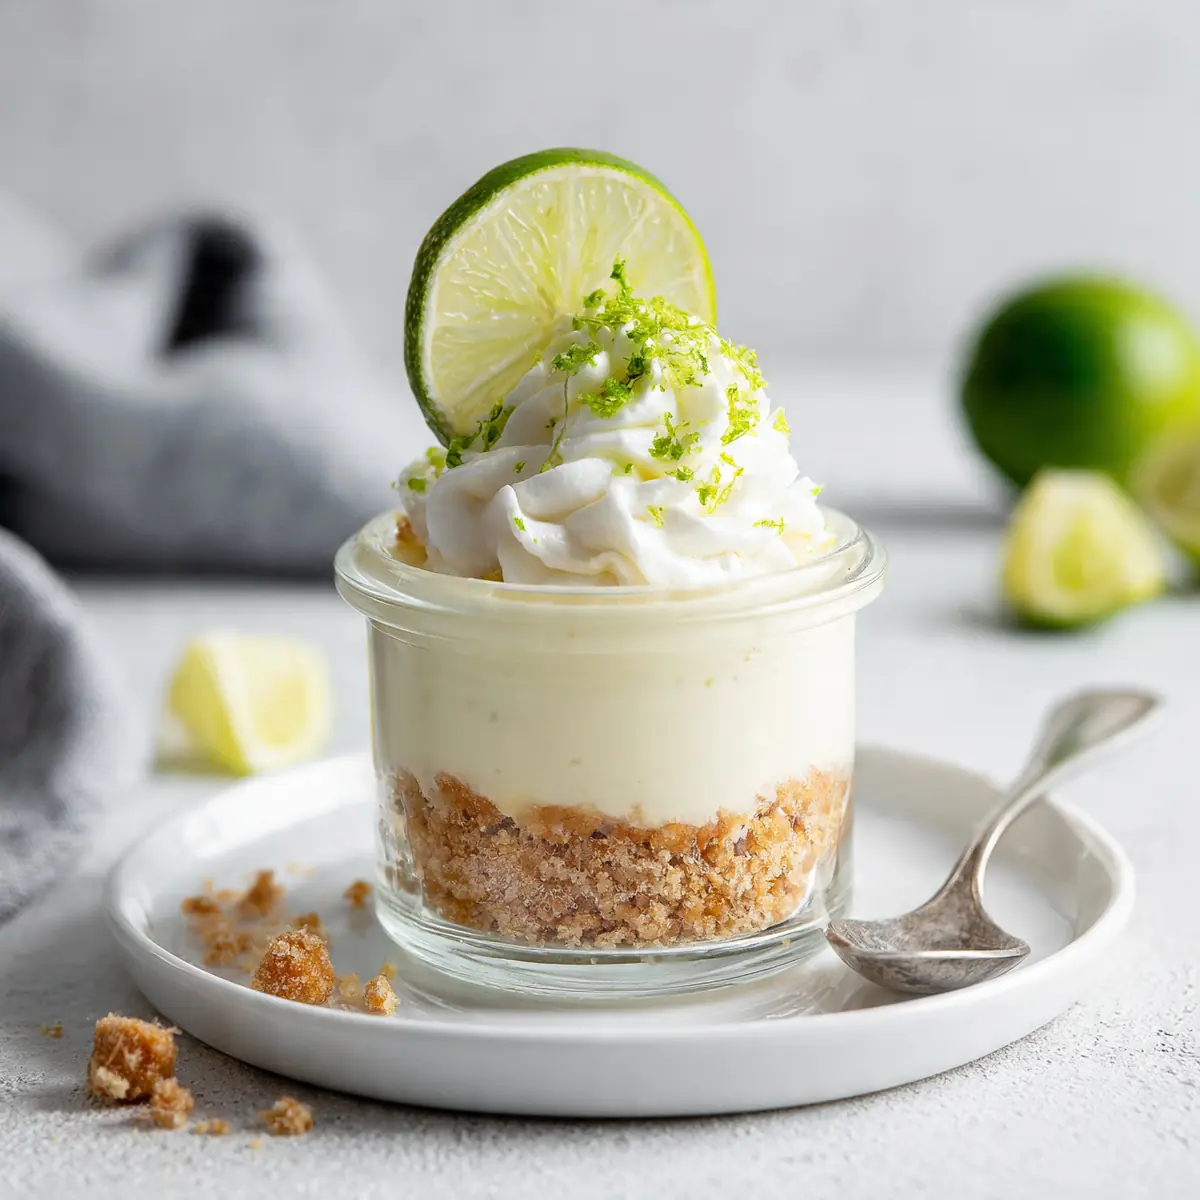
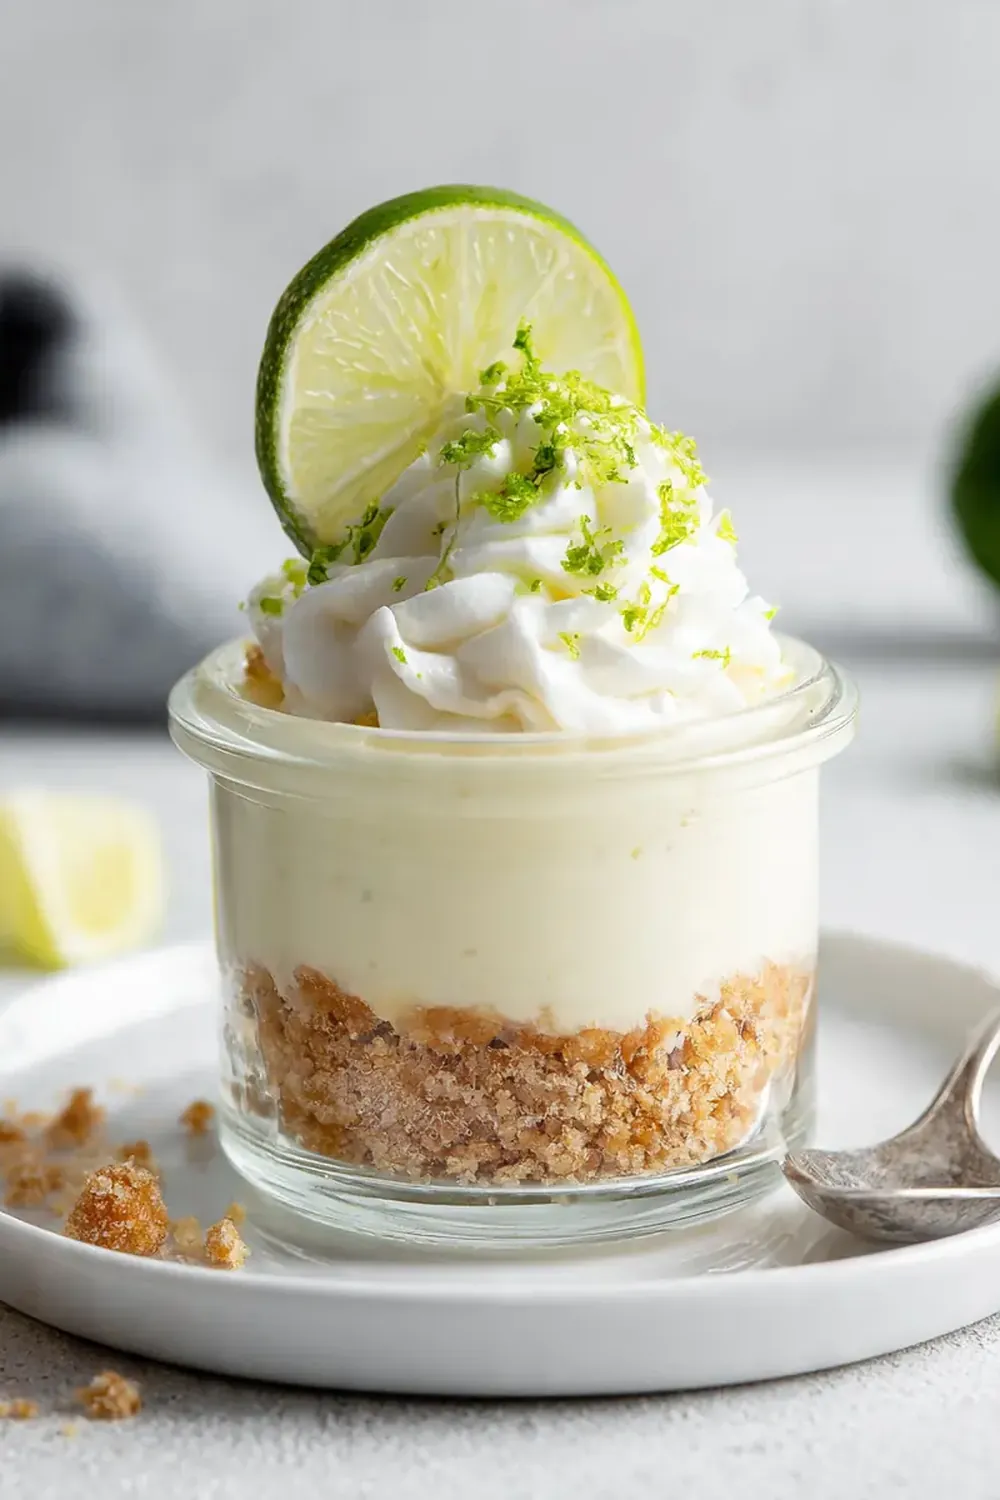
Zesty No Bake Key Lime Cheesecake Jars
As the clock ticks past 5 pm on a Tuesday, the familiar chaos descends upon our household. School bags are dropped, hungry cries emerge, and the universal question echoes: “What’s for dinner?” For years, I found myself scrambling not just for the main course, but for a sweet finish that felt special without adding another layer of stress to an already packed evening. My children, bless them, have always loved a little something sweet after their meal, and frankly, so do I. It’s during these frantic moments, when time is a luxury and a mountain of washing up looms, that I truly appreciate recipes that deliver maximum delight with minimum fuss. That’s precisely why these Zesty No Bake Key Lime Cheesecake Jars have become a firm favourite in our home.
I distinctly remember one particularly hectic week when my eldest had a school play, my youngest was teething, and my work deadlines seemed to multiply overnight. The thought of baking anything felt entirely overwhelming, yet I still wanted to create a moment of joy at the dinner table, perhaps with something like a Crispy Baked Chicken Taquitos Recipe For Dinner. The thought of baking anything felt entirely overwhelming, yet I still wanted to create a moment of joy at the dinner table. It was then, rifling through my fridge, that the idea for these individual cheesecake jars truly solidified. No oven, barely any washing up, and the vibrant, tangy flavour of key lime – it was a revelation. Friends always ask me for this recipe after trying them at casual get-togethers, often surprised at how something so seemingly sophisticated can be so utterly straightforward, making them a fantastic addition to any collection of Delicious Summer Party Desserts For Garden Gatherings, alongside a Sweet Peach Mango Pie With Flaky Pastry Crust, a refreshing Creamy Peach Mousse Trifle For Summer Parties, a Classic Creme Brulee Recipe For Date Night , Festive Pumpkin Thanksgiving Dessert Ideas, or even a selection from 42 Holiday Thanksgiving Desserts And Pies .com/pillow-soft-chocolate-cinnamon-rolls-with-icing/”>Pillow-Soft Chocolate Cinnamon Rolls With Icing, or a Creamy No Bake Strawberry Cheesecake For Two.com/classic-creme-brulee-recipe-for-date-night/”>Classic Creme Brulee Recipe For Date Night, or a Creamy No Bake Strawberry Cheesecake For Two .com/creamy-peach-mousse-trifle-for-summer-parties-2/”>Creamy Peach Mousse Trifle For Summer Parties .com/delicious-summer-party-desserts-for-garden-gatherings-2/”>Delicious Summer Party Desserts For Garden Gatherings .com/sweet-peach-mangcom/creamy-no-bake-strawberry-cheesecake-for-two/”>Creamy No Bake Strawberry Cheesecake For Two.com/creamy-peach-mousse-trifle-for-summer-parties-2/”>Creamy Peach Mousse Trifle For Summer Parties.com/delicious-summer-party-desserts-for-garden-gatherings-2/”>Delicious Summer Party Desserts For Garden Gatherings .com/sweet-peach-mango-pie-with-flaky-pastry-crust-2/”>Sweet Peach Mango Pie With Flaky Pastry Crust.com/delicious-summer-party-desserts-for-garden-gatherings-2/”>Delicious Summer Party Desserts For Garden Gatherings.
These jars aren’t just a dessert; they’re a small act of self-care for the busy family chef. They’re about reclaiming a little bit of peace in the kitchen, offering a genuinely refreshing treat that can be made hours, or even a day, in advance. Imagine the satisfaction of pulling a perfectly chilled, individual dessert from the fridge, ready to serve, while the main course is still simmering. It’s a game-changer for weeknight dinners, transforming a potential culinary rush into a moment of calm and delicious anticipation. It’s all about making life a little sweeter, one zesty spoonful at a time.
Recipe Overview
- Prep Time: 25 minutes
- Chill Time: 2 hours (minimum)
- Total Time: 2 hours 25 minutes
- Servings: 6-8 jars
- Difficulty: Easy
Why You’ll Love This Zesty No Bake Key Lime Cheesecake Jars
- Effortless Elegance: These jars present beautifully with minimal effort, making them ideal for both weeknight treats and casual entertaining.
- No Oven Required: Perfect for warm weather or when you simply don’t want to turn on the oven, saving energy and keeping your kitchen cool.
- Minimal Washing Up: Individual jars mean fewer serving dishes and less mess to clean up after dinner, a godsend on busy evenings.
- Make-Ahead Marvel: Prepare them a day or two in advance and store them in the fridge, ready to grab and enjoy whenever you need a quick dessert.
- Customisable Flavours: While key lime is the star, the base recipe is versatile enough to adapt with different citrus or fruit purees for endless variations.
Ingredients You’ll Need
- 200g digestive biscuits
- 75g unsalted butter, melted
- 400g full-fat cream cheese, softened
- 100g caster sugar
- 60ml key lime juice (freshly squeezed for best flavour)
- Zest of 2-3 key limes (approx. 2 teaspoons)
- 1 teaspoon vanilla extract
- 240ml double cream, chilled
- Optional: Extra lime zest or thin lime slices for garnish
- Optional: Fresh mint leaves for garnish
Tip: Always use full-fat cream cheese for the best texture and richness in your cheesecake. Low-fat versions can make the mixture too watery and less stable.
How to Make Zesty No Bake Key Lime Cheesecake Jars
- Prepare the Biscuit Base: Crush the digestive biscuits until they resemble fine crumbs. You can do this by placing them in a sealed bag and crushing with a rolling pin, or by pulsing in a food processor until you hear a consistent whirring and see a fine, sandy texture. Melt the unsalted butter gently in a small saucepan over a low heat until completely liquid and shimmering. Pour the melted butter over the biscuit crumbs and mix thoroughly until all the crumbs are evenly coated, taking on a slightly darker, moist appearance.
- Assemble the Bases: Divide the buttered biscuit crumbs evenly among 6-8 small jars or glasses. Press the crumbs down firmly into the bottom of each jar using the back of a spoon or a small tamper. This step is crucial for a stable base; you should feel a slight resistance and hear a compacting sound as you press. Place the jars in the refrigerator while you prepare the filling.
- Whip the Cream Cheese Mixture: In a large mixing bowl, beat the softened full-fat cream cheese with the caster sugar using a stand mixer fitted with the whisk attachment, or a hand mixer, on medium speed. Continue mixing until the mixture is light, fluffy, and visibly smooth, with no lumps, typically taking about 2-3 minutes. Scrape down the sides of the bowl to ensure everything is incorporated.
- Add Key Lime Flavour: Gradually beat in the key lime juice, key lime zest, and vanilla extract into the cream cheese mixture. Mix on low speed until just combined. The mixture will smell wonderfully zesty and should have a slightly looser consistency. Be careful not to overmix at this stage, as it can make the filling too thin.
- Whip the Double Cream: In a separate, chilled bowl, whip the cold double cream until stiff peaks form. The cream should hold its shape when you lift the whisk and look visibly thicker and opaque. Be attentive to the sound of your mixer; it will change from a liquid slosh to a thicker, whirring sound as the cream thickens.
- Combine and Fill: Gently fold the whipped double cream into the key lime cream cheese mixture using a spatula. Use a light hand, folding until no streaks of white cream are visible and the mixture is uniformly pale green-yellow and airy. Spoon or pipe the cheesecake filling into the prepared jars over the biscuit base. Fill them nearly to the top, ensuring a smooth surface.
- Chill and Set: Cover each jar loosely with cling film or a lid and refrigerate for a minimum of 2 hours, or preferably overnight. As they chill, the cheesecake will firm up and become beautifully set. When ready to serve, the surface should feel firm to the touch and appear glossy.
Tips From My Kitchen
- Use Fresh Key Lime Juice and Zest: This is arguably the most important tip for true key lime flavour. Bottled lime juice simply doesn’t compare to the bright, aromatic punch of freshly squeezed key limes. The zest contains essential oils that elevate the flavour profile significantly, giving that characteristic vibrant aroma. Using fresh ingredients ensures a truly authentic and refreshing taste that makes all the difference.
- Ensure Ingredients Are at the Right Temperature: For the cream cheese mixture, make sure your full-fat cream cheese is at room temperature. This allows it to whip up smoothly with the sugar, preventing lumps and ensuring a silky-smooth texture. Conversely, the double cream must be thoroughly chilled (and ideally, the bowl and whisk too!) to achieve stiff peaks, which is essential for the cheesecake’s structure and lightness. Temperature control is key to a cohesive and stable filling.
- Don’t Overmix the Filling: Once you’ve added the key lime juice and especially when folding in the whipped cream, mix only until just combined. Overmixing the cream cheese can cause it to become too thin and lose its ability to set properly. Overmixing the whipped cream when combining it can deflate the air, resulting in a dense, heavy cheesecake rather than a light, airy one. Gently folding maintains that lovely, fluffy texture.
- Press the Biscuit Base Firmly: A well-compressed biscuit base is crucial. If it’s too loose, it will crumble when you spoon into it, rather than providing a stable, satisfying crunch. Use the back of a spoon or a small tamper to really press those crumbs down. This creates a solid foundation for your cheesecake layers and prevents a messy eating experience. After testing this recipe five times, I finally got it just right, and firm biscuit bases were a major learning point.
- Chill for Long Enough: While 2 hours is the minimum, allowing these jars to chill overnight truly makes a difference. The longer chilling time allows the flavours to meld and the cheesecake filling to fully set and firm up, resulting in a more stable and enjoyable texture. It also intensifies the key lime flavour, making it even more refreshing. This is a brilliant make-ahead tip for busy weeknights, as you can prepare them the evening before and simply pull them out of the fridge after dinner.
- Individual Jars for Portion Control and Presentation: Using individual jars not only looks delightful but also helps with portion control. It eliminates the need for slicing and serving, which can often be messy with no-bake cheesecakes. Furthermore, it means less washing up, which is always a win in my book, especially on a busy weeknight. They’re also wonderfully portable for packed lunches or picnics!
Equipment You’ll Need
- Stand mixer or hand mixer
- Baking tray (optional, for chilling multiple jars at once)
- Parchment paper (not strictly needed for this recipe, but good to have)
- Wire cooling rack (not strictly needed for this recipe)
- 6-8 small jars or glasses (e.g., jam jars, small tumblers)
- Large mixing bowls (2, one preferably chilled for cream)
- Rubber spatula
- Measuring cups and spoons
- Zester or fine grater
- Citrus juicer
- Rolling pin or food processor (for crushing biscuits)
Common Mistakes to Avoid
- Overcrowding the pan: While not a ‘pan’ in the traditional sense, overcrowding your refrigerator shelf with too many jars can impede proper air circulation, leading to uneven chilling. Ensure there’s space around each jar for the cold air to circulate evenly, allowing all your cheesecakes to set properly and consistently.
- Wrong temperature: Using cold cream cheese will result in a lumpy filling that’s difficult to smooth out, while using warm double cream will prevent it from whipping to stiff peaks. Always ensure your cream cheese is at room temperature and your double cream is straight from the fridge and very cold for optimal results.
- Skipping the rest time: The chilling time isn’t just for cooling; it’s essential for the cheesecake to firm up and for the flavours to meld and develop. Skipping or shortening this crucial rest time will result in a soft, unset, and less flavourful dessert that won’t hold its shape or deliver the satisfying texture you expect.
Delicious Variations to Try
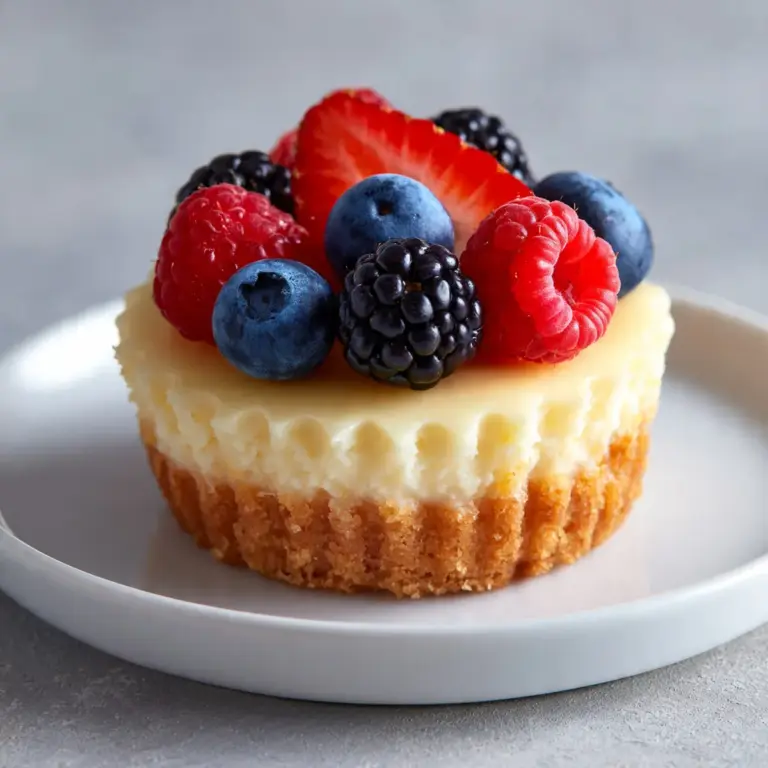
- Berry Burst Version: For a vibrant twist, layer a spoonful of berry compote (made from fresh or frozen mixed berries simmered with a touch of sugar) over the biscuit base before adding the cheesecake filling. You could also swirl a little compote through the cheesecake mixture itself, or simply top with fresh berries like raspberries or blueberries just before serving for a burst of colour and sweetness.
- Tropical Mango Option: Introduce a tropical flair by folding in a few tablespoons of mango puree into the cream cheese mixture along with the key lime juice. Garnish with fresh mango cubes and a sprinkle of toasted coconut flakes for an exotic, sunny dessert that transports you straight to warmer climes.
- Chocolate Drizzle Delight: For chocolate lovers, a delicate drizzle of melted dark chocolate over the top of the set cheesecake before serving adds a luxurious touch. The slight bitterness of the dark chocolate beautifully complements the tartness of the key lime, creating a sophisticated flavour combination.
What to Serve With Zesty No Bake Key Lime Cheesecake Jars
- A light dusting of icing sugar
- Fresh mint leaves for a refreshing garnish
- Extra thin slices or wedges of key lime
- A dollop of extra whipped cream
- A sprinkle of toasted coconut flakes
Frequently Asked Questions
Zesty No Bake Key Lime Cheesecake Jars
Ingredients
Method
-
Prepare the Biscuit Base: Crush the digestive biscuits until they resemble fine crumbs. You can do this by placing them in a sealed bag and crushing with a rolling pin, or by pulsing in a food processor until you hear a consistent whirring and see a fine, sandy texture. Melt the unsalted butter gently in a small saucepan over a low heat until completely liquid and shimmering. Pour the melted butter over the biscuit crumbs and mix thoroughly until all the crumbs are evenly coated, taking on a slightly darker, moist appearance.
-
Assemble the Bases: Divide the buttered biscuit crumbs evenly among 6-8 small jars or glasses. Press the crumbs down firmly into the bottom of each jar using the back of a spoon or a small tamper. This step is crucial for a stable base; you should feel a slight resistance and hear a compacting sound as you press. Place the jars in the refrigerator while you prepare the filling.
-
Whip the Cream Cheese Mixture: In a large mixing bowl, beat the softened full-fat cream cheese with the caster sugar using a stand mixer fitted with the whisk attachment, or a hand mixer, on medium speed. Continue mixing until the mixture is light, fluffy, and visibly smooth, with no lumps, typically taking about 2-3 minutes. Scrape down the sides of the bowl to ensure everything is incorporated.
-
Add Key Lime Flavour: Gradually beat in the key lime juice, key lime zest, and vanilla extract into the cream cheese mixture. Mix on low speed until just combined. The mixture will smell wonderfully zesty and should have a slightly looser consistency. Be careful not to overmix at this stage, as it can make the filling too thin.
-
Whip the Double Cream: In a separate, chilled bowl, whip the cold double cream until stiff peaks form. The cream should hold its shape when you lift the whisk and look visibly thicker and opaque. Be attentive to the sound of your mixer; it will change from a liquid slosh to a thicker, whirring sound as the cream thickens.
-
Combine and Fill: Gently fold the whipped double cream into the key lime cream cheese mixture using a spatula. Use a light hand, folding until no streaks of white cream are visible and the mixture is uniformly pale green-yellow and airy. Spoon or pipe the cheesecake filling into the prepared jars over the biscuit base. Fill them nearly to the top, ensuring a smooth surface.
-
Chill and Set: Cover each jar loosely with cling film or a lid and refrigerate for a minimum of 2 hours, or preferably overnight. As they chill, the cheesecake will firm up and become beautifully set. When ready to serve, the surface should feel firm to the touch and appear glossy.
Notes
There you have it – a vibrant, tangy, and utterly fuss-free dessert that’s tailor-made for the realities of modern family life. These Zesty No Bake Key Lime Cheesecake Jars are more than just a sweet treat; they’re a testament to how simple yet satisfying homemade food can be, even when time is of the essence. They’ve brought so much joy to our dinner table without adding to my never-ending to-do list, and I truly hope they do the same for yours. If you give this recipe a whirl, please do let me know how it turns out in the comments below – I’d love to hear about your zesty adventures!