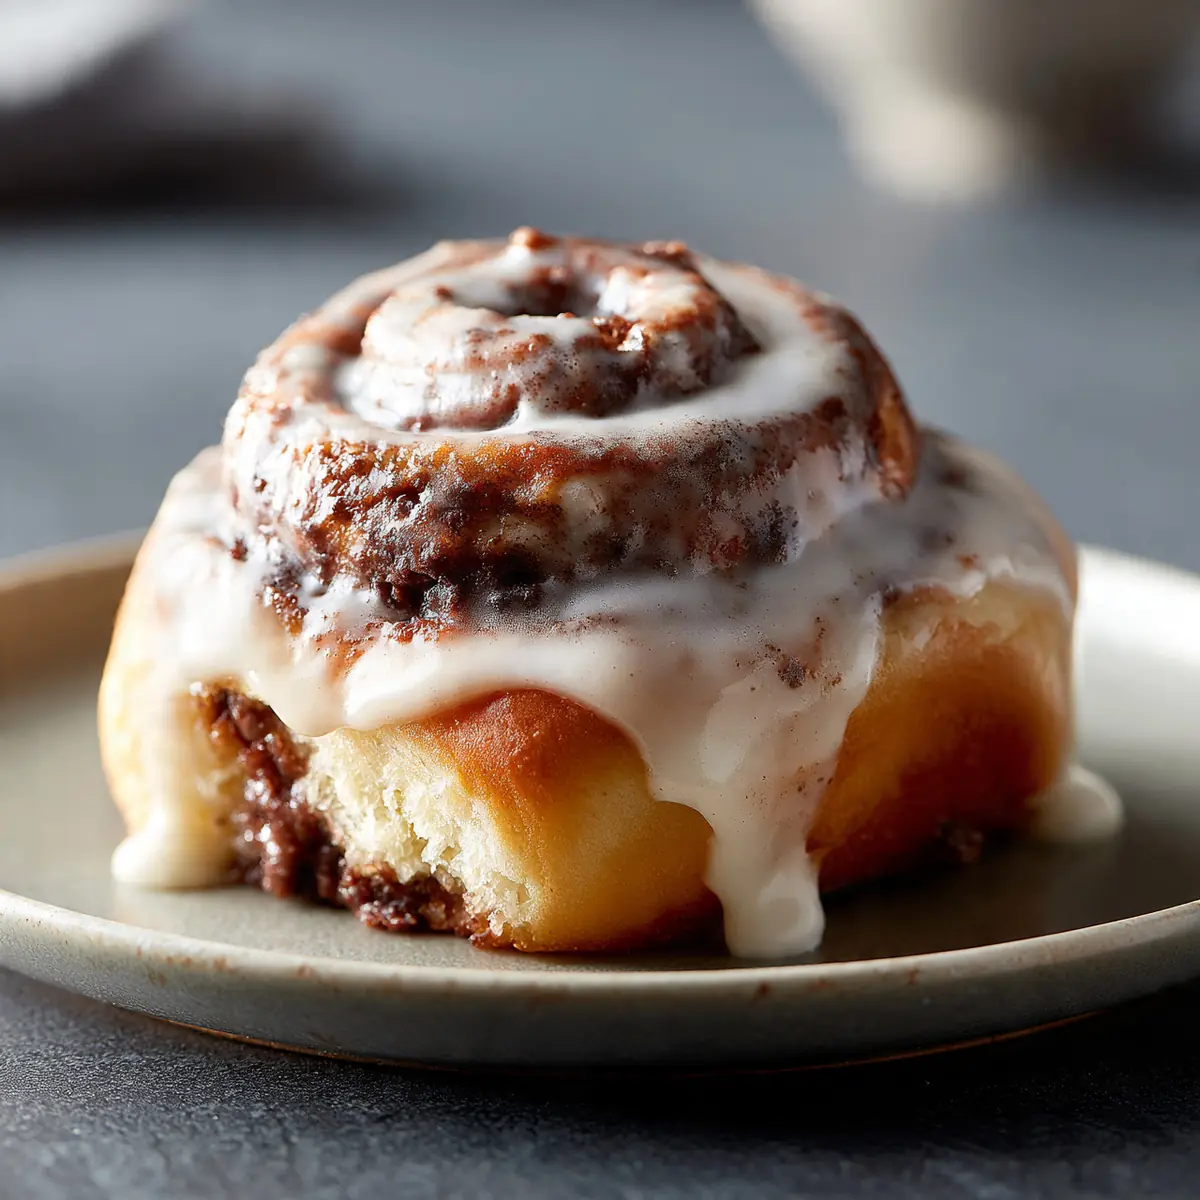
Pillow-Soft Chocolate Cinnamon Rolls With Icing
As a busy mum, I know the sheer chaos that often descends upon us during the week. After school clubs, homework battles, and the relentless quest to get a wholesome dinner on the table can leave little time for anything else, let alone a delightful treat. That’s why I’m always on the hunt for recipes that deliver big on flavour and comfort without demanding hours in the kitchen, and these Pillow-Soft Chocolate Cinnamon Rolls with Icing are my secret weapon for a truly special weeknight dessert.
I remember one Tuesday evening, completely frazzled after a particularly challenging day. The kids were tired, I was exhausted, and the thought of another mundane dessert was just too much. I wanted something that felt indulgent, something that would bring a genuine smile to their faces, but I simply didn’t have the energy for a complicated bake. That night, I decided to adapt my favourite cinnamon roll recipe, tweaking it for speed and adding chocolate, and the result was pure magic. The aroma alone started to lift everyone’s spirits, and watching my children’s eyes light up as they bit into those warm, gooey rolls was worth every single minute.
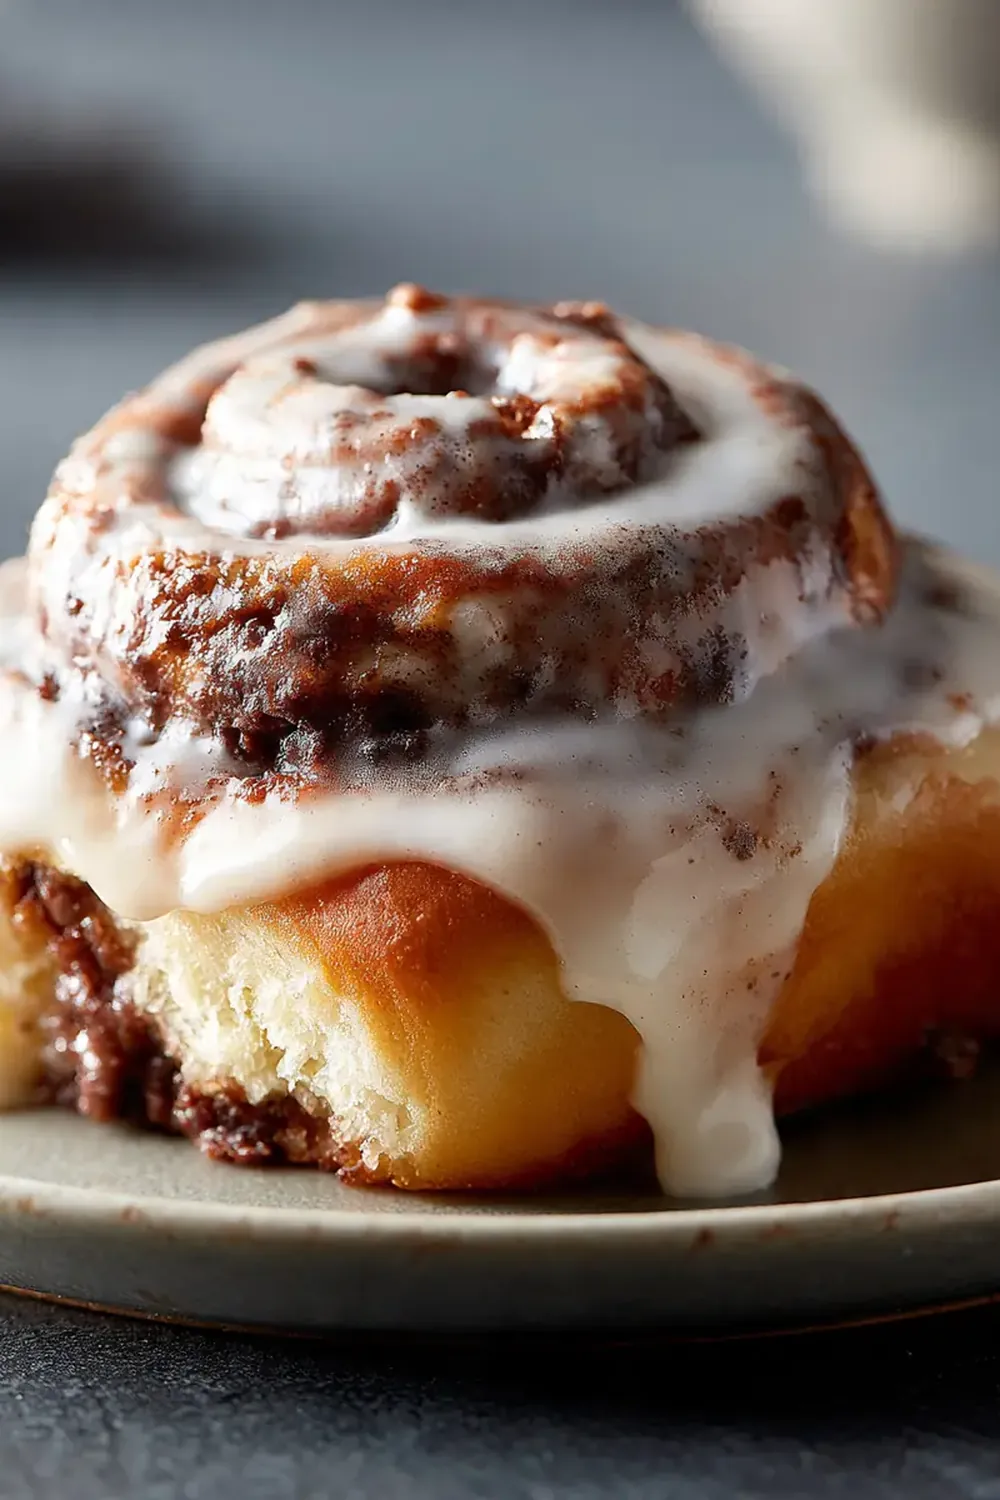
This recipe isn’t just about making a sweet treat; it’s about reclaiming a little bit of joy and connection at the end of a hectic day. It’s designed to be approachable, with make-ahead options that fit seamlessly into a busy family schedule, and minimal washing up – a true lifesaver! These rolls are so incredibly soft, bursting with the warmth of cinnamon and rich chocolate, all finished with a luscious, sweet icing. It quickly became a firm family favourite, and my husband, who’s usually quite discerning when it comes to baked goods, actually declared them “better than the bakery!” after his second one.
Recipe Overview
- Prep time: 25 minutes
- Cook time: 20-25 minutes
- Total time: 45-50 minutes (plus proofing time)
- Servings: 12 rolls
- Difficulty: Moderate
Why You’ll Love This Pillow-Soft Chocolate Cinnamon Rolls with Icing
- Weeknight Wonder: Designed with speed and efficiency in mind, allowing you to enjoy a homemade treat even on your busiest evenings.
- Minimal Mess: Clever techniques and make-ahead steps reduce washing up, meaning more family time and less scrubbing.
- Irresistibly Soft Texture: The dough remains wonderfully light and fluffy, ensuring each bite melts in your mouth.
- Rich Flavour Combination: The classic warmth of cinnamon beautifully complements decadent chocolate, all balanced by a sweet, tangy icing.
- Versatile & Adaptable: Easy to customise with different fillings or prepare ahead, making it suitable for various occasions or dietary needs.
Ingredients You’ll Need
- 300ml warm whole milk (around 40-45°C)
- 7g sachet active dry yeast (or 2 ¼ teaspoons)
- 75g granulated sugar, divided
- 60g unsalted butter, melted, plus extra for greasing
- 1 large egg, at room temperature
- 450g strong white bread flour, plus extra for dusting
- 1 teaspoon fine sea salt
- 1 tablespoon ground cinnamon
- 100g light brown sugar
- 150g good quality dark chocolate chips or finely chopped dark chocolate
- 100g icing sugar
- 2-3 tablespoons whole milk (for icing)
- ½ teaspoon vanilla extract
Tip: Using strong white bread flour is key here, as its higher protein content develops more gluten, giving these rolls their signature chewy-soft texture. Don’t skimp on the quality of your chocolate; it truly makes a difference to the finished flavour.
How to Make Pillow-Soft Chocolate Cinnamon Rolls with Icing
- Activate the Yeast: In a large mixing bowl, combine the warm milk, yeast, and 25g of the granulated sugar. Give it a gentle stir. The mixture should smell subtly yeasty and begin to foam and bubble within 5-10 minutes, indicating the yeast is active and ready. If it doesn’t foam, your milk might have been too hot or too cold, or your yeast is past its best, and it’s best to start again.
- Prepare the Dough: Add the melted butter, egg, remaining 50g granulated sugar, and salt to the yeast mixture. Stir until well combined. Gradually add the strong white bread flour, mixing with a wooden spoon until a shaggy dough forms. Once it comes together, turn it out onto a lightly floured surface.
- Knead the Dough: Knead the dough for 8-10 minutes. At first, it will feel a little sticky, but as you knead, it will become smooth, elastic, and springy to the touch. You’ll notice it changing from a rough, floury lump to a soft, pliable ball that holds its shape and springs back when gently poked. Place the dough into a lightly greased bowl, turn it once to coat, and cover with cling film. Let it rise in a warm place for 1-1.5 hours, or until it has visibly doubled in size and feels airy.
- Form the Rolls: Once risen, gently punch down the dough to release the air. Turn it out onto a lightly floured surface and roll it into a large rectangle, approximately 30x40cm. In a small bowl, mix the cinnamon and light brown sugar. Brush the entire surface of the dough with a thin layer of melted butter (about 1 tablespoon), then evenly sprinkle the cinnamon-sugar mixture over it, leaving a small border along one long edge. Finally, scatter the chocolate chips generously over the cinnamon-sugar.
- Roll and Slice: Starting from one of the long edges, carefully roll the dough into a tight log. Pinch the seam gently to seal it. Using a sharp, un-serrated knife or a piece of dental floss, slice the log into 12 even rolls, each about 3-4cm thick. As you slice, you’ll see the beautiful swirls of cinnamon and chocolate emerge. Arrange the rolls snugly in a lightly greased 23x33cm baking dish.
- Second Rise and Bake: Cover the baking dish loosely with cling film and let the rolls rise again in a warm spot for another 30-45 minutes, or until they look puffy and have nearly doubled in size. While they rise, preheat your oven to 180°C (160°C fan/Gas Mark 4). Once risen, bake for 20-25 minutes. The rolls should turn a beautiful golden-brown on top, and you’ll notice a wonderful sweet, spicy, and chocolatey aroma filling your kitchen. The centres should feel soft and slightly springy when gently pressed.
- Prepare the Icing: While the rolls are baking, whisk together the icing sugar, 2 tablespoons of milk, and vanilla extract in a small bowl until smooth. If it’s too thick, add the remaining tablespoon of milk, a tiny drop at a time, until you reach a pourable yet thick consistency. The icing should be bright white and glossy.
- Ice and Serve: As soon as the rolls come out of the oven, while they are still warm and steaming, generously drizzle the prepared icing over them. The warmth of the rolls will make the icing melt slightly and seep into all the crevices, creating a beautiful glaze. Serve immediately and enjoy the pillow-soft texture and comforting warmth.
Tips From My Kitchen
- Don’t Rush the Proofing: The rising time, or “proofing,” is absolutely crucial for achieving that signature pillow-soft texture. If your kitchen is cool, you can create a warm environment by placing the bowl in an oven that’s been briefly warmed to its lowest setting and then turned off. The yeast needs warmth to activate properly and produce the carbon dioxide bubbles that make the dough light and airy. Underrisen dough will result in dense, heavy rolls, so be patient and let the dough truly double in size.
- Use Room Temperature Ingredients (Especially the Egg and Milk): Cold ingredients can shock the yeast and slow down its activation. By ensuring your milk is warm (not hot!) and your egg is at room temperature, you give the yeast the best possible environment to thrive. I used to struggle with this dish until I discovered this technique, and it made a huge difference to the consistency of my dough. Take your egg out of the fridge about 30 minutes before you start, and warm your milk gently on the hob or in the microwave.
- Kneading for Texture: Kneading isn’t just about mixing; it develops the gluten strands in the flour, which are responsible for the dough’s elasticity and structure. A well-kneaded dough will be smooth, supple, and will spring back when poked. This gluten development is what traps the air bubbles during proofing, leading to those lovely, soft rolls. If you under-knead, your rolls might be crumbly or tough.
- Make-Ahead Magic: To save time on a busy weeknight, you can prepare the rolls up to the second rise. After arranging them in the baking dish, cover them tightly with cling film and refrigerate overnight (up to 12 hours). In the morning, take them out and let them come to room temperature and rise for about 1-1.5 hours before baking as usual. This method means you can wake up to fresh, warm rolls without the early morning fuss. For even more convenience, you could also prepare the dough, let it complete its first rise, then punch it down, shape it, and freeze the unbaked rolls. Thaw them overnight in the fridge and then proceed with the second rise and bake.
- Don’t Overbake: Overbaking is the enemy of soft rolls. Keep a close eye on them during the last few minutes of baking. They should be golden brown on top, but still feel quite tender to the touch. If they look too dark, they’ll likely be dry. Remember, they continue to cook slightly from residual heat once removed from the oven.
- The Power of Quality Chocolate: While any chocolate chips will work, using a good quality dark chocolate (around 50-70% cocoa solids) will elevate the flavour significantly. It provides a richer, less cloyingly sweet counterpoint to the cinnamon and sugar, making the rolls feel more sophisticated and decadent.
Equipment You’ll Need
- Large mixing bowls (2)
- Whisk or fork
- Wooden spoon or spatula
- Measuring cups and spoons
- Rolling pin
- Sharp knife or dental floss
- 23x33cm baking dish (or similar size)
- Cling film
Common Mistakes to Avoid
- Overcrowding the pan: If you pack the rolls in too tightly, they won’t have enough space to expand properly during the second rise and baking. This can result in unevenly baked rolls, with some parts undercooked and others too dense. To avoid this, ensure you use a baking dish of the correct size (23x33cm is ideal for 12 rolls), allowing a little space between each roll for them to puff up beautifully without becoming squashed.
- Wrong temperature: Using milk that’s too hot will kill the yeast, preventing the dough from rising, while milk that’s too cold will inhibit yeast activity, leading to a very slow or incomplete rise. Aim for warm milk between 40-45°C; it should feel comfortably warm to the touch, like a baby’s bath water. An instant-read thermometer is your best friend here for accuracy.
- Skipping the rest time: After kneading, the dough needs time to relax and rise. This initial rest allows the gluten to develop fully and the yeast to produce carbon dioxide, which creates the airy texture. Skipping or shortening this crucial first rise will result in a dense, heavy dough that lacks the signature “pillow-soft” quality we’re aiming for. Give it the full 1-1.5 hours until it’s truly doubled in size.
Delicious Variations to Try
- Nutty Version: For an added crunch and depth of flavour, sprinkle 50g of finely chopped toasted pecans or walnuts over the cinnamon-sugar mixture before adding the chocolate. This adds a lovely textural contrast.
- Fruity Twist: Instead of, or in addition to, the chocolate chips, try adding 75g of dried cranberries or finely chopped dried apricots. These fruits will plump up beautifully when baked, releasing their sweet and tangy notes.
- Orange Zest Infusion: For a bright, citrusy lift, add the zest of one orange to the dough mixture during the kneading stage, and a little more zest into the icing. The orange complements both the chocolate and cinnamon wonderfully.
What to Serve With Pillow-Soft Chocolate Cinnamon Rolls with Icing
- A strong cup of tea or coffee
- A glass of cold milk
- Fresh fruit salad (especially berries or sliced oranges)
- A dollop of crème fraîche or Greek yoghurt for a tangy contrast
Frequently Asked Questions
Pillow-Soft Chocolate Cinnamon Rolls with Icing
Ingredients
Method
- Activate the Yeast: In a large mixing bowl, combine the warm milk, yeast, and 25g of the granulated sugar. Give it a gentle stir. The mixture should smell subtly yeasty and begin to foam and bubble within 5-10 minutes, indicating the yeast is active and ready. If it doesn't foam, your milk might have been too hot or too cold, or your yeast is past its best, and it's best to start again.
- Prepare the Dough: Add the melted butter, egg, remaining 50g granulated sugar, and salt to the yeast mixture. Stir until well combined. Gradually add the strong white bread flour, mixing with a wooden spoon until a shaggy dough forms. Once it comes together, turn it out onto a lightly floured surface.
- Knead the Dough: Knead the dough for 8-10 minutes. At first, it will feel a little sticky, but as you knead, it will become smooth, elastic, and springy to the touch. You'll notice it changing from a rough, floury lump to a soft, pliable ball that holds its shape and springs back when gently poked. Place the dough into a lightly greased bowl, turn it once to coat, and cover with cling film. Let it rise in a warm place for 1-1.5 hours, or until it has visibly doubled in size and feels airy.
- Form the Rolls: Once risen, gently punch down the dough to release the air. Turn it out onto a lightly floured surface and roll it into a large rectangle, approximately 30x40cm. In a small bowl, mix the cinnamon and light brown sugar. Brush the entire surface of the dough with a thin layer of melted butter (about 1 tablespoon), then evenly sprinkle the cinnamon-sugar mixture over it, leaving a small border along one long edge. Finally, scatter the chocolate chips generously over the cinnamon-sugar.
- Roll and Slice: Starting from one of the long edges, carefully roll the dough into a tight log. Pinch the seam gently to seal it. Using a sharp, un-serrated knife or a piece of dental floss, slice the log into 12 even rolls, each about 3-4cm thick. As you slice, you'll see the beautiful swirls of cinnamon and chocolate emerge. Arrange the rolls snugly in a lightly greased 23x33cm baking dish.
- Second Rise and Bake: Cover the baking dish loosely with cling film and let the rolls rise again in a warm spot for another 30-45 minutes, or until they look puffy and have nearly doubled in size. While they rise, preheat your oven to 180°C (160°C fan/Gas Mark 4). Once risen, bake for 20-25 minutes. The rolls should turn a beautiful golden-brown on top, and you’ll notice a wonderful sweet, spicy, and chocolatey aroma filling your kitchen. The centres should feel soft and slightly springy when gently pressed.
- Prepare the Icing: While the rolls are baking, whisk together the icing sugar, 2 tablespoons of milk, and vanilla extract in a small bowl until smooth. If it's too thick, add the remaining tablespoon of milk, a tiny drop at a time, until you reach a pourable yet thick consistency. The icing should be bright white and glossy.
- Ice and Serve: As soon as the rolls come out of the oven, while they are still warm and steaming, generously drizzle the prepared icing over them. The warmth of the rolls will make the icing melt slightly and seep into all the crevices, creating a beautiful glaze. Serve immediately and enjoy the pillow-soft texture and comforting warmth.
Notes
There you have it – my tried-and-tested recipe for Pillow-Soft Chocolate Cinnamon Rolls with Icing, adapted to bring a little bit of baking joy into even the most chaotic weeknights. These rolls are more than just a dessert; they’re a moment of warmth, a shared smile, and a reminder that even when life is busy, there’s always time for something truly delicious. I genuinely hope this recipe brings as much happiness to your family as it does to mine. Do give them a go, and let me know in the comments below how they turn out!