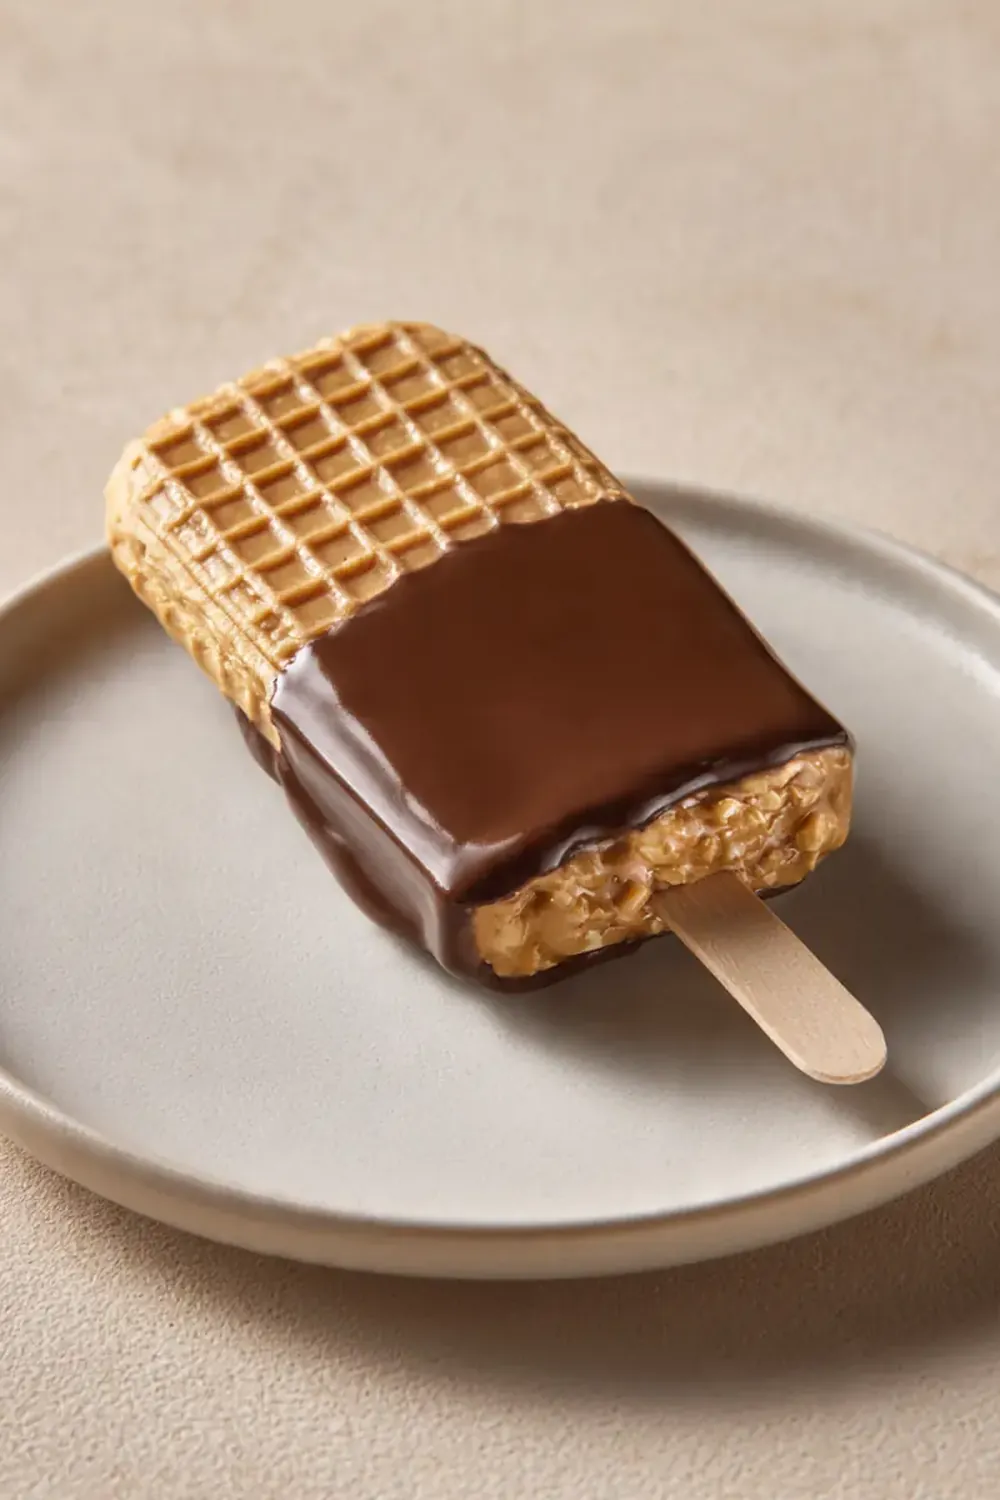
Chocolate Dipped Peanut Butter Pops Snack
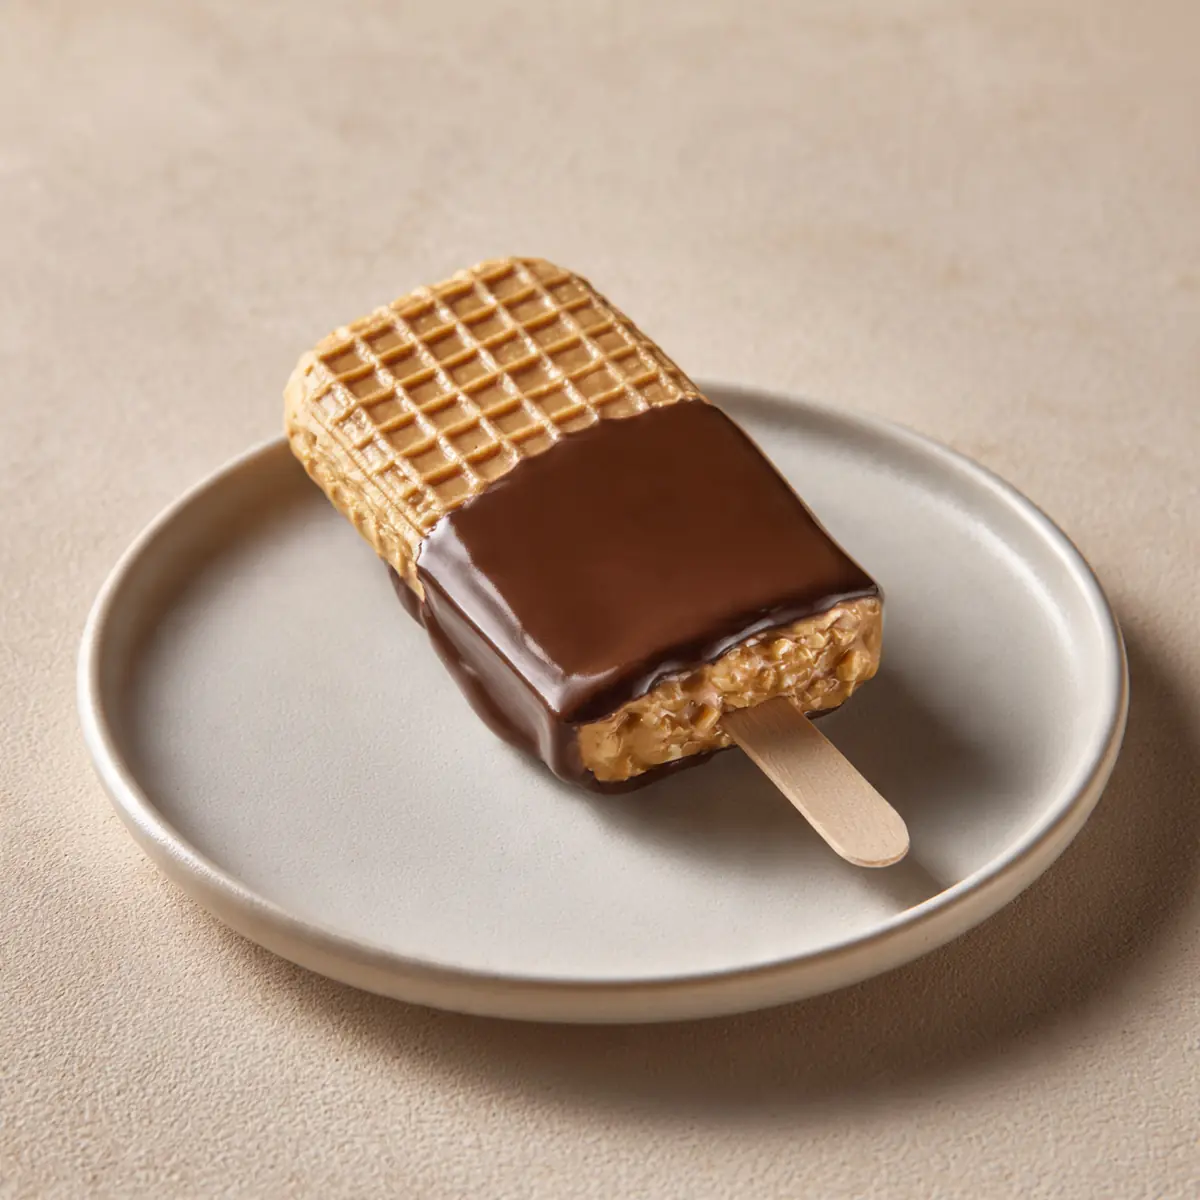
Tuesday nights in my house are a frantic relay race between homework, bath time, and the sudden, sharp realisation that nobody has thought about dinner. For years, I’d stare into the fridge, defeated, before reaching for the same tired takeaway menu. That was until I stumbled upon a solution that felt less like a recipe and more like a culinary cheat code: the Chocolate Dipped Peanut Butter Pops Snack. It’s not just a treat; it’s a full, satisfying meal disguised as dessert, ready in the time it takes to boil the kettle.
Recipe Overview
- Prep Time: 15 minutes
- Cook Time: 0 minutes (no-bake)
- Freeze Time: 1 hour
- Total Time: 1 hour 15 minutes
- Servings: 8 pops
- Difficulty: Easy
Why You’ll Love This Chocolate Dipped Peanut Butter Pops Snack
- Zero Oven Time: On those sweltering summer evenings or when the oven is already occupied, this no-bake marvel comes together in minutes. There’s no waiting for a preheat, no checking on a bake, just simple assembly.
- Make-Ahead Magic: I make a double batch of these on a Sunday afternoon while catching up on a podcast. They live happily in the freezer, ready to be plucked out for a last-minute dinner or a post-football practice refuel.
- Minimal Washing Up: You only need one bowl and a few spoons. The clean-up is so swift you could be sitting down with your own pop before the kids have finished their first one. It’s the dream for anyone who dreads the washing-up pile.
- Secretly Nutritious: We’re packing in protein from the peanut butter and healthy fats, while the dark chocolate offers a decent dose of antioxidants. It feels like a decadent pudding, but it actually has the staying power to keep little (and big) bellies full.
- Customisable for Fussy Eaters: My youngest won’t touch a green bean, but she adores these pops. The base is so forgiving that you can stir in a tablespoon of ground flaxseed or a handful of finely chopped nuts without anyone being the wiser.
Ingredients You’ll Need
- 250g (1 cup) smooth peanut butter (no added sugar or salt is best)
- 3 tablespoons honey or maple syrup
- 50g (½ cup) oat flour (blitz rolled oats in a blender until fine)
- 1 teaspoon vanilla extract
- A pinch of sea salt
- 150g (1 cup) dark chocolate chips (at least 70% cocoa solids)
- 1 tablespoon coconut oil
- 8 wooden lolly sticks or popsicle sticks
- A baking tray lined with parchment paper
- Optional: 2 tablespoons finely chopped roasted peanuts, for sprinkling
Tip: If your peanut butter is very stiff and oily, give it a good stir before measuring. This ensures the mixture binds together perfectly without being too greasy.
How to Make Chocolate Dipped Peanut Butter Pops Snack
- Mix the base: In a large mixing bowl, combine the peanut butter, honey (or maple syrup), oat flour, vanilla extract, and a pinch of sea salt. Stir with a wooden spoon until a thick, cohesive dough forms. You’ll know it’s ready when the mixture pulls away from the sides of the bowl and feels pliable, like soft cookie dough, with a rich, nutty aroma.
- Shape the pops: Divide the dough into eight equal portions. Roll each portion into a ball between your palms, then gently shape it into a chunky rectangle or a round disc, about 1.5cm thick. Place each shape onto the lined baking tray. The texture should feel firm but not crumbly; if it cracks, you can press it back together with your fingers.
- Insert the sticks: Gently push a wooden lolly stick into the centre of each shaped pop, about halfway through. Ensure the stick feels secure and isn’t poking out the other side. Place the tray in the freezer for at least 1 hour, or until the pops are firm to the touch. They should feel solid and cold, like a chilled butter pat.
- Melt the chocolate: When the pops are nearly frozen, melt the dark chocolate chips and coconut oil together. You can do this in a heatproof bowl set over a pan of simmering water (make sure the bowl doesn’t touch the water) or in the microwave in 20-second bursts, stirring after each. The chocolate should be smooth, glossy, and fluid, with a deep, bitter-sweet scent.
- Dip and decorate: Remove the frozen pops from the freezer. One at a time, hold a pop by the stick and dip it into the melted chocolate, tilting the bowl slightly to coat the top and sides. Let any excess chocolate drip back into the bowl. The contrast of the cold pop against the warm chocolate will create a satisfying, immediate set.
- Add toppings (optional): If using, immediately sprinkle the finely chopped peanuts over the wet chocolate before it hardens. Place the dipped pop back onto the lined tray. The chocolate should begin to set within seconds, creating a hard, snappy shell.
- Final chill: Return the tray to the freezer for a final 15–20 minutes to fully set the chocolate. When ready, the coating will be matte and crisp, and it will break with a clean snap when bitten into.
Tips From My Kitchen
- Use frozen pops for dipping: This is the most important step for a perfect, crackly chocolate shell. If the pops are even slightly warm, the chocolate will slide off in a thick, messy puddle. Freezing them solid ensures the chocolate sets almost instantly upon contact.
- Thin your chocolate: Dark chocolate can be thick and claggy when melted. Adding a teaspoon of coconut oil (or any neutral oil) lowers the melting point and makes the coating much thinner and more even. You’ll use less chocolate overall and get a neater finish.
- Press the mixture firmly: When shaping the pops, really squeeze the dough together. Any air pockets or cracks will be weak points where the pop might break apart when you bite into it. Think of it like packing a snowball—the tighter it is, the better it holds.
- Double dip for extra crunch: If you’re feeling indulgent, dip the pop once, let it set for a minute, then dip it again. This creates a thicker, more satisfying chocolate shell. It’s a simple tweak that makes them feel like a luxury dessert from a patisserie.
- Make it a complete meal: To turn these into a balanced weeknight dinner, serve them alongside a handful of fresh berries and a small glass of milk or a plant-based alternative. The fruit adds fibre and vitamins, while the milk provides extra protein, making the meal more rounded.
- Storage savvy: These pops freeze beautifully for up to three months. Store them in a single layer in a freezer-safe container, separated by parchment paper. This prevents them from sticking together and keeps the chocolate shell intact.
Equipment You’ll Need
- Large mixing bowl
- Wooden spoon or sturdy spatula
- Baking tray
- Parchment paper
- 8 wooden lolly sticks
- Small heatproof bowl for melting chocolate
- Saucepan (if using the hob method for melting)
Delicious Variations to Try
- Spicy Version: Add ½ teaspoon of cayenne pepper and ¼ teaspoon of smoked paprika to the peanut butter dough. The gentle heat from the spice cuts through the sweetness of the chocolate beautifully, creating a grown-up flavour profile that’s utterly moreish.
- Vegan Option: This recipe is incredibly easy to make vegan. Simply swap the honey for maple syrup or agave nectar, and ensure you are using a high-quality dark chocolate that is certified vegan. The rest of the ingredients are naturally plant-based.
- Different Nut Butter: If you have a peanut allergy or simply fancy a change, substitute the peanut butter with almond butter, cashew butter, or sunflower seed butter (for a nut-free version). The texture will be slightly different, but the method remains exactly the same.
What to Serve With Chocolate Dipped Peanut Butter Pops Snack
- A bowl of fresh, vibrant berries (strawberries, raspberries, or blueberries) to add a sharp, juicy contrast.
- A small glass of cold oat milk or regular milk for a classic, comforting pairing.
- A handful of crunchy apple slices dusted with a little cinnamon – a perfect textural partner.
Frequently Asked Questions
Chocolate Dipped Peanut Butter Pops Snack
Ingredients
Method
- Mix the base: In a large mixing bowl, combine the peanut butter, honey (or maple syrup), oat flour, vanilla extract, and a pinch of sea salt. Stir with a wooden spoon until a thick, cohesive dough forms. You’ll know it’s ready when the mixture pulls away from the sides of the bowl and feels pliable, like soft cookie dough, with a rich, nutty aroma.
- Shape the pops: Divide the dough into eight equal portions. Roll each portion into a ball between your palms, then gently shape it into a chunky rectangle or a round disc, about 1.5cm thick. Place each shape onto the lined baking tray. The texture should feel firm but not crumbly; if it cracks, you can press it back together with your fingers.
- Insert the sticks: Gently push a wooden lolly stick into the centre of each shaped pop, about halfway through. Ensure the stick feels secure and isn’t poking out the other side. Place the tray in the freezer for at least 1 hour, or until the pops are firm to the touch. They should feel solid and cold, like a chilled butter pat.
- Melt the chocolate: When the pops are nearly frozen, melt the dark chocolate chips and coconut oil together. You can do this in a heatproof bowl set over a pan of simmering water (make sure the bowl doesn't touch the water) or in the microwave in 20-second bursts, stirring after each. The chocolate should be smooth, glossy, and fluid, with a deep, bitter-sweet scent.
- Dip and decorate: Remove the frozen pops from the freezer. One at a time, hold a pop by the stick and dip it into the melted chocolate, tilting the bowl slightly to coat the top and sides. Let any excess chocolate drip back into the bowl. The contrast of the cold pop against the warm chocolate will create a satisfying, immediate set.
- Add toppings (optional): If using, immediately sprinkle the finely chopped peanuts over the wet chocolate before it hardens. Place the dipped pop back onto the lined tray. The chocolate should begin to set within seconds, creating a hard, snappy shell.
- Final chill: Return the tray to the freezer for a final 15–20 minutes to fully set the chocolate. When ready, the coating will be matte and crisp, and it will break with a clean snap when bitten into.
Notes
Friends always ask me for this recipe after trying it at dinner parties, and I make it at least once a week – it’s become a family favourite. I honestly believe it’s the perfect solution for those chaotic evenings when you need something on the table (or in the hand) that feels like a win. If you give these a go, I’d love to know how you get on. Drop a comment below and tell me what your family thought, or if you came up with a brilliant new variation. Happy snacking!