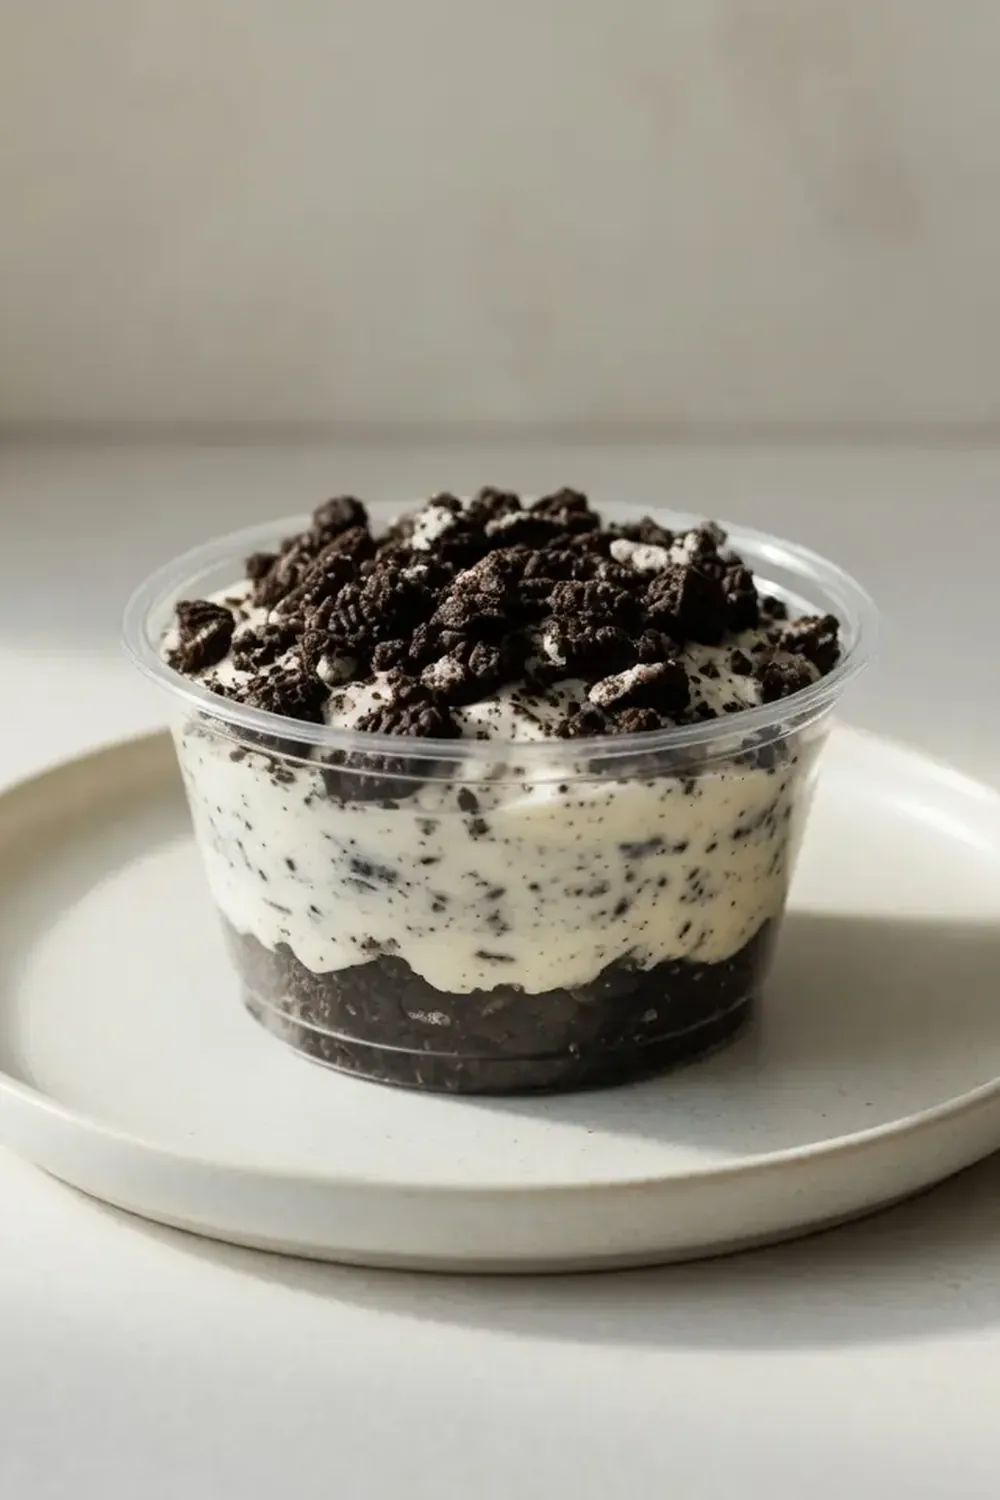
Creamy No Bake Oreo Cheesecake Cups Recipe

As a busy mum of three, I know the absolute chaos that can descend upon a kitchen on a Tuesday evening. The kids are buzzing after school, homework looms, and the last thing anyone wants is a complicated recipe that leaves you with a mountain of washing up. For years, I found myself defaulting to the same few uninspiring dinners, feeling like I was constantly sacrificing deliciousness for speed. That was until I stumbled upon the magic of no-bake desserts, and specifically, these delightful Oreo cheesecake cups, which have become an absolute lifesaver. What started as a weekend treat quickly evolved into a clever weeknight solution, offering a moment of pure bliss without any fuss, making our evenings feel a little bit more special even when time is tight.
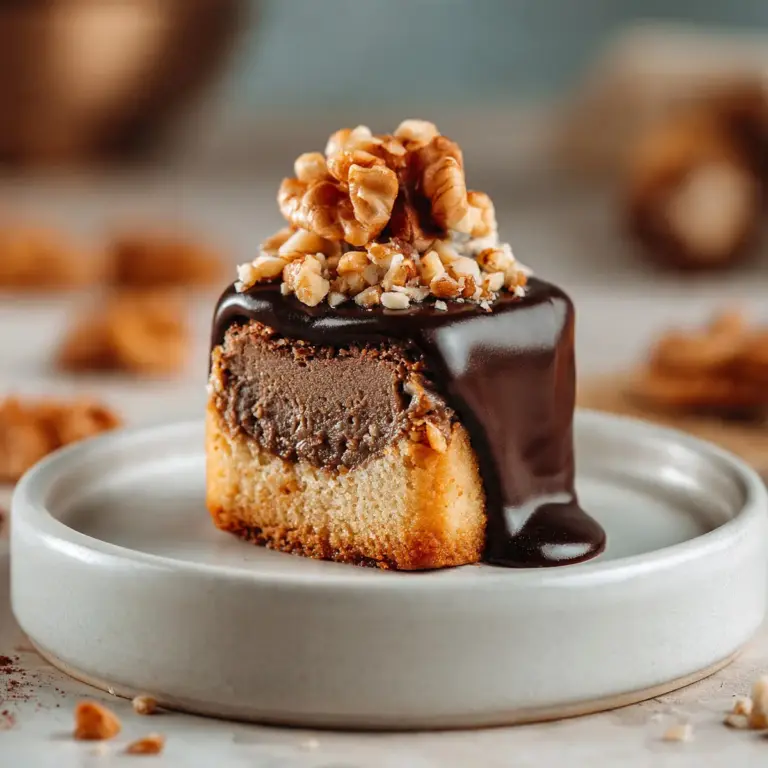
I’ve refined this recipe over countless busy evenings, turning it into something truly special that requires minimal effort but delivers maximum smiles. The beauty of these cheesecake cups lies in their simplicity and the fact that you can prepare them well in advance, just like our Fudgy Zucchini Brownies With Chocolate Glaze, leaving you free to focus on everything else life throws at you.com/creamy-high-protein-cheesecake-jars-no-bake/”>Creamy High Protein Cheesecake Jars No Bake, leaving you free to focus on everything else life throws at you. Imagine finishing dinner, knowing that a perfectly set, creamy, chocolatey treat is waiting patiently in the fridge, ready to be enjoyed with no additional cooking or cleanup. It’s a genuine game-changer for family mealtimes, allowing us to savour those precious few moments together around the dinner table without the stress of a big culinary production. They’re so simple, I often get the children involved, which adds another layer of fun to our weeknights.
This recipe isn’t just about making a dessert; it’s about reclaiming a little bit of calm in the midst of a hectic week. It’s about creating those small, joyful moments that truly matter. We often enjoy these after a simple pasta dish or a quick roast chicken, and the contrast between the savoury main and the sweet, rich cheesecake is always a hit. I make this at least once a week – it’s become a family favourite, and honestly, the sheer delight on everyone’s faces when they see them makes any minimal effort completely worthwhile. It’s truly a delicious secret weapon for any family looking for a touch of sweetness without the usual fuss.
Recipe Overview
- Prep Time: 20 minutes
- Cook Time: 0 minutes
- Chill Time: 2-4 hours (or overnight for best results)
- Total Time: 2 hours 20 minutes – 4 hours 20 minutes
- Servings: 12 cups
- Difficulty: Easy
Why You’ll Love This Creamy No Bake Oreo Cheesecake Cups Recipe
- Effortless Preparation: No baking means no oven time, just simple mixing and chilling, perfect for busy weeknights.
- Minimal Cleanup: Everything comes together in a few bowls, significantly reducing post-dinner washing up.
- Make-Ahead Marvel: Prepare these a day or two in advance, freeing up your evening for family activities or relaxation.
- Crowd-Pleasing Flavour: The combination of rich cream cheese and crunchy Oreo biscuits is universally adored by all ages.
- Individual Portions: Served in cups, they’re perfect for portion control and easy serving – no slicing required!
Ingredients You’ll Need
- 250g Oreo biscuits (roughly 20-25 biscuits)
- 75g unsalted butter, melted
- 500g full-fat cream cheese, softened
- 100g icing sugar
- 1 teaspoon vanilla extract
- 300ml double cream
- 50g milk chocolate, finely chopped (optional, for garnish)
- 12 cupcake liners or silicone cupcake moulds
Tip: Ensure your cream cheese is at room temperature before you start. This makes for a much smoother, lump-free cheesecake filling. Take it out of the fridge at least 30 minutes before you plan to begin.
How to Make Creamy No Bake Oreo Cheesecake Cups Recipe
- Prepare the Biscuit Base: Take your Oreo biscuits and place them into a food processor. Blitz until they form fine, dark crumbs, almost like damp sand. Alternatively, place them in a strong freezer bag and bash them with a rolling pin until they are finely crushed, listening for the satisfying crunch as they break down.
- Combine with Butter: Pour the melted butter over the Oreo crumbs in a mixing bowl. Stir thoroughly with a spoon until all the crumbs are evenly coated and appear richly dark and slightly glossy. This ensures a firm base.
- Create the Bases: Line a 12-hole muffin tin with cupcake liners. Spoon approximately 1-2 tablespoons of the Oreo mixture into the bottom of each liner. Press down firmly with the back of a spoon or a small glass to create a compact, even base. You should hear a slight crunch as the crumbs compress.
- Chill the Bases: Place the muffin tin into the refrigerator for at least 15-20 minutes. This allows the butter to firm up, setting the bases so they don’t crumble when you add the filling.
- Prepare the Cheesecake Filling: In a large mixing bowl, beat the softened cream cheese with the icing sugar and vanilla extract using an electric mixer until the mixture is light, pale, and completely smooth, with no visible lumps. You’ll notice a sweet, creamy aroma filling your kitchen.
- Whip the Cream: In a separate bowl, whip the double cream until it forms soft peaks, becoming noticeably thicker and holding its shape. Be careful not to over-whip it, or it will become grainy.
- Fold it Together: Gently fold the whipped cream into the cream cheese mixture using a spatula. Do this in two additions to maintain the airiness of the cream. Continue folding until the mixture is uniformly light, fluffy, and a lovely pale cream colour, with swirls of darker Oreo crumbs if you wish to add some crushed biscuits to the filling now.
- Assemble the Cups: Spoon or pipe the cheesecake filling over the chilled Oreo bases in each cupcake liner, filling them almost to the top. Smooth the tops with the back of a spoon. You’ll see the distinct layers forming – a dark base, topped with a creamy, pale filling.
- Chill to Set: Return the muffin tin to the refrigerator and chill for a minimum of 2-4 hours, or ideally overnight. This is crucial for the cheesecake to firm up and achieve its delightful creamy texture. You’ll know they are ready when the filling is firm to the touch and holds its shape perfectly when gently pressed.
- Garnish and Serve: Once fully set, carefully remove the cheesecake cups from the muffin tin. Peel off the cupcake liners just before serving. Garnish with finely chopped milk chocolate or an extra crushed Oreo biscuit on top for that final flourish.
Tips From My Kitchen
- Room Temperature Cream Cheese is Key: Always ensure your full-fat cream cheese is at room temperature. The “why” here is crucial: cold cream cheese won’t cream smoothly with the sugar and vanilla. Instead, you’ll end up with lumps, and no amount of beating will truly get rid of them, resulting in a less-than-silky cheesecake filling. I used to struggle with this dish until I discovered this technique, and it truly makes all the difference to the final texture.
- Don’t Over-Mix the Filling: Once you’ve folded in the whipped cream, stop mixing as soon as everything is just combined. The “why” is that over-mixing can deflate the whipped cream, leading to a denser, less airy cheesecake texture. We want that light, fluffy mouthfeel, so gentle folding is paramount to keep the air in.
- Use Full-Fat Cream Cheese and Double Cream: For the best results, stick to full-fat varieties for both the cream cheese and the double cream. The “why” is simple: lower-fat versions contain more water and less fat, which impacts the setting of a no-bake cheesecake. They won’t set as firmly and can result in a watery or grainy texture, losing that luxurious creaminess we’re aiming for.
- Press the Base Firmly: When creating the biscuit base, press the mixture down very firmly into the cupcake liners. The “why” is that a well-compacted base prevents crumbling when you take the cheesecake out of the liner or when you bite into it. It creates a sturdy foundation for your creamy filling.
- Chill for Longer for Optimal Set: While 2-4 hours is the minimum, chilling these cheesecake cups overnight in the fridge is always best. The “why” is that a longer chill time allows all the ingredients to fully meld and the cream cheese to firm up completely, resulting in a perfectly set, sliceable (or scoopable, in this case) and stable cheesecake with a superior texture. Patience truly pays off here.
- Individual Portion Control with Liners: Using cupcake liners isn’t just for easy removal; it also helps with portion control and makes these perfect for packed lunches or quick grab-and-go treats. The “why” is that it means less mess, no need for extra plates, and a perfectly sized dessert for everyone, which is ideal for busy weeknights when you want minimal fuss.
Common Mistakes to Avoid
- Overcrowding the pan: If you try to squeeze too many cupcake liners into a muffin tin or place them too close together, the air won’t circulate properly around each cup, which can affect the even chilling and setting of your cheesecakes. This might lead to some cups setting faster or firmer than others. To avoid this, ensure there’s a small gap between each liner if your tin allows, or use multiple tins if necessary to give them space.
- Wrong temperature: Using cold cream cheese is the biggest culprit for a lumpy filling. If your cream cheese isn’t at room temperature, it won’t blend smoothly with the sugar and will leave small, unsightly lumps throughout your cheesecake. Always take your cream cheese out of the fridge at least 30 minutes before you plan to start mixing to ensure it’s soft and pliable.
- Skipping the rest time: While it’s tempting to dive straight in, skipping the recommended chilling time will result in a soft, unset cheesecake that won’t hold its shape and will likely be a messy disappointment. Resting is important because it allows the fat in the cream cheese and butter to firm up and the ingredients to fully bind together, creating that stable, creamy texture you desire. Give them at least 2-4 hours, but ideally overnight, for the best results.
Delicious Variations to Try
- Spicy Version: While not typical for cheesecake, you could add a very subtle pinch of finely ground ginger or a tiny dash of cayenne pepper to the biscuit base mixture for a surprising, warming kick that contrasts beautifully with the sweet cream. Start with a tiny amount and taste.
- Vegetarian/Vegan Option: To make these plant-based, simply swap the dairy ingredients. Use vegan Oreo biscuits (check the label as some contain milk), dairy-free butter alternative, a block-style vegan cream cheese, and a plant-based double cream alternative (such as coconut or oat-based whipping cream). Ensure your chosen cream alternative is suitable for whipping and holds stiff peaks.
- Different Protein: While this is a dessert, if you wanted to add a protein boost, you could stir a tablespoon of unflavoured or vanilla protein powder into the cream cheese mixture along with the icing sugar. Ensure it’s a smooth-mixing powder to avoid a grainy texture. This would make them a more substantial treat after a workout, for example.
What to Serve With Creamy No Bake Oreo Cheesecake Cups Recipe
- A warm mug of tea or coffee
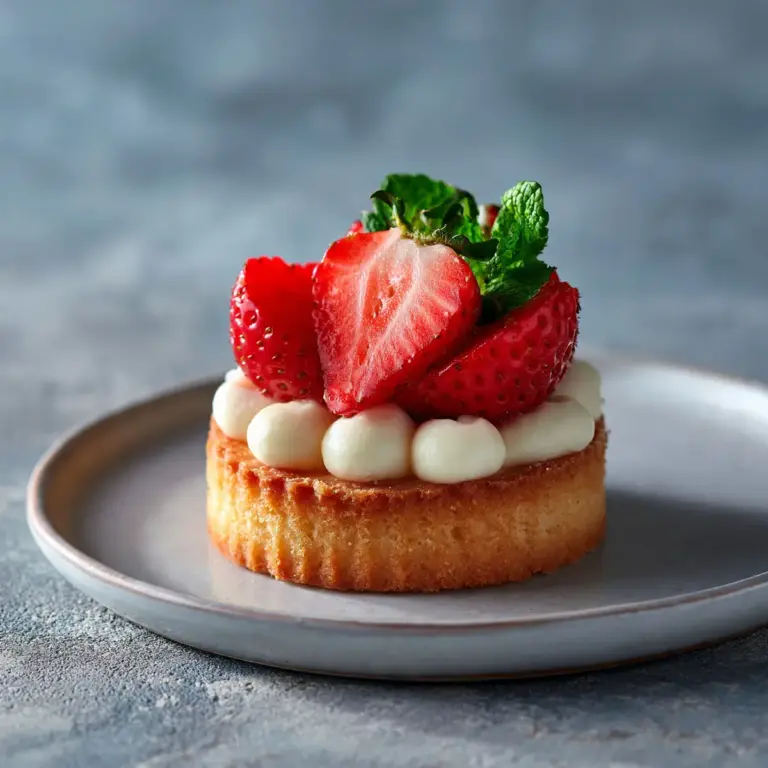
- A side of fresh mixed berries, like strawberries or blueberries
- A drizzle of chocolate sauce
- A sprinkle of cocoa powder
- A glass of cold milk
Frequently Asked Questions
Creamy No Bake Oreo Cheesecake Cups Recipe
Ingredients
Method
-
Prepare the Biscuit Base: Take your Oreo biscuits and place them into a food processor. Blitz until they form fine, dark crumbs, almost like damp sand. Alternatively, place them in a strong freezer bag and bash them with a rolling pin until they are finely crushed, listening for the satisfying crunch as they break down.
-
Combine with Butter: Pour the melted butter over the Oreo crumbs in a mixing bowl. Stir thoroughly with a spoon until all the crumbs are evenly coated and appear richly dark and slightly glossy. This ensures a firm base.
-
Create the Bases: Line a 12-hole muffin tin with cupcake liners. Spoon approximately 1-2 tablespoons of the Oreo mixture into the bottom of each liner. Press down firmly with the back of a spoon or a small glass to create a compact, even base. You should hear a slight crunch as the crumbs compress.
-
Chill the Bases: Place the muffin tin into the refrigerator for at least 15-20 minutes. This allows the butter to firm up, setting the bases so they don’t crumble when you add the filling.
-
Prepare the Cheesecake Filling: In a large mixing bowl, beat the softened cream cheese with the icing sugar and vanilla extract using an electric mixer until the mixture is light, pale, and completely smooth, with no visible lumps. You’ll notice a sweet, creamy aroma filling your kitchen.
-
Whip the Cream: In a separate bowl, whip the double cream until it forms soft peaks, becoming noticeably thicker and holding its shape. Be careful not to over-whip it, or it will become grainy.
-
Fold it Together: Gently fold the whipped cream into the cream cheese mixture using a spatula. Do this in two additions to maintain the airiness of the cream. Continue folding until the mixture is uniformly light, fluffy, and a lovely pale cream colour, with swirls of darker Oreo crumbs if you wish to add some crushed biscuits to the filling now.
-
Assemble the Cups: Spoon or pipe the cheesecake filling over the chilled Oreo bases in each cupcake liner, filling them almost to the top. Smooth the tops with the back of a spoon. You’ll see the distinct layers forming – a dark base, topped with a creamy, pale filling.
-
Chill to Set: Return the muffin tin to the refrigerator and chill for a minimum of 2-4 hours, or ideally overnight. This is crucial for the cheesecake to firm up and achieve its delightful creamy texture. You’ll know they are ready when the filling is firm to the touch and holds its shape perfectly when gently pressed.
-
Garnish and Serve: Once fully set, carefully remove the cheesecake cups from the muffin tin. Peel off the cupcake liners just before serving. Garnish with finely chopped milk chocolate or an extra crushed Oreo biscuit on top for that final flourish.
Notes
There you have it – a simple, delightful, and incredibly versatile recipe that promises to bring a touch of joy to even the most chaotic of weeknights. I truly hope these Creamy No Bake Oreo Cheesecake Cups become as much of a staple in your home as they have in mine. They’re a testament to the idea that delicious treats don’t have to be complicated, and that even a few minutes of prep can lead to moments of genuine happiness. Do let me know in the comments below if you try them, and what your family thought. I always love hearing about your kitchen adventures!