Quick 5-Minute Frozen Lemonade Pie For Busy Weeknights
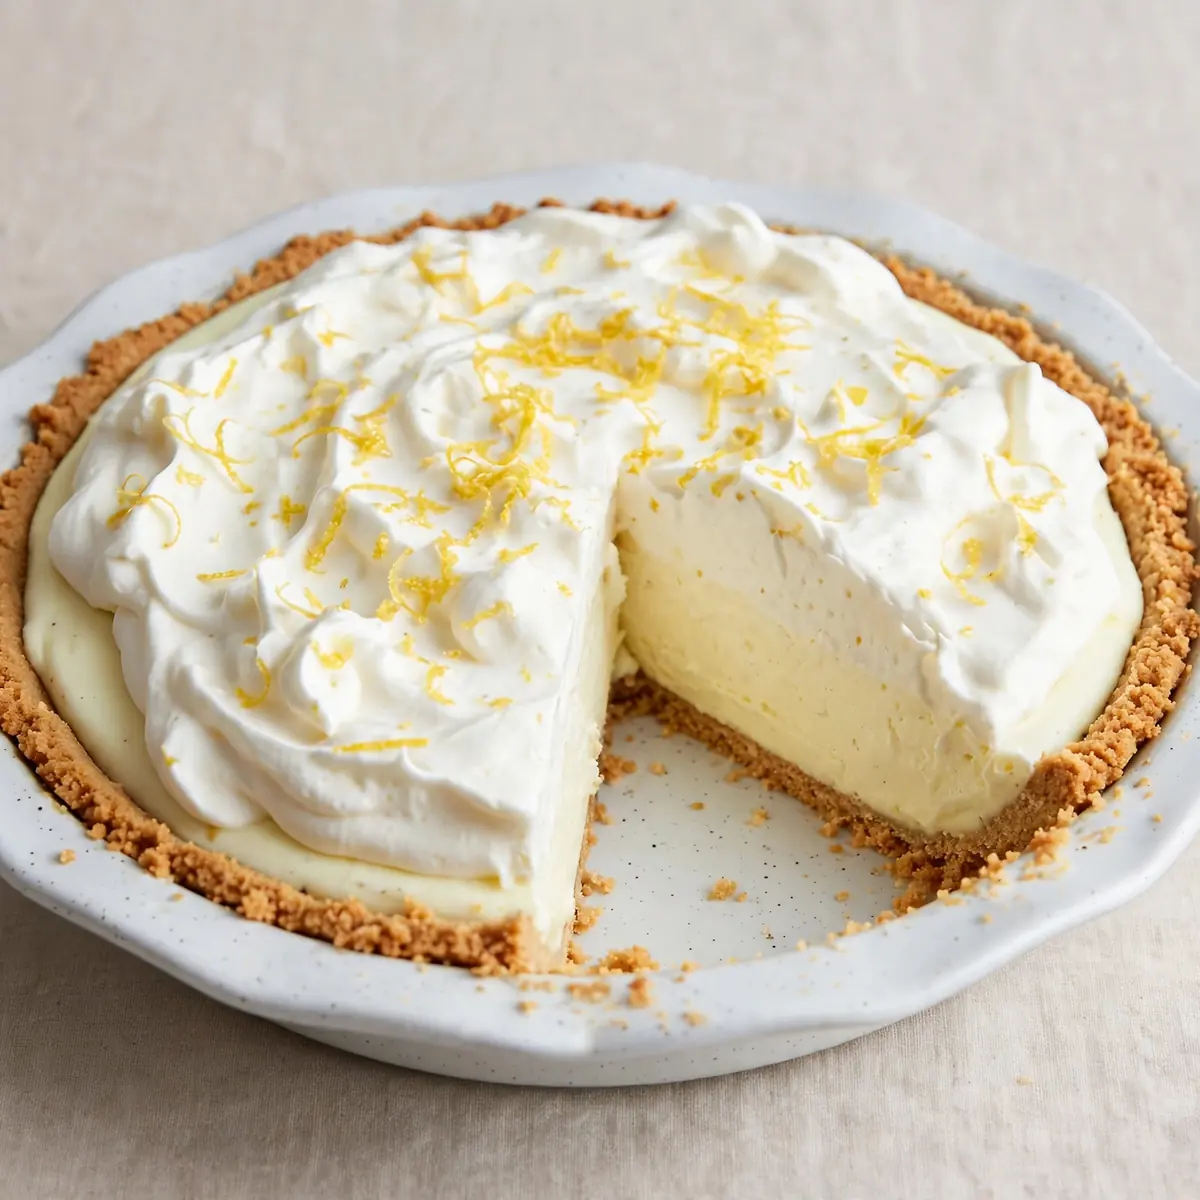
On frantic weeknights, when the oven feels like a luxury and the sink is already full, I turn to a dessert that works on my schedule, not the other way around. After years of testing, I’ve landed on a make-ahead Frozen Lemonade Pie that goes from freezer to table with zero fuss, minimal washing up, and the kind of bright, tangy finish that makes everyone forget you barely broke a sweat.
Recipe Overview
- Prep Time: 15 minutes
- Cook Time: 0 minutes (no-bake)
- Freeze Time: 4 hours minimum (or overnight)
- Total Time: 4 hours 15 minutes (mostly inactive)
- Servings: 8 generous slices
- Difficulty: Easy — no special skills needed
Why You’ll Love This Frozen Lemonade Pie
- Ready when you are: Make it the night before, or even three days ahead, and simply slice when needed. No last-minute panic, unlike these Deconstructed Cheesecake Bowls Ready in 10 Minutes which come together in a flash.
- One bowl, one pie dish: Everything mixes in a single bowl, and the crust presses straight into the dish. The washing up takes less than two minutes.
- No oven required: On hot evenings or when the oven is occupied with the main meal, this pie sits happily in the freezer without using a single degree of heat.
- Bright, not cloying: The lemon cuts through richness, meaning even after a hearty dinner, a slice feels refreshing rather than heavy.
- Kid-friendly assembly: My children have been helping me crush biscuits and stir the filling for years. It’s a proper hands-on recipe for little helpers.

Ingredients You’ll Need
- 200g digestive biscuits (or graham crackers)
- 80g unsalted butter, melted
- 1 x 397g can sweetened condensed milk
- 120ml double cream (heavy cream)
- 120ml freshly squeezed lemon juice (about 3 large lemons)
- 1 tablespoon finely grated lemon zest
- 1 teaspoon vanilla extract
- Pinch of fine sea salt
Tip: Use room-temperature condensed milk and cream for the smoothest, creamiest filling. Cold ingredients can cause the mixture to seize when you add the lemon juice.
How to Make Frozen Lemonade Pie
- Prepare the crust: Place the digestive biscuits in a sealed plastic bag and crush them with a rolling pin until they resemble fine, sandy crumbs with a few slightly larger bits for texture. Alternatively, pulse them in a food processor until you hear a consistent, soft crunching sound. Pour the crumbs into a medium bowl, add the melted butter, and stir with a fork until every crumb looks damp and darkens slightly, clumping together when pressed between your fingers.
- Press the crust: Tip the buttery crumbs into a 20cm (8-inch) pie dish. Using the flat bottom of a glass or a measuring cup, press the mixture firmly and evenly across the base and up the sides. The surface should feel compact and smooth, with no loose crumbs shifting. Place the dish in the freezer for 10 minutes while you make the filling.
- Mix the filling base: In a large mixing bowl, whisk the sweetened condensed milk, double cream, and vanilla extract together until the mixture looks pale, glossy, and slightly thickened, about 1 minute of vigorous whisking. You should see soft ribbons form when you lift the whisk.
- Add the lemon: Pour in the lemon juice and add the zest and salt. Stir gently but continuously for about 30 seconds. The mixture will immediately begin to thicken as the acid reacts with the condensed milk — you’ll feel the resistance change from a liquid to a soft, spoonable consistency. Stop as soon as it looks uniform and creamy, with no streaks of juice visible.
- Assemble the pie: Remove the chilled crust from the freezer. Spoon the filling into the crust, spreading it evenly with a spatula right to the edges. The surface should be smooth and level, with a slight wobble when you gently shake the dish.
- Freeze: Place the pie on a level shelf in the freezer, uncovered, for at least 4 hours. After the first 2 hours, the surface will feel firm to a gentle touch and no longer sticky. Once fully set, cover with cling film or foil and freeze for up to 1 week.
- Serve: Remove the pie from the freezer about 5-8 minutes before slicing. Run a sharp knife under hot water, wipe it dry, then slice cleanly through. The first cut should reveal a bright, pale yellow interior with a crisp, golden crust edge. Serve immediately while still firm but scoopable.
Tips From My Kitchen
- Use freshly squeezed lemon juice every time: Bottled lemon juice contains preservatives that can alter the setting reaction. Fresh juice creates a firmer, cleaner slice that doesn’t weep when thawed slightly. I’ve been making this for over 5 years, and it never disappoints when I use real lemons.
- Chill your bowl and cream beforehand: Popping the mixing bowl and the carton of double cream in the fridge for 10 minutes before starting helps the filling whip up lighter and hold its structure better during freezing. It’s a small step that makes a noticeable difference in texture.
- Press the crust while it’s still warm: The butter in the crust sets quickly once it hits the cold dish. Press firmly and quickly, using a glass or measuring cup, to ensure a compact, even base that won’t crumble when you slice.
- Don’t over-mix after adding the lemon juice: Once the lemon juice goes in, stir only until combined. Over-mixing can break down the structure and lead to a slightly grainy texture rather than that silky, scoopable consistency we’re after.
- Let it sit briefly before slicing: A few minutes at room temperature transforms the pie from rock-hard to perfectly sliceable. If you try to cut it straight from the freezer, the crust may shatter. Patience here pays off in clean, beautiful slices.
- Wrap tightly for longer storage: After the initial 4-hour set, cover the pie with cling film touching the surface of the filling to prevent ice crystals from forming. This keeps the texture creamy for up to a week.
Equipment You’ll Need
- Stand mixer or hand mixer (though a strong arm and a whisk work fine)
- 20cm (8-inch) pie dish or metal tart tin
- Rolling pin or food processor for crushing biscuits
- Box grater or microplane for lemon zest
- Citrus juicer or reamer
- Large mixing bowl and spatula
- Cling film or reusable beeswax wrap for storage
Common Mistakes to Avoid
- Using cold condensed milk: If the condensed milk is straight from the fridge, it won’t blend smoothly with the cream and can cause the lemon juice to react unevenly, leaving lumps. Let it sit at room temperature for 15 minutes before starting.
- Skipping the zest: The lemon juice provides acidity, but the zest carries the true, aromatic lemon flavour. Without it, the pie tastes one-dimensional and flat. Always include the zest for that bright, rounded citrus punch.
- Freezing uncovered for too long: Leaving the pie uncovered in the freezer for more than 4-6 hours can dry out the surface and allow freezer smells to seep in. Always cover it tightly once it’s fully set.
Delicious Variations to Try
- Berry Lemonade Pie: After spreading the filling, drop small spoonfuls of raspberry or blueberry jam onto the surface and swirl gently with a knife. The frozen jam pockets add a sweet-tart surprise in every slice.
- Lime and Coconut Version: Replace the lemon juice and zest with lime juice and zest, and fold 40g of desiccated coconut into the filling before freezing. The coconut adds a chewy texture that pairs beautifully with the sharp lime.
- Mango Lemonade Pie: Swap 60ml of the lemon juice for 60ml of mango purée (from ripe, blended mangoes). The result is a softer, tropical flavour with a stunning golden-orange colour.
What to Serve With Frozen Lemonade Pie
- A handful of fresh raspberries or blueberries scattered over each slice for a pop of colour and tartness
- A dollop of lightly whipped cream (unsweetened, to balance the sweet filling)
- A short, crisp biscuit on the side for extra crunch
- A tall glass of iced tea or sparkling water with lemon wheels
Frequently Asked Questions
Frozen Lemonade Pie
Ingredients
Method
-
Prepare the crust: Place the digestive biscuits in a sealed plastic bag and crush them with a rolling pin until they resemble fine, sandy crumbs with a few slightly larger bits for texture. Alternatively, pulse them in a food processor until you hear a consistent, soft crunching sound. Pour the crumbs into a medium bowl, add the melted butter, and stir with a fork until every crumb looks damp and darkens slightly, clumping together when pressed between your fingers.
-
Press the crust: Tip the buttery crumbs into a 20cm (8-inch) pie dish. Using the flat bottom of a glass or a measuring cup, press the mixture firmly and evenly across the base and up the sides. The surface should feel compact and smooth, with no loose crumbs shifting. Place the dish in the freezer for 10 minutes while you make the filling.
-
Mix the filling base: In a large mixing bowl, whisk the sweetened condensed milk, double cream, and vanilla extract together until the mixture looks pale, glossy, and slightly thickened, about 1 minute of vigorous whisking. You should see soft ribbons form when you lift the whisk.
-
Add the lemon: Pour in the lemon juice and add the zest and salt. Stir gently but continuously for about 30 seconds. The mixture will immediately begin to thicken as the acid reacts with the condensed milk — you’ll feel the resistance change from a liquid to a soft, spoonable consistency. Stop as soon as it looks uniform and creamy, with no streaks of juice visible.
-
Assemble the pie: Remove the chilled crust from the freezer. Spoon the filling into the crust, spreading it evenly with a spatula right to the edges. The surface should be smooth and level, with a slight wobble when you gently shake the dish.
-
Freeze: Place the pie on a level shelf in the freezer, uncovered, for at least 4 hours. After the first 2 hours, the surface will feel firm to a gentle touch and no longer sticky. Once fully set, cover with cling film or foil and freeze for up to 1 week.
-
Serve: Remove the pie from the freezer about 5-8 minutes before slicing. Run a sharp knife under hot water, wipe it dry, then slice cleanly through. The first cut should reveal a bright, pale yellow interior with a crisp, golden crust edge. Serve immediately while still firm but scoopable.
Notes
I’d love to hear how this Frozen Lemonade Pie fits into your own busy evenings. Drop a comment below to share your favourite twist or a tip that made your weeknight dinner just a little bit sweeter.