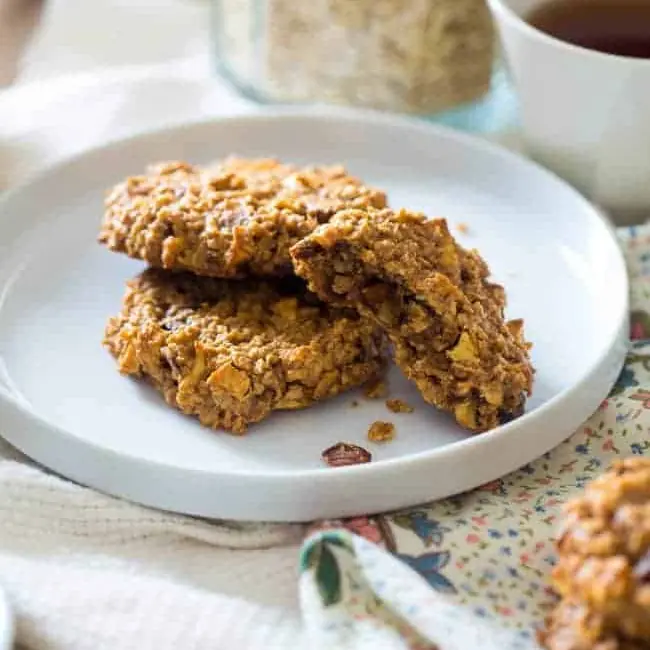
Pumpkin Breakfast Cookies Tutorial Step-By-Step
I remember a Tuesday night when the clock had already struck seven, the kids were circling like hungry sharks, and I hadn’t even started thinking about dinner. I opened the fridge, saw a tin of pumpkin purée from a weekend baking project, and decided on a whim to throw together what I now call our weeknight lifesaver. These Pumpkin Breakfast Cookies are not just for mornings; they’re my secret weapon for those chaotic evenings when you need something nourishing on the table in under thirty minutes.
Recipe Overview
- Prep time: 10 minutes
- Cook time: 12 minutes
- Total time: 22 minutes
- Servings: 12 cookies
- Difficulty: Easy
Why You’ll Love This Pumpkin Breakfast Cookies Tutorial Step-by-Step
- One-bowl magic: You mix everything in a single bowl, which means washing up takes less time than the actual baking. My kids absolutely devour this every time I make it, and I love that I’m not scrubbing pans for half an hour afterwards.
- No mixer required: A wooden spoon or a sturdy spatula is all you need. No dragging out the stand mixer or hunting for the hand mixer leads, which saves precious minutes during a busy weeknight.
- Make-ahead friendly: The dough keeps beautifully in the fridge for up to three days, so you can prep it on a calm Sunday and bake fresh cookies on a frantic Wednesday evening. My husband, who’s usually picky, asked for seconds the first time I served these for dinner!
- Balanced and filling: With oats, pumpkin, and a touch of protein from the egg, these cookies provide steady energy without a sugar crash. They’re substantial enough to serve as a main course alongside a simple soup or salad.
- Customisable for picky eaters: You can leave out the raisins or swap the nuts for seeds, and the basic formula still works perfectly. It’s a forgiving recipe that adapts to whatever you have in the cupboard.
Ingredients You’ll Need
- 200g rolled oats (not instant)
- 150g pumpkin purée (unsweetened)
- 80ml maple syrup
- 1 large egg
- 60ml coconut oil, melted and cooled slightly
- 1 teaspoon vanilla extract
- 1 teaspoon baking powder
- 1 teaspoon ground cinnamon
- ½ teaspoon ground nutmeg
- ½ teaspoon ground ginger
- ¼ teaspoon salt
- 60g raisins or dried cranberries
- 40g chopped walnuts or pecans (optional)
Tip: For the best texture, use rolled oats rather than the quick-cook variety. The sturdier oats hold their shape during baking and give the cookies a satisfying chew that makes them feel more like a proper meal.
How to Make Pumpkin Breakfast Cookies Tutorial Step-by-Step
- Preheat and prepare: Set your oven to 180°C (160°C fan) and line a large baking tray with parchment paper. While the oven warms, the kitchen will begin to smell faintly of vanilla and spice, a promise of what’s to come.
- Mix the wet ingredients: In a large mixing bowl, combine the pumpkin purée, maple syrup, egg, melted coconut oil, and vanilla extract. Stir until the mixture is smooth and a deep, warm orange colour, with no streaks of egg white remaining. The aroma of pumpkin and vanilla will start to fill the air.
- Add the dry ingredients: Tip in the rolled oats, baking powder, cinnamon, nutmeg, ginger, and salt. Fold everything together with a wooden spoon until the oats are thoroughly coated and the dough looks thick and slightly sticky, with a rustic, speckled appearance from the spices.
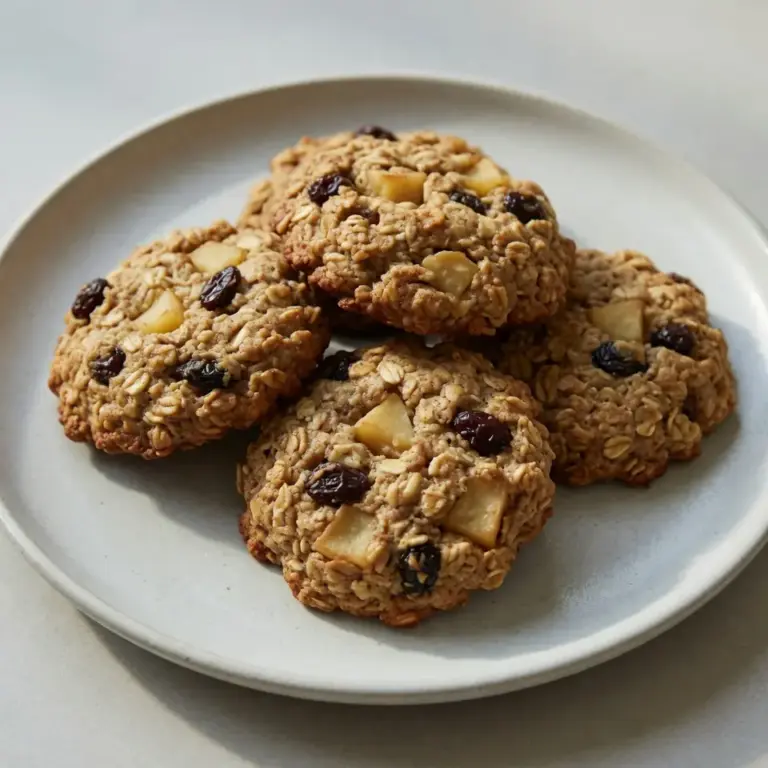
- Fold in the extras: Add the raisins and chopped nuts, if using, and stir just until they are evenly distributed. You’ll see the dark flecks of dried fruit and the pale chunks of nuts scattered throughout the orange dough.
- Shape the cookies: Using a tablespoon or a small ice cream scoop, drop rounded mounds of dough onto the prepared baking tray, leaving about 5cm between each one. Gently flatten each mound with the back of a spoon until they are about 1.5cm thick. The dough will feel soft and a little tacky to the touch.
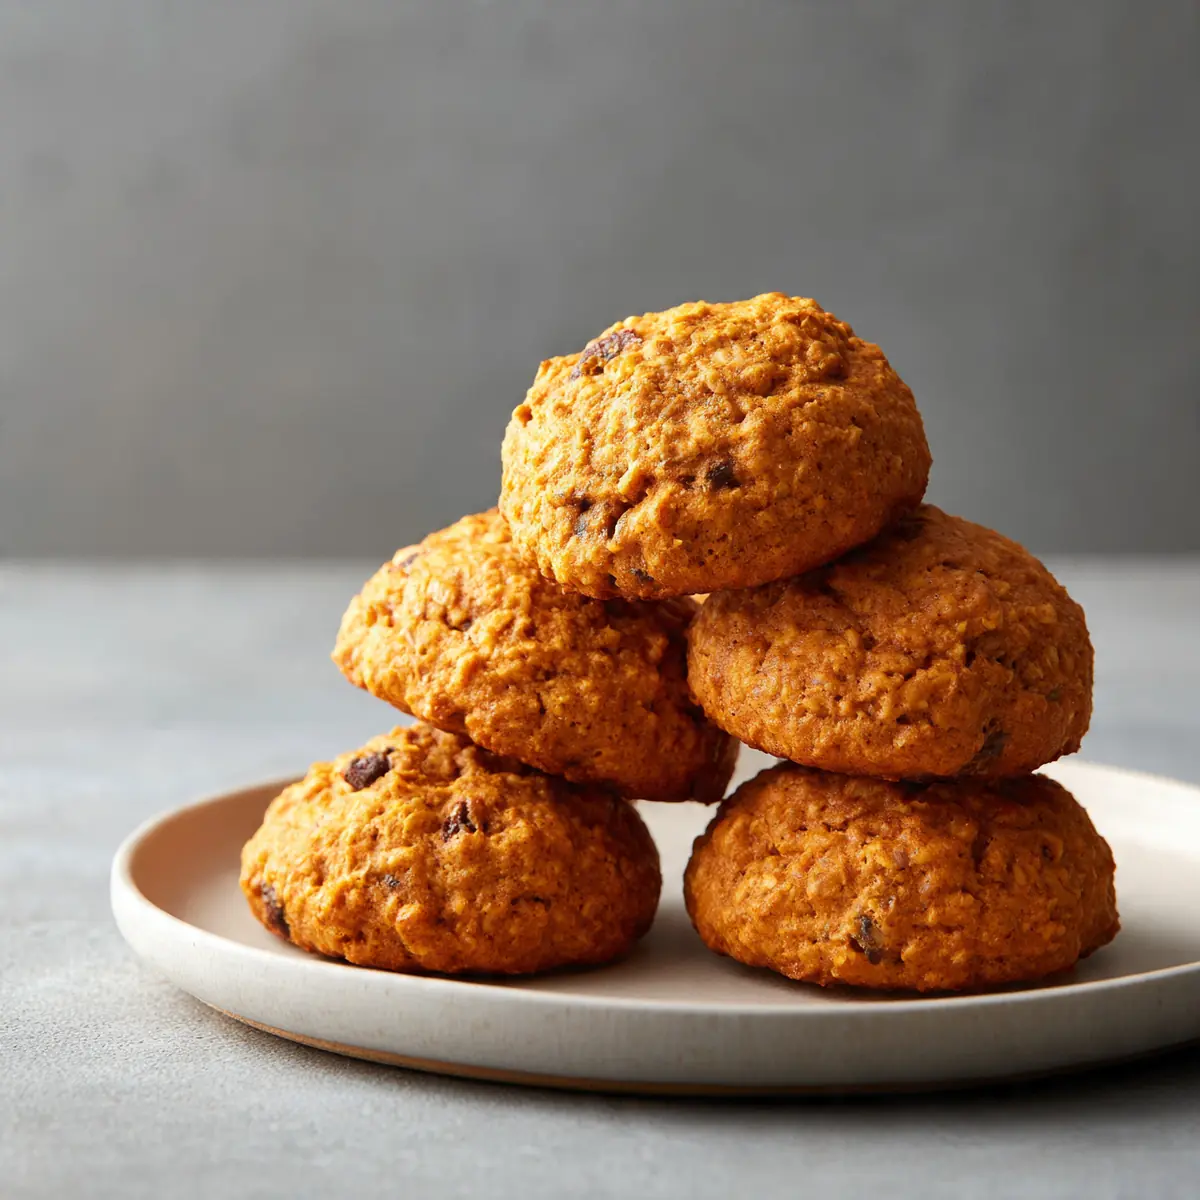
- Bake to golden perfection: Place the tray in the preheated oven and bake for 10 to 12 minutes. The cookies are done when the edges turn a deep golden brown and the tops feel firm when lightly pressed. A faint, nutty scent of toasted oats and pumpkin spice will tell you they’re nearly ready.
- Cool and set: Remove the tray from the oven and let the cookies rest on the tray for 5 minutes. They will be soft and fragile straight out of the oven, but as they cool, they firm up beautifully. Transfer them to a wire rack to cool completely, where they will develop a slightly crisp exterior and a tender, chewy centre.
Tips From My Kitchen
- Don’t overmix the dough: Stir just until the ingredients come together. Overworking the dough can make the cookies dense and tough rather than tender and chewy. Stop as soon as you see no more dry patches of flour or oats.
- Chill the dough for thicker cookies: If you have an extra ten minutes, pop the shaped dough into the fridge before baking. Chilled dough spreads less in the oven, resulting in thicker, softer cookies with a more pronounced pumpkin flavour.
- Use a cookie scoop for even sizing: A small cookie scoop ensures each cookie is the same size, so they bake evenly. Uneven cookies mean some will be overdone while others are still underbaked, which is frustrating when you’re short on time.
- Line your tray with parchment every time: Parchment paper prevents sticking without adding extra fat, and it makes cleanup almost non-existent. You can lift the paper off the tray and throw it away, leaving a completely clean baking sheet underneath.
- Store properly to maintain freshness: Keep the cooled cookies in an airtight container at room temperature for up to four days, or freeze them for up to three months. If freezing, place a sheet of parchment between layers to prevent them from sticking together.
Equipment You’ll Need
- Stand mixer or hand mixer (optional — a wooden spoon works just as well)
- Baking tray
- Parchment paper
- Wire cooling rack
- Large mixing bowl
- Wooden spoon or sturdy spatula
- Tablespoon or small ice cream scoop
Delicious Variations to Try
- Spicy Version: Add a pinch of cayenne pepper and an extra ½ teaspoon of ground ginger to the dough. The gentle heat contrasts beautifully with the sweet pumpkin and maple syrup, giving the cookies a warming kick that’s especially lovely on chilly evenings.
- Vegetarian/Vegan Option: Replace the egg with a flax egg (1 tablespoon ground flaxseed mixed with 3 tablespoons water, left to sit for 5 minutes) and use a plant-based milk if needed. The cookies will be slightly denser but just as delicious and satisfying.
- Different Protein: Stir in 2 tablespoons of hemp seeds or a scoop of unflavoured protein powder for an extra protein boost. If using protein powder, reduce the oats by 20g to keep the dough from becoming too dry.
What to Serve With Pumpkin Breakfast Cookies Tutorial Step-by-Step
- A bowl of hearty vegetable soup or chilli for a complete, warming dinner
- A simple side salad with a tangy vinaigrette to cut through the sweetness
- A dollop of Greek yoghurt or a drizzle of tahini on the side for extra creaminess
- A glass of cold milk or a warm mug of herbal tea for dipping
Frequently Asked Questions
Pumpkin Breakfast Cookies Tutorial Step-by-Step
Ingredients
Method
- Preheat and prepare: Set your oven to 180°C (160°C fan) and line a large baking tray with parchment paper. While the oven warms, the kitchen will begin to smell faintly of vanilla and spice, a promise of what's to come.
- Mix the wet ingredients: In a large mixing bowl, combine the pumpkin purée, maple syrup, egg, melted coconut oil, and vanilla extract. Stir until the mixture is smooth and a deep, warm orange colour, with no streaks of egg white remaining. The aroma of pumpkin and vanilla will start to fill the air.
- Add the dry ingredients: Tip in the rolled oats, baking powder, cinnamon, nutmeg, ginger, and salt. Fold everything together with a wooden spoon until the oats are thoroughly coated and the dough looks thick and slightly sticky, with a rustic, speckled appearance from the spices.
- Fold in the extras: Add the raisins and chopped nuts, if using, and stir just until they are evenly distributed. You'll see the dark flecks of dried fruit and the pale chunks of nuts scattered throughout the orange dough.
- Shape the cookies: Using a tablespoon or a small ice cream scoop, drop rounded mounds of dough onto the prepared baking tray, leaving about 5cm between each one. Gently flatten each mound with the back of a spoon until they are about 1.5cm thick. The dough will feel soft and a little tacky to the touch.
- Bake to golden perfection: Place the tray in the preheated oven and bake for 10 to 12 minutes. The cookies are done when the edges turn a deep golden brown and the tops feel firm when lightly pressed. A faint, nutty scent of toasted oats and pumpkin spice will tell you they're nearly ready.
- Cool and set: Remove the tray from the oven and let the cookies rest on the tray for 5 minutes. They will be soft and fragile straight out of the oven, but as they cool, they firm up beautifully. Transfer them to a wire rack to cool completely, where they will develop a slightly crisp exterior and a tender, chewy centre.
Notes
I’d love to hear how these pumpkin breakfast cookies work for your family’s weeknight dinners. Do you have a favourite variation or a clever shortcut you’ve discovered? Drop a comment below and share your experience — I’m always looking for new ideas to make busy evenings a little smoother.